
Learn How To Paint With Light In 6 Easy Steps | Light Painting Tutorial
Prepare to blow everybody away once you’re through with this one!
Light painting, or painting with light might seem like rocket science but it really isn’t. Just about anybody can paint with light following the easy steps given below.
Falling somewhere between fine art photography and long exposure photography the art form has boomed in the last couple of years with over a million hits on the #lightpainting hashtag on Instagram as of today.
Also known as light drawing, the art form goes back to the year 1889. Ever since scientist and physiologist Étienne-Jules Marey and inventor Georges Demeny laid down human emotion in the first ever light painting, some real maestros have come forward and used the technique to express themselves. Some photographers have dedicated their entire lives to this art-form.
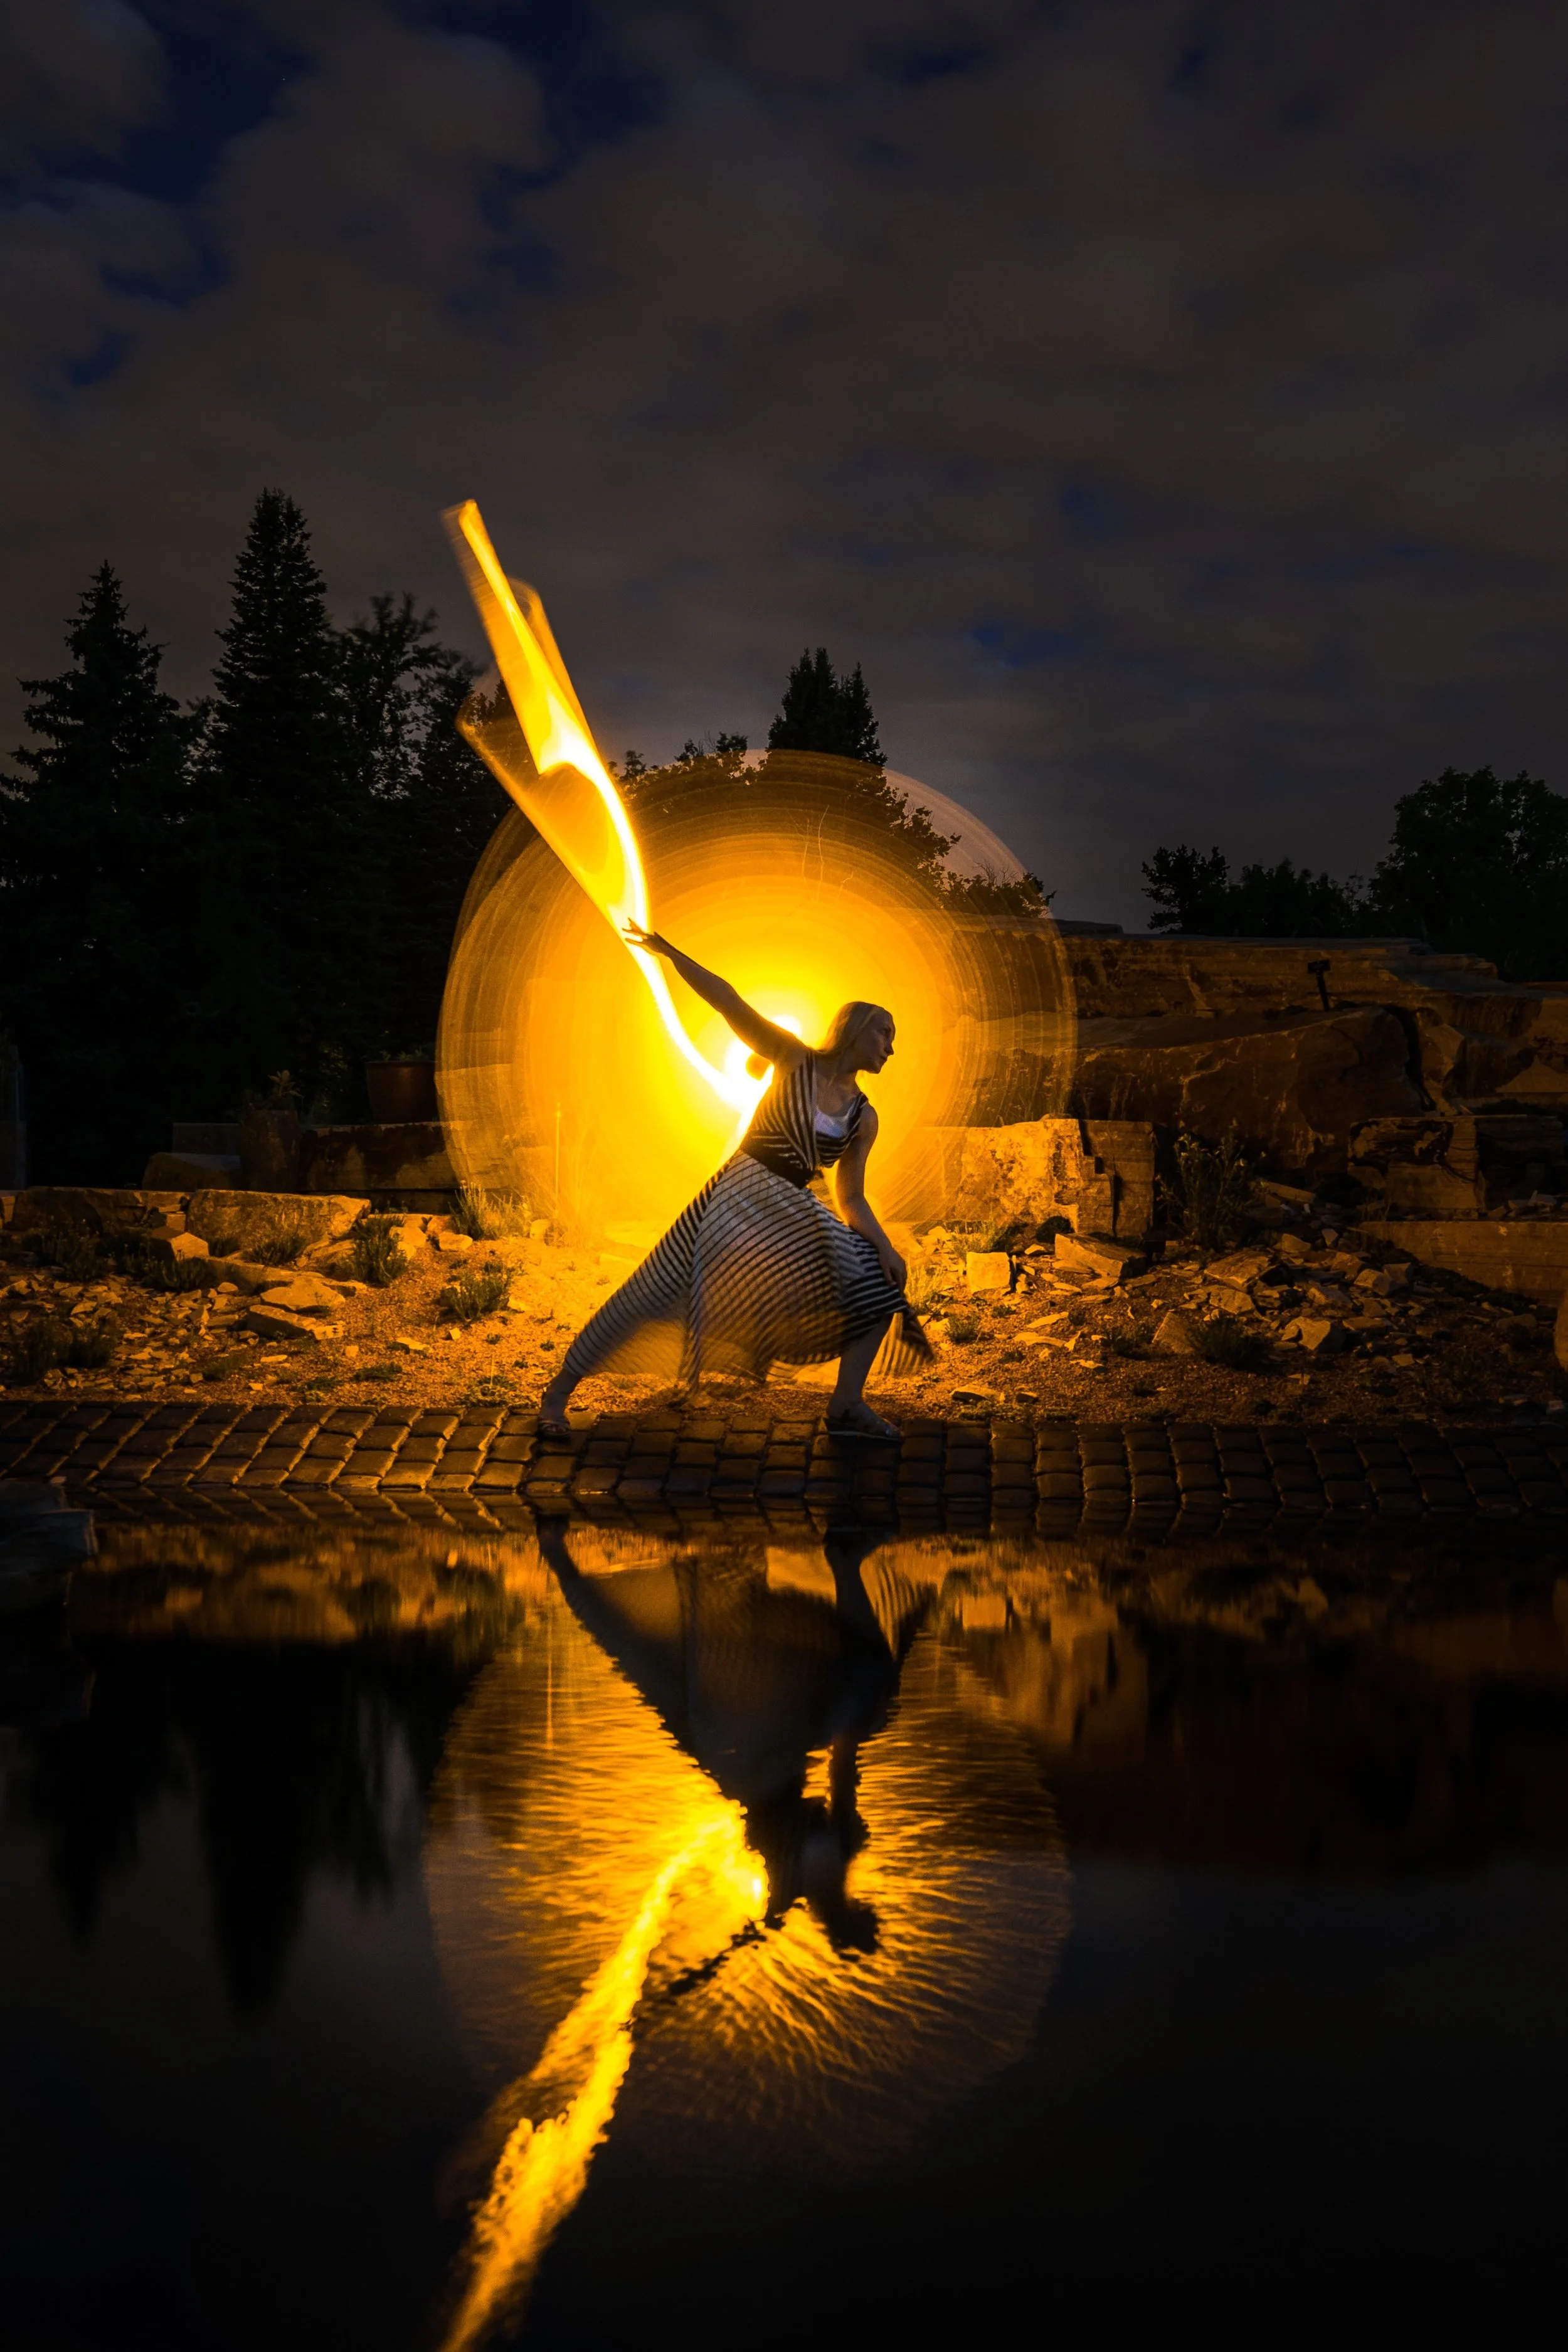
Photo by Xuan Nguyen on Unsplash
The simple idea that light could be manipulated and painted with much like a paintbrush and the sensor being the canvas has captured the imagination of many down the years.
Contemporaries like Eric Pare are leading the way with their fine art portraits today.
We sought to use the same technique for our portraits and the result leaves you truly wanting for more.
While it is an interesting way of doing portraits, it can be time consuming. Those who care enough to put in the effort will not leave disheartened.

Things You Will Need
Camera
Tripod
Off Camera Flash (optional)
Tracing Paper
Gaffer’s Tape
Acrylic Tube (they’re plastic tubes really, you can find them at a departmental store)
Small Torch
Bar Light
STEP NO 1
Find a good location
Painting with light is a kind of long exposure photography except you don’t need all of the lights. You have to be in a location that’s free of light pollution, where you can control the light. You can either do this in a studio where the light is under your complete control or you can go to a nice exterior location that’s free of extraneous light sources. This means no street lamps, no lights from oncoming vehicles, homes etc. A countryside location that’s away from the humbug of the city, where you can see the night sky perhaps?
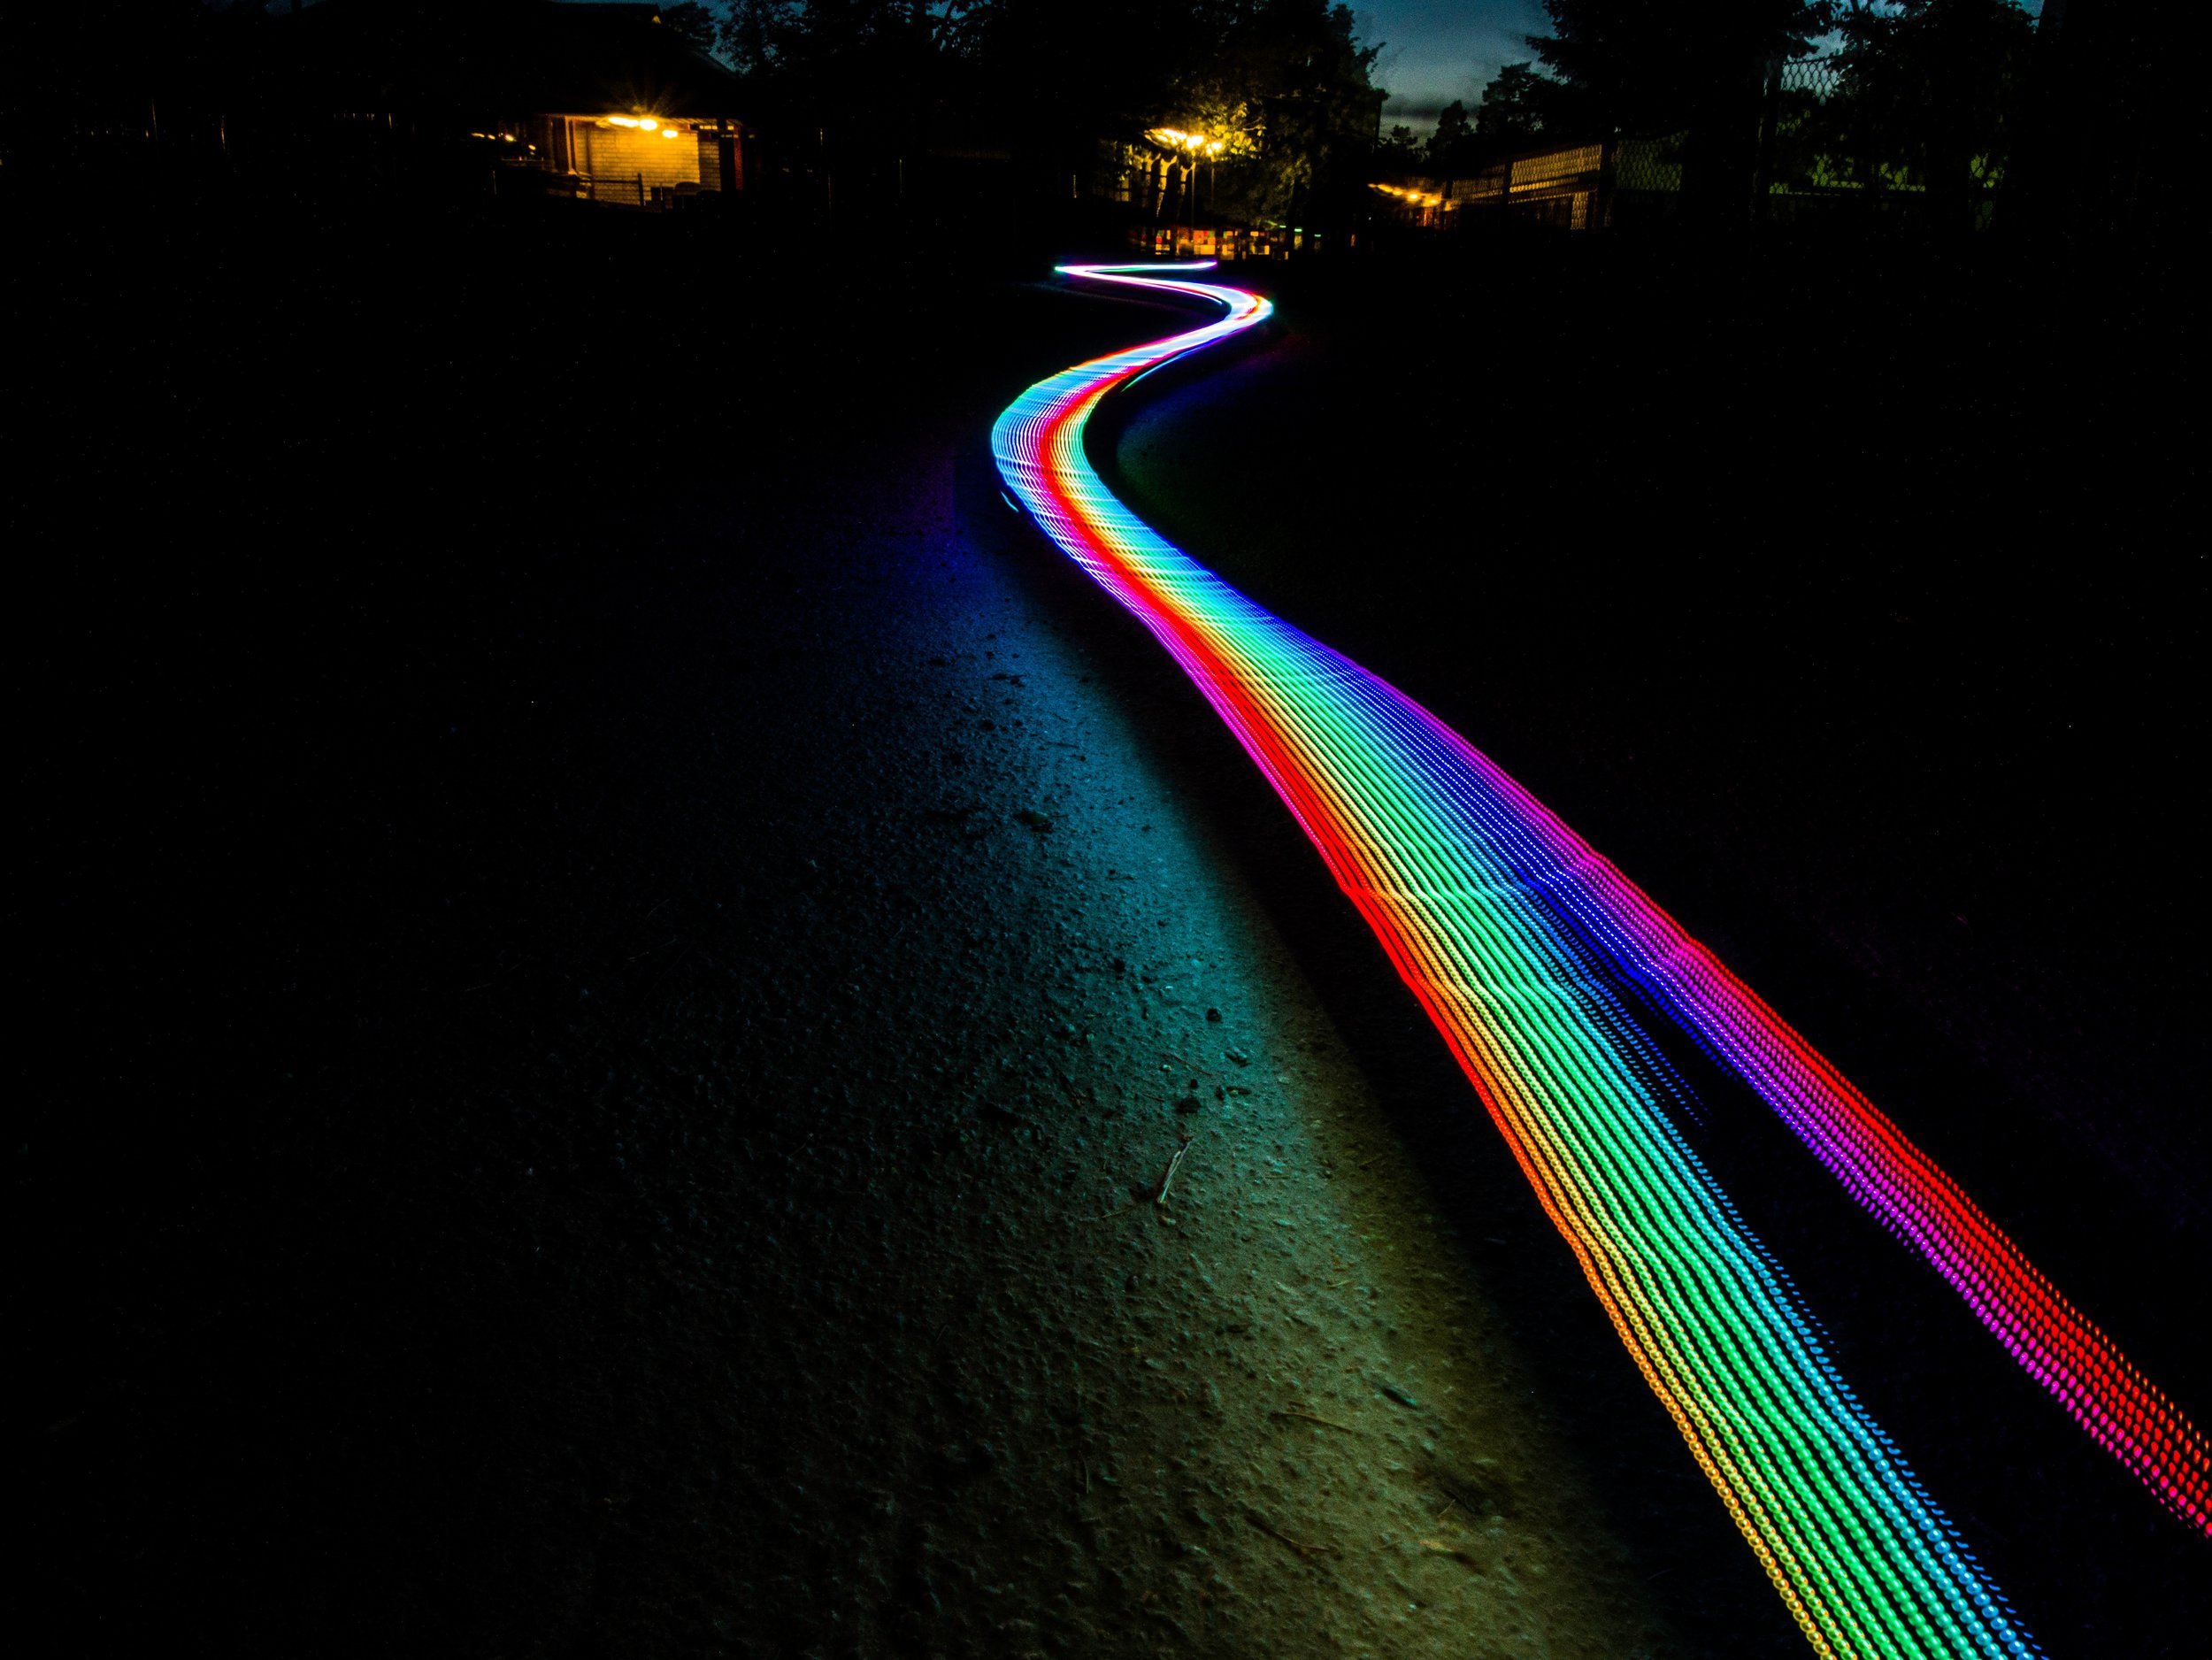
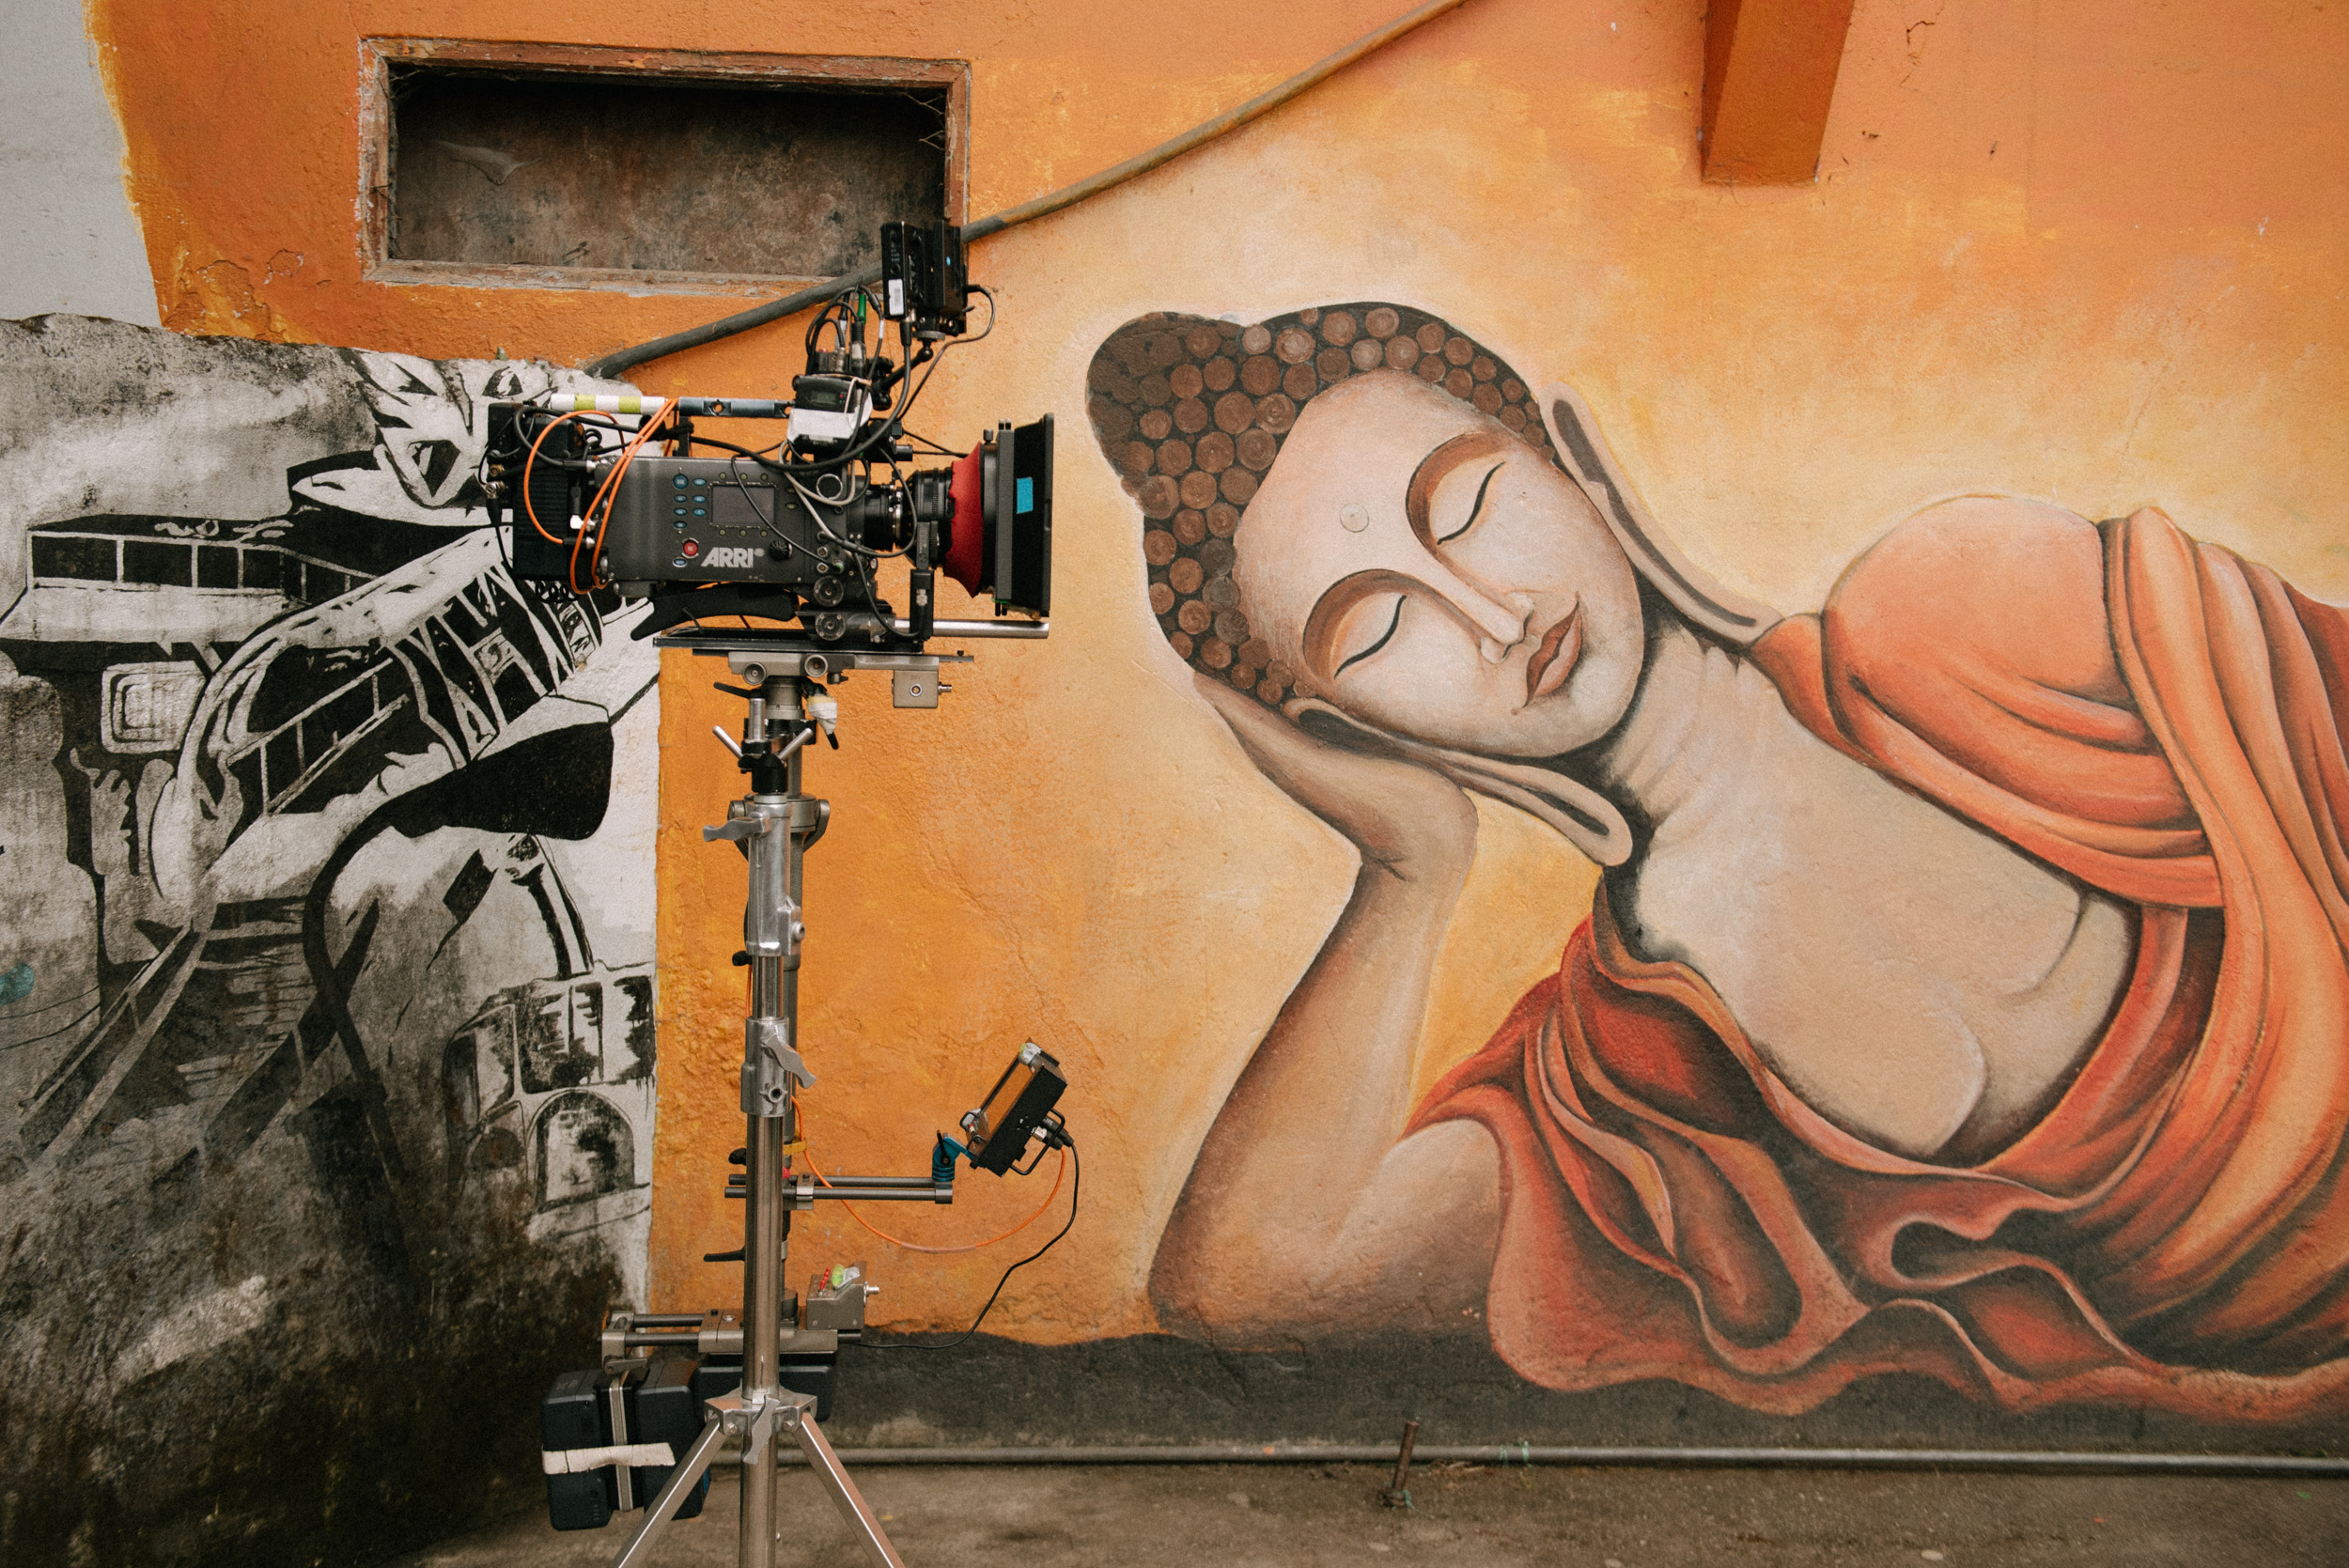
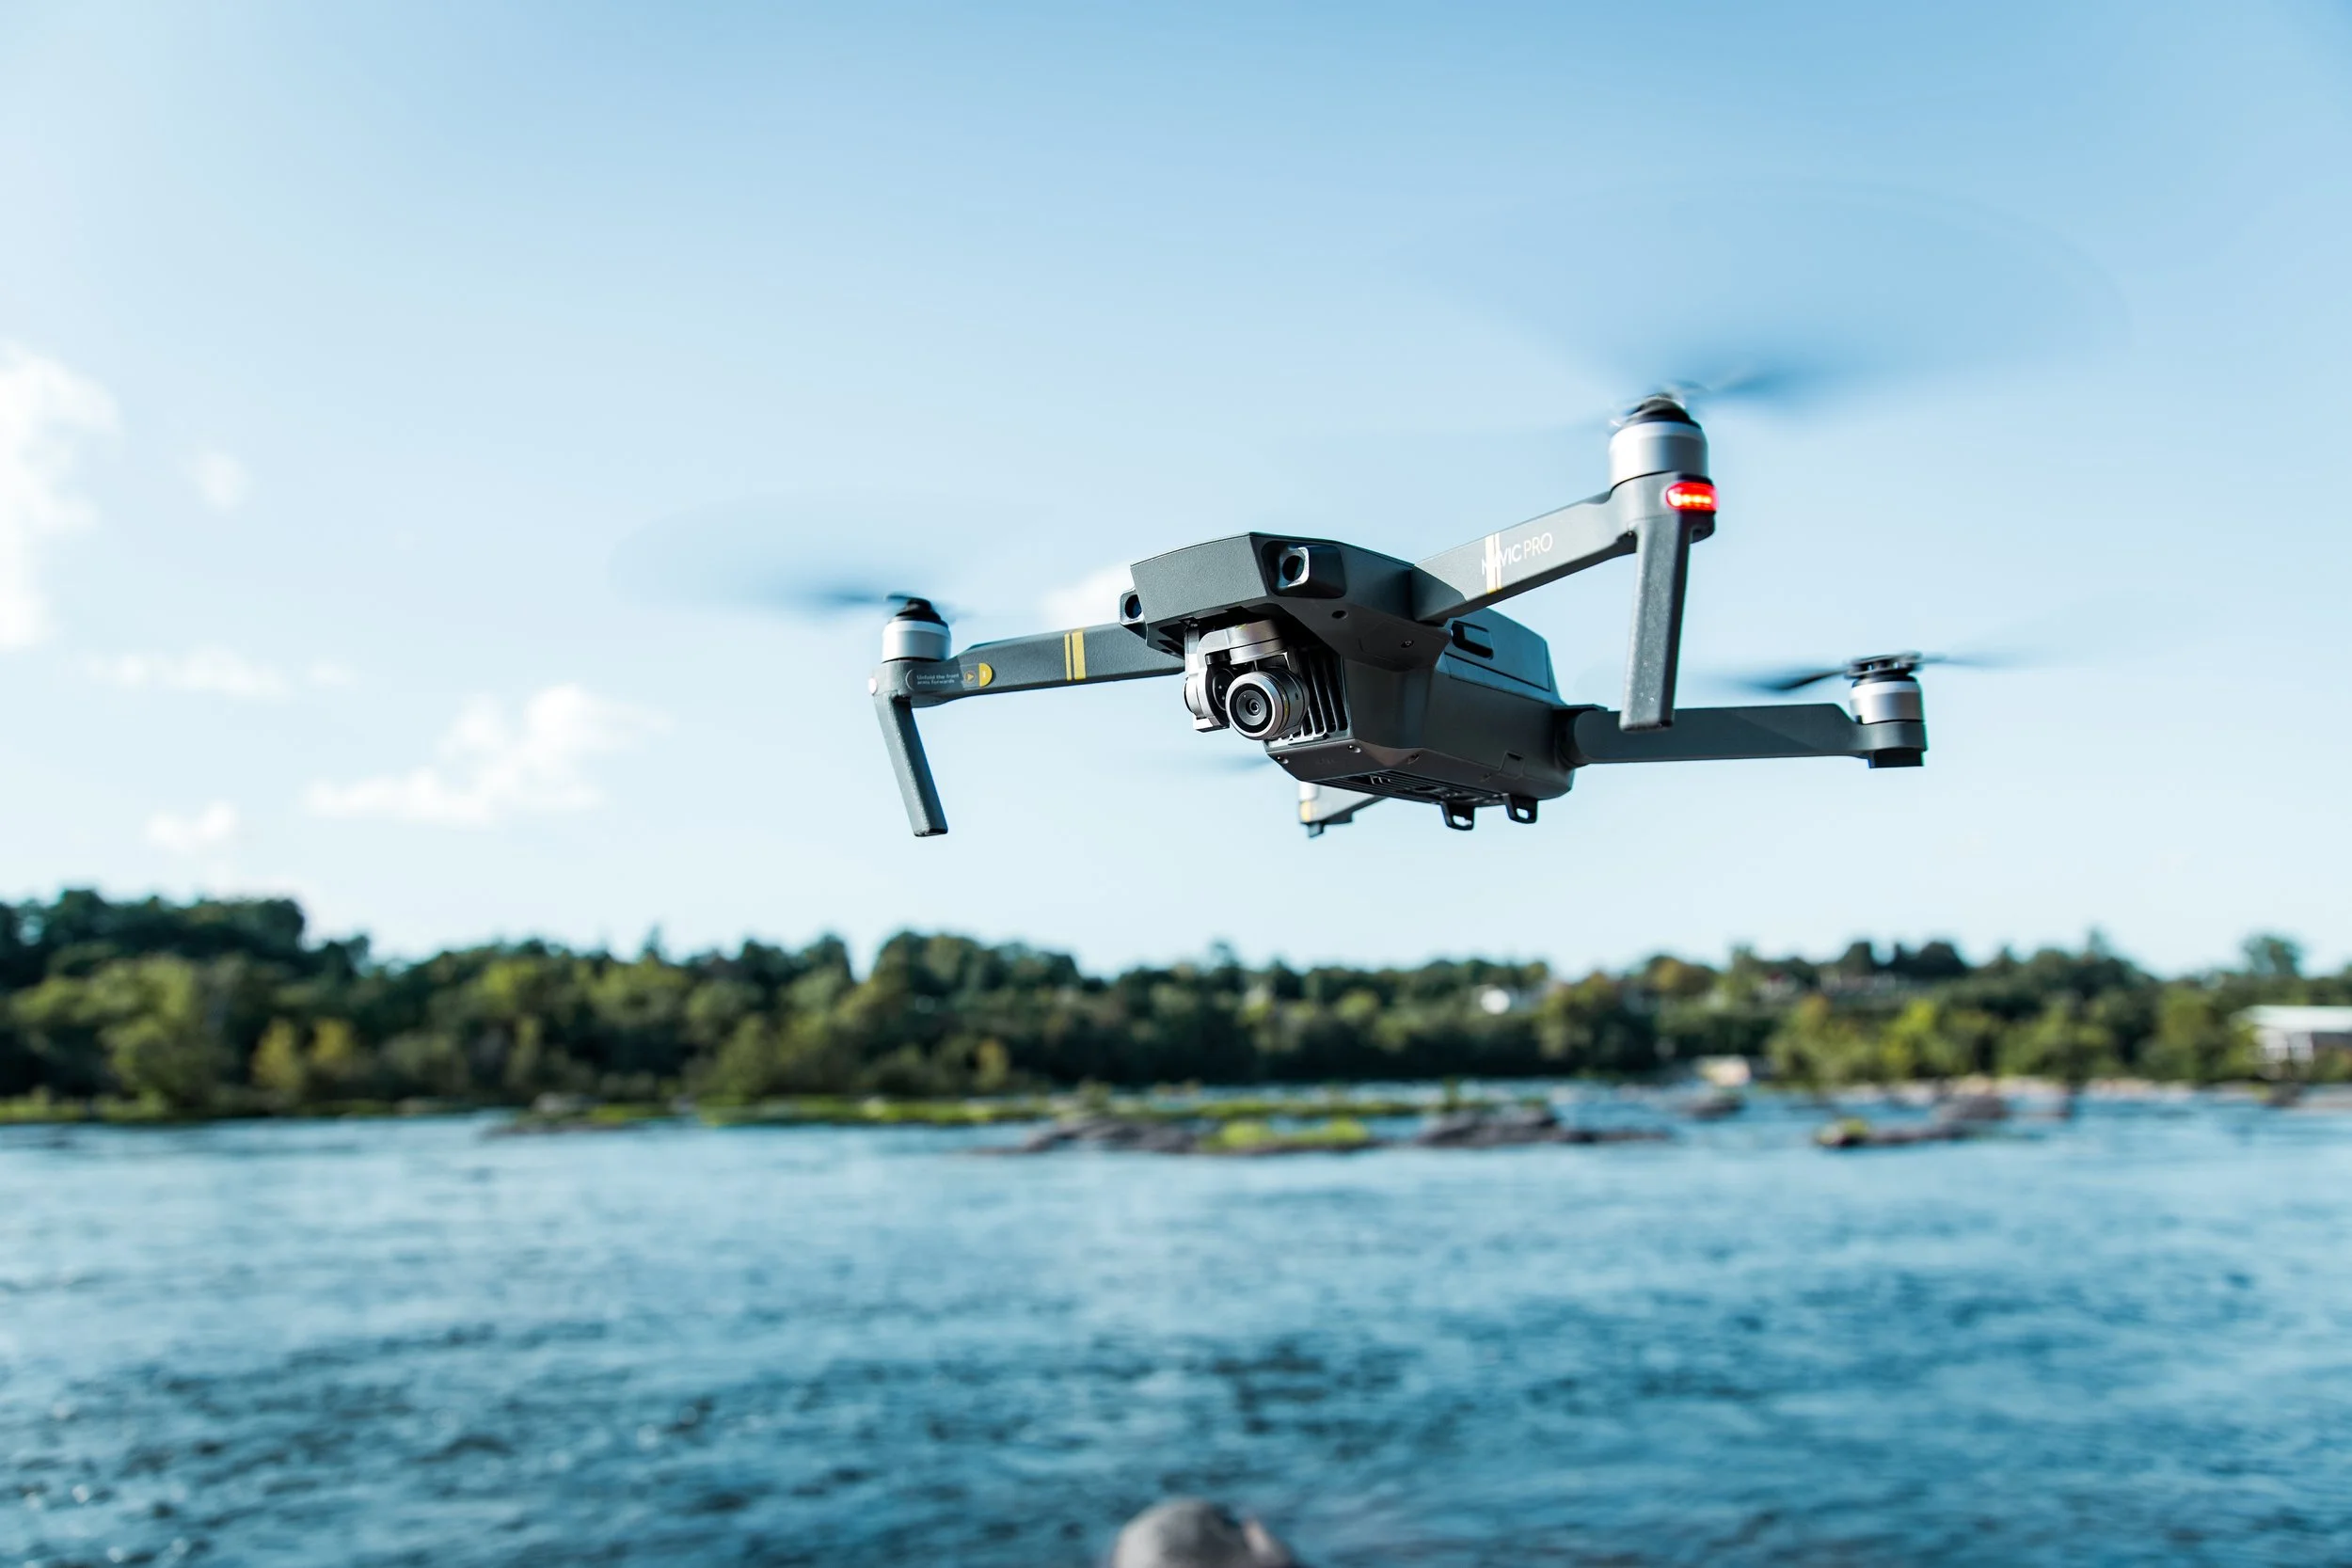
Photo by Tobias Carlsson on Unsplash
STEP NO 2
Find a good subject
This often gets overlooked. Are you looking to paint on a human subject or are you just looking to draw a shape or write something? Knowing this is very important. Plan beforehand about the kind of shot you’re looking to get and look up some references online.
When shooting with a human subject, you need someone who understands how to strike and hold a pose. Since the shutter on your camera will be open at least 20 seconds, you’ll need someone who can hold a pose while you’re painting around them and look good through it all.
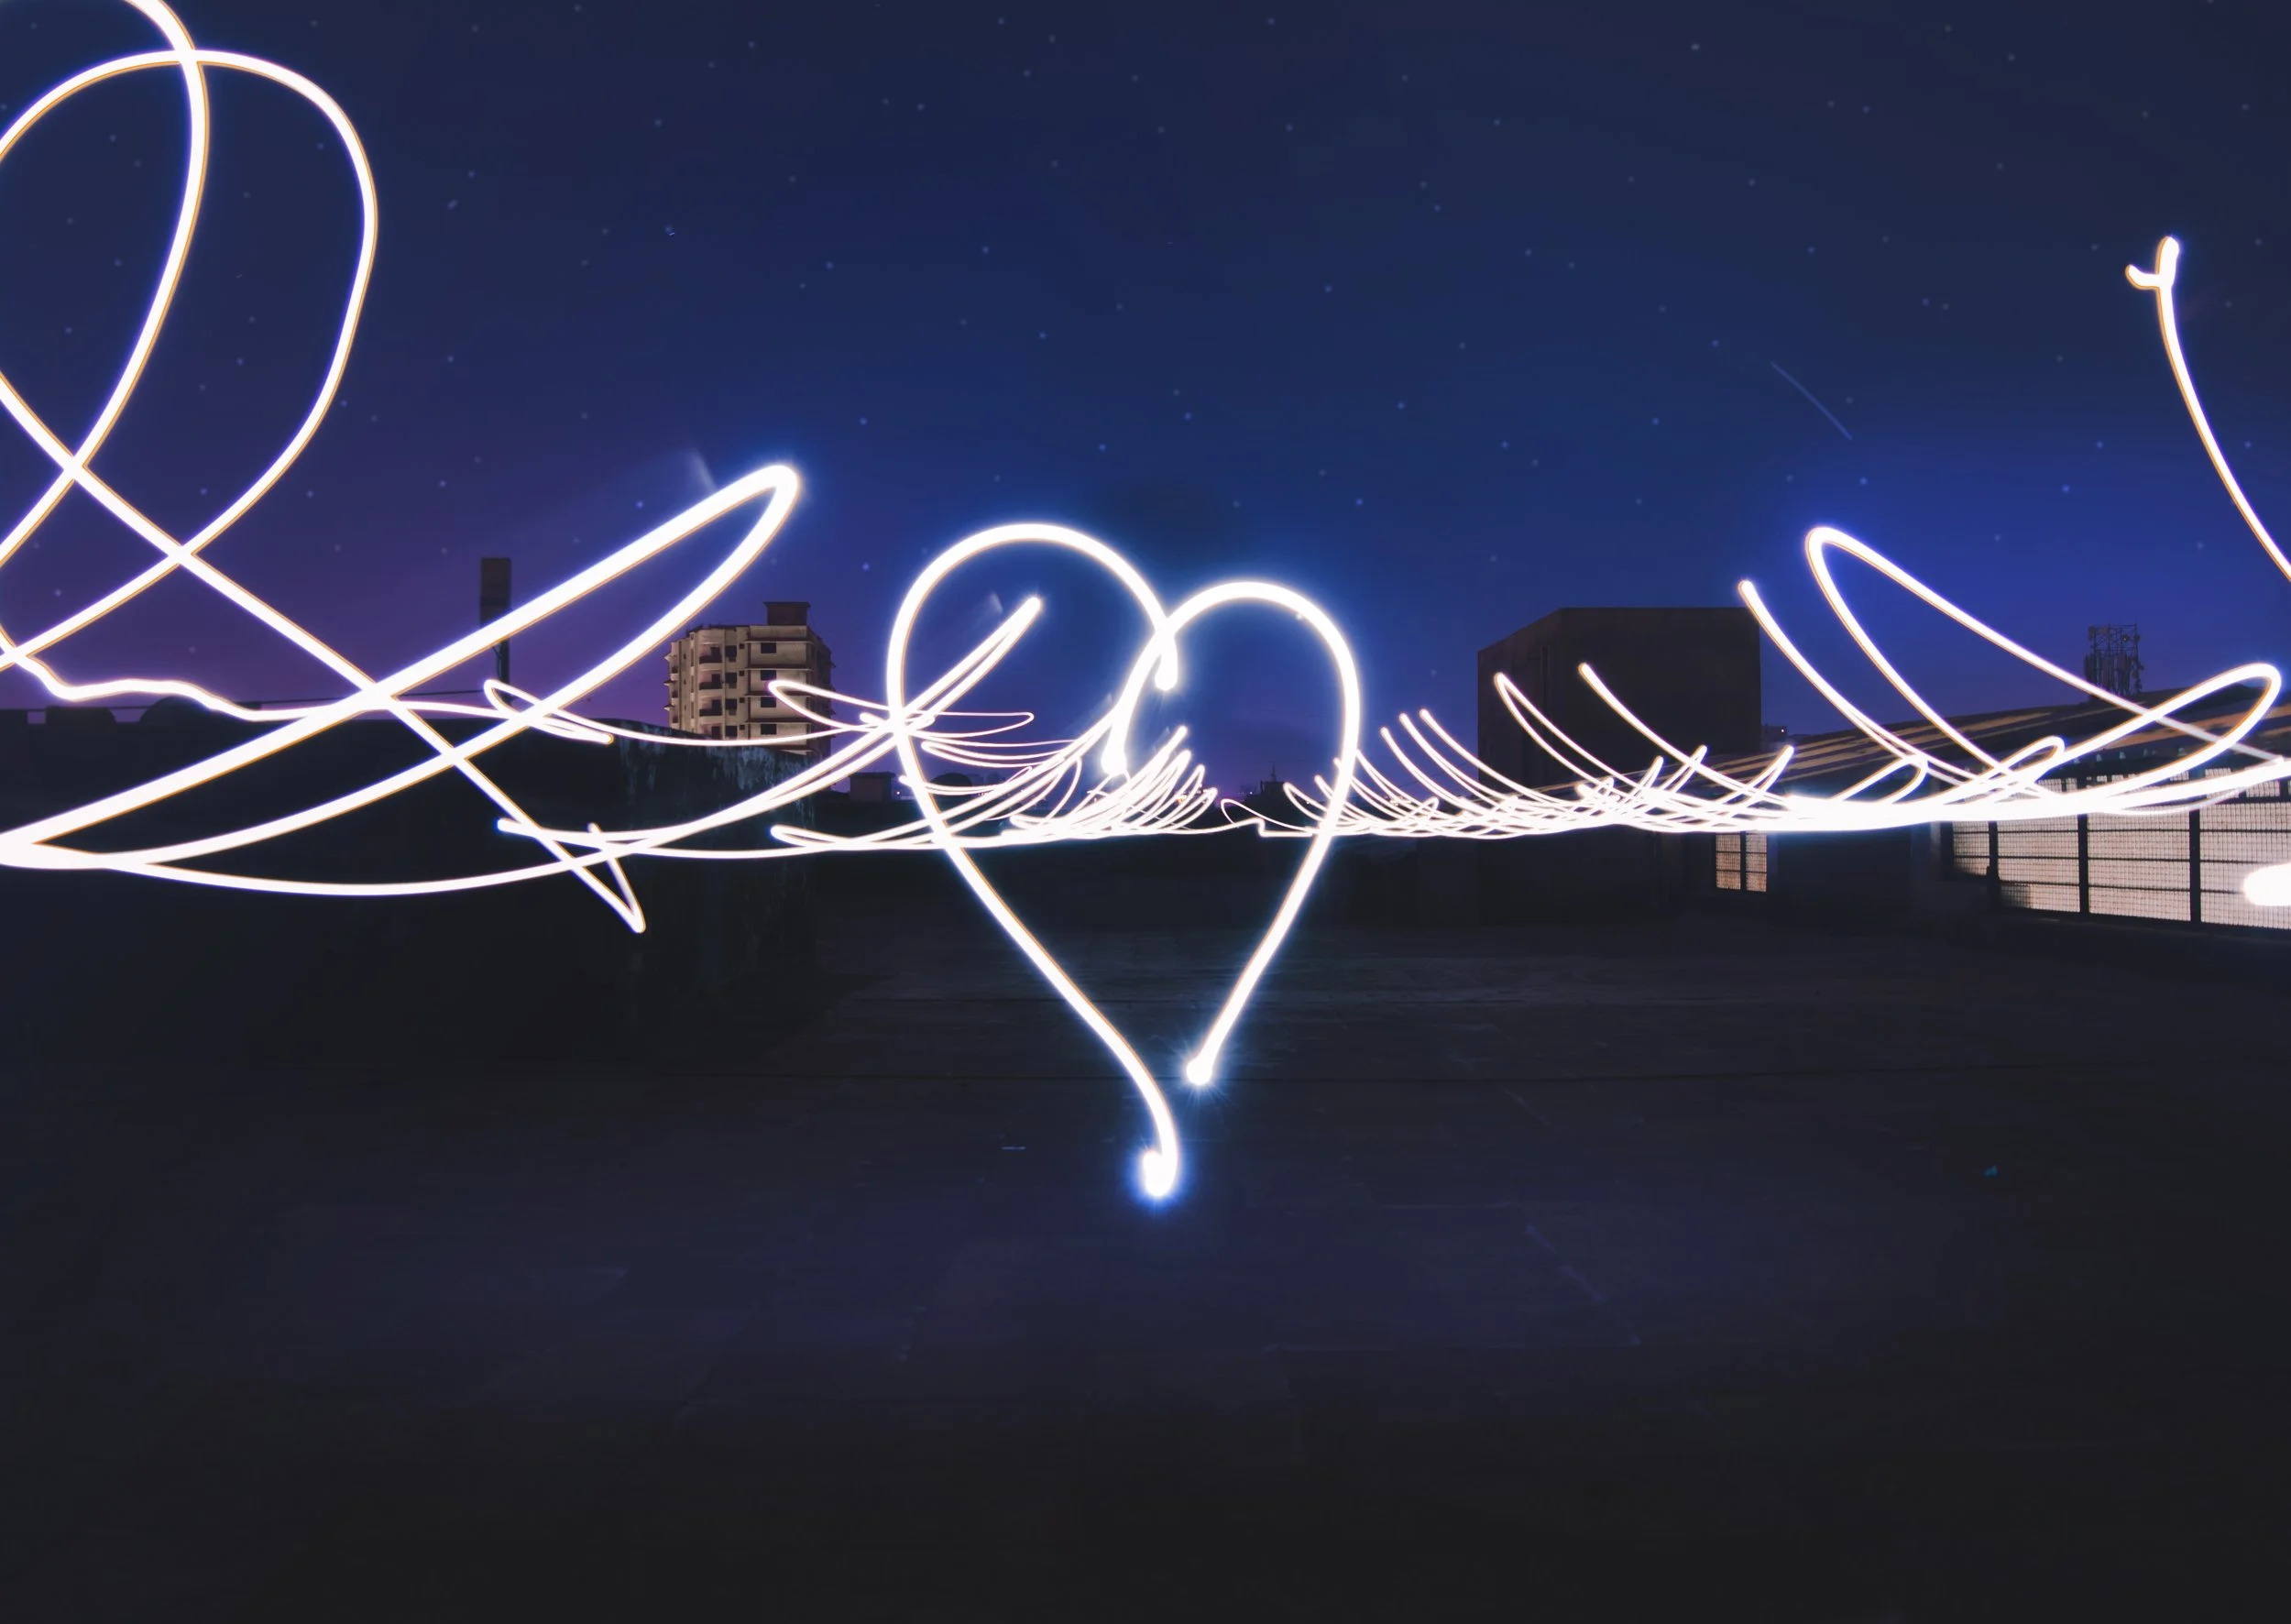
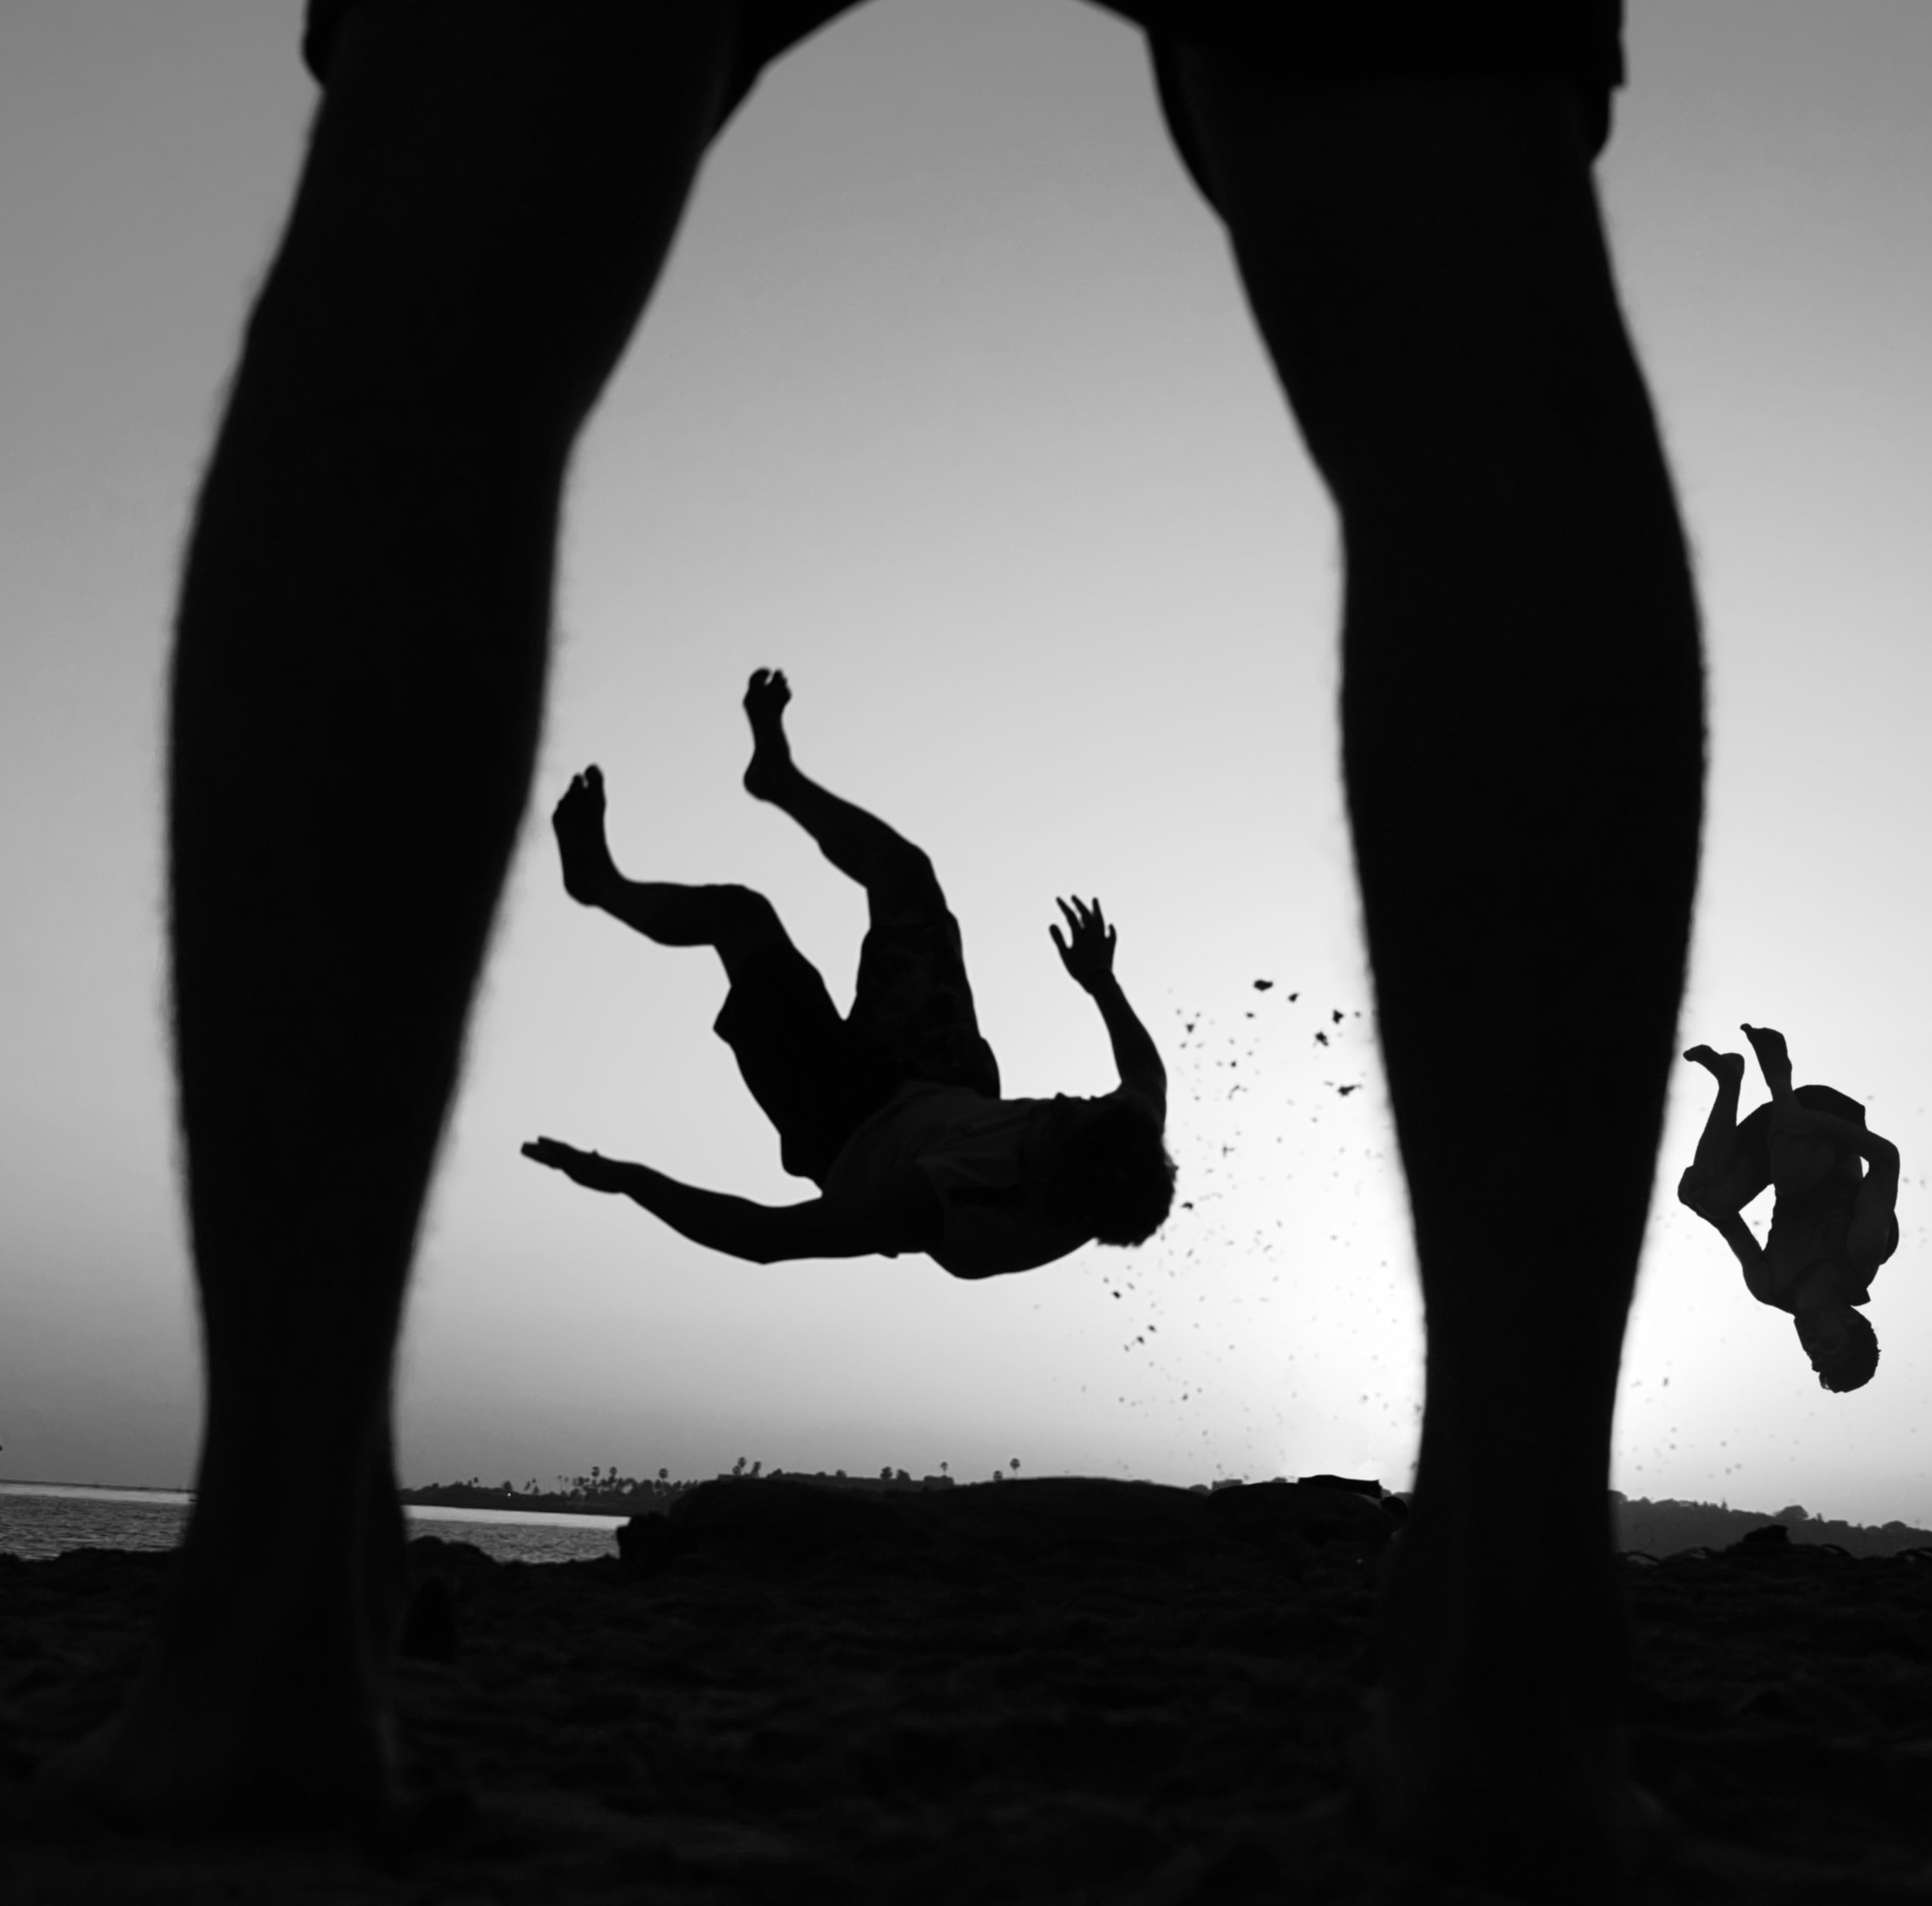
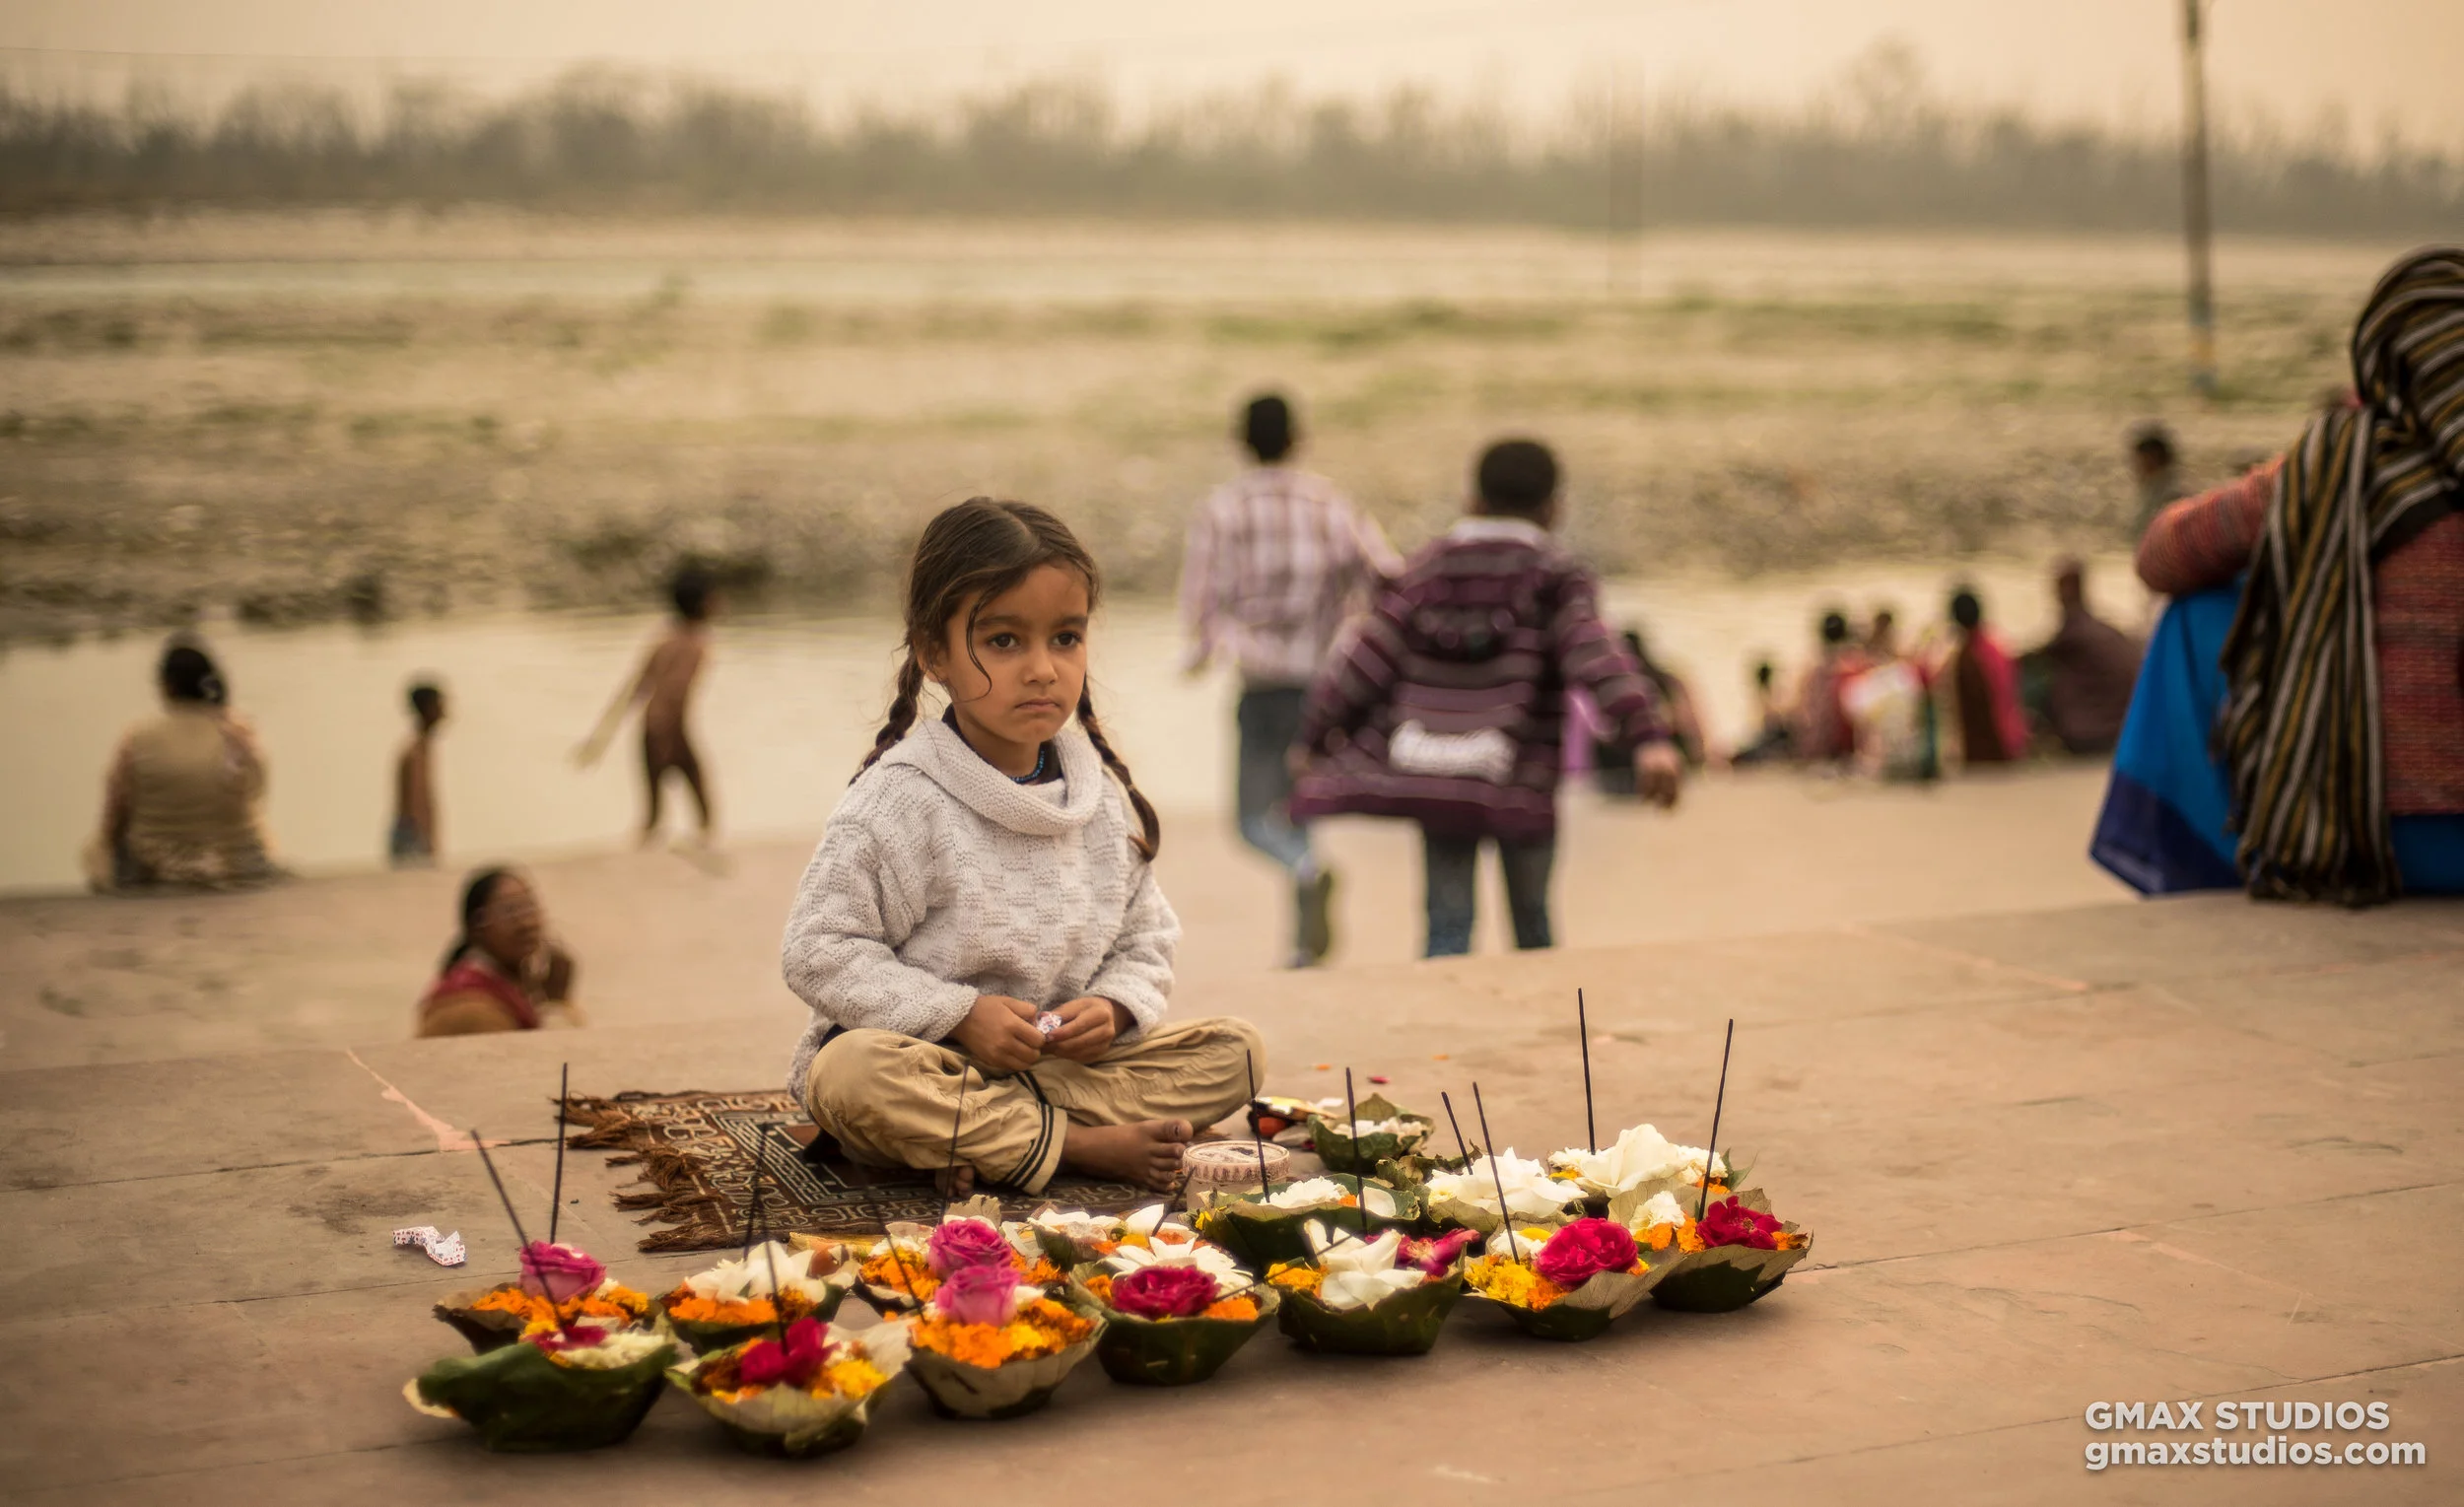
Photo by Akshar Dave on Unsplash
STEP NO 3
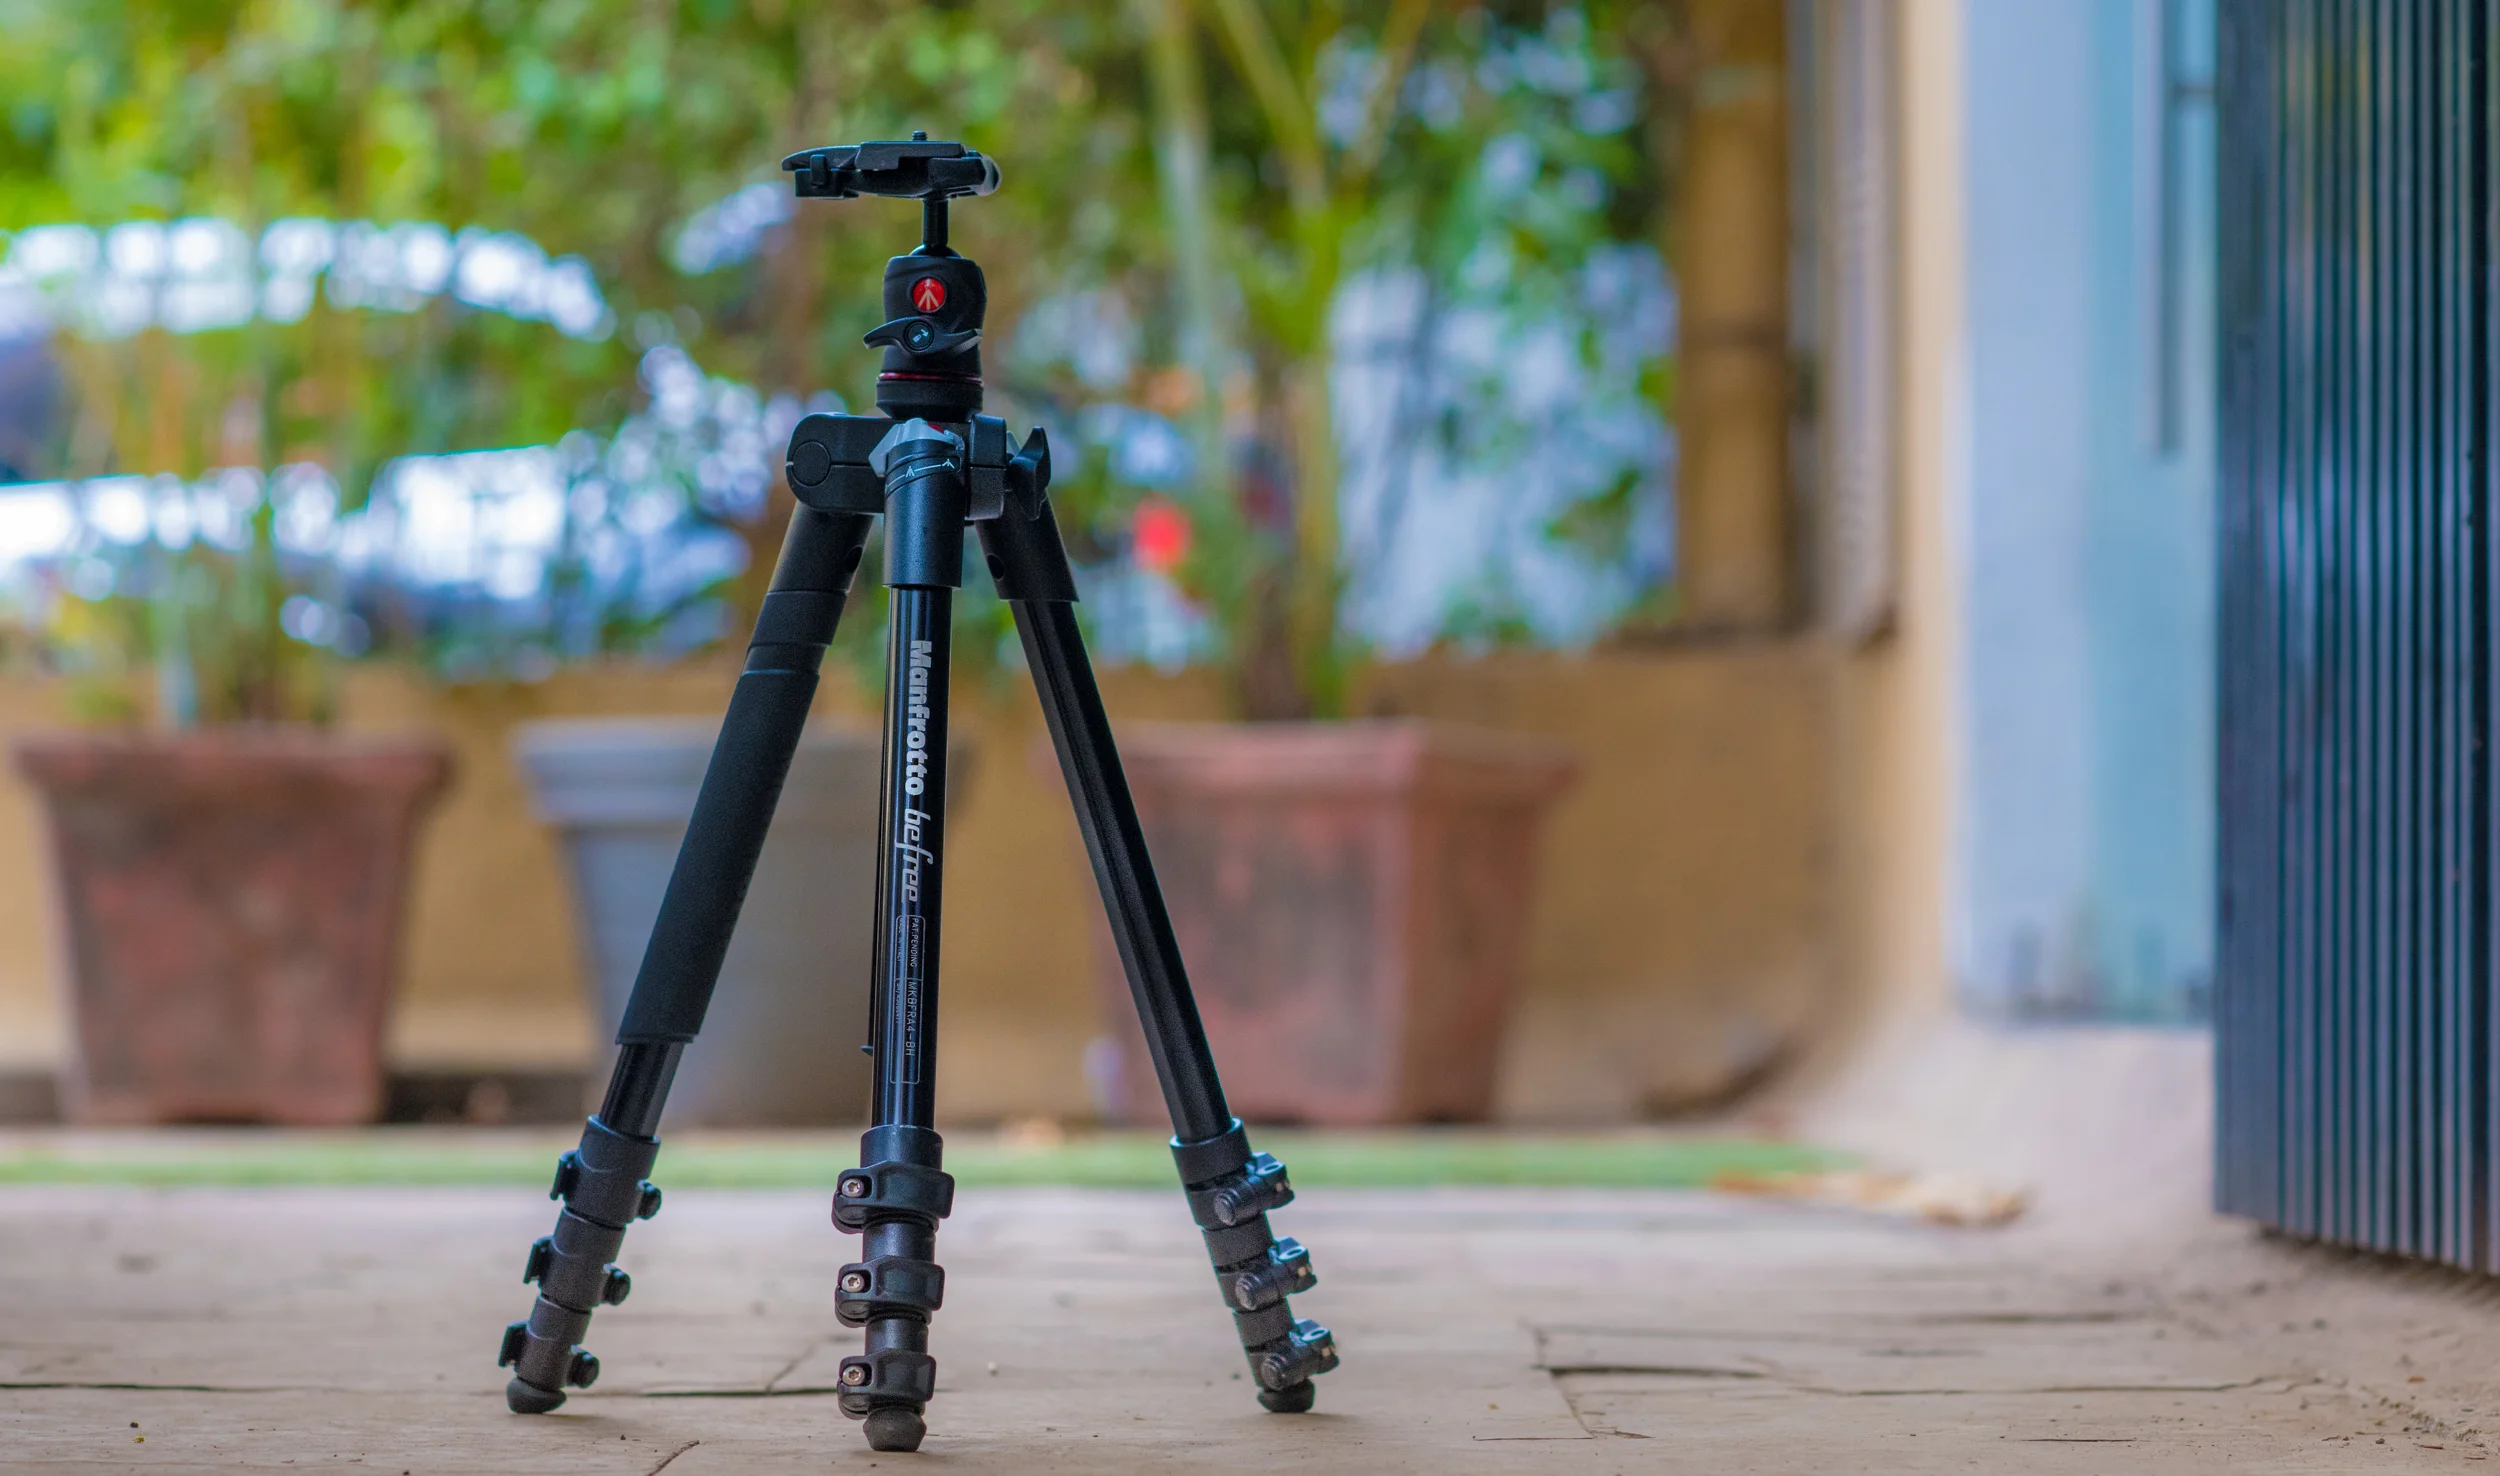
Tripods are our friends
Once you’ve found your model/subject, the next thing you do is mount your camera on a tripod. We want the photo to be as sharp as possible so we’ll be avoiding any kind of camera shake. If it helps, use a shutter release cable for this purpose. If you don’t have one, download your camera app and see if it allows you to record or press the shutter using the app. You can also use the interval timer mode on your camera and set it to twenty seconds or more depending on your exposure.
STEP NO 4
Decide your light/Equipment
When it’s dark out - how are you going to expose your subject? What else will you be exposing while the shutter remains open? Maybe you want a little bit of the background to be exposed as well. Settle on all of this and then figure out how you’re going to light all these elements.
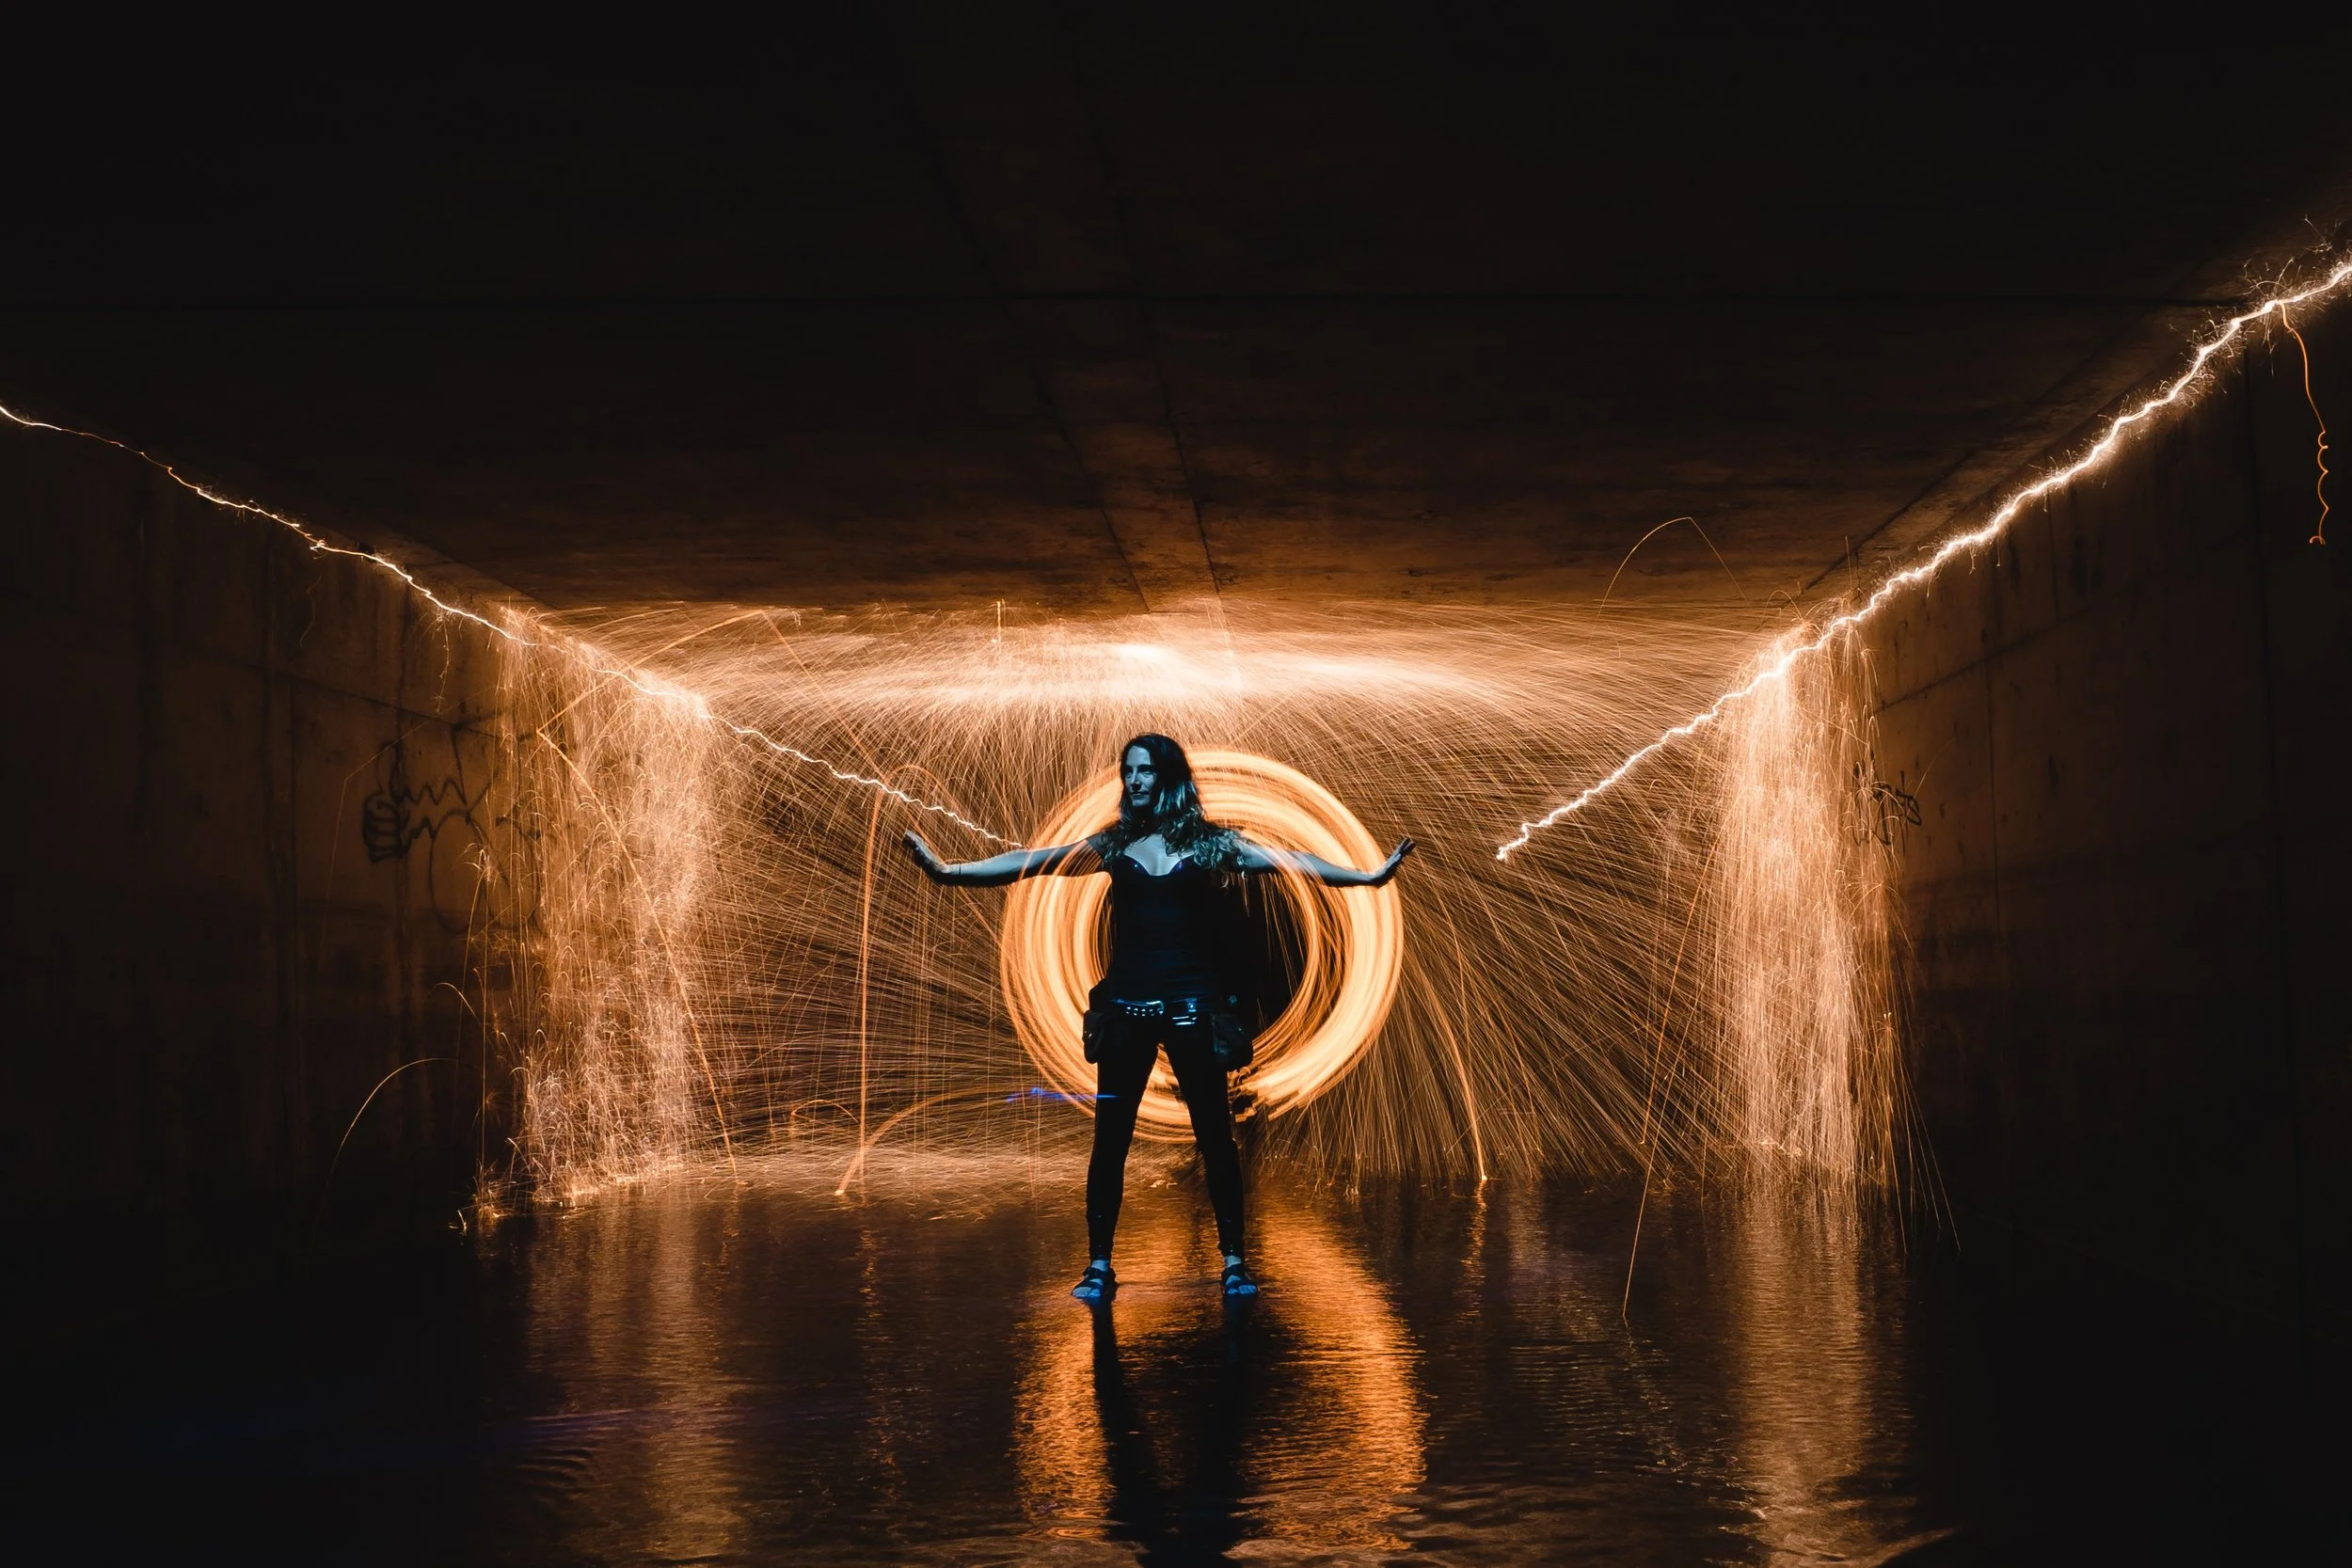
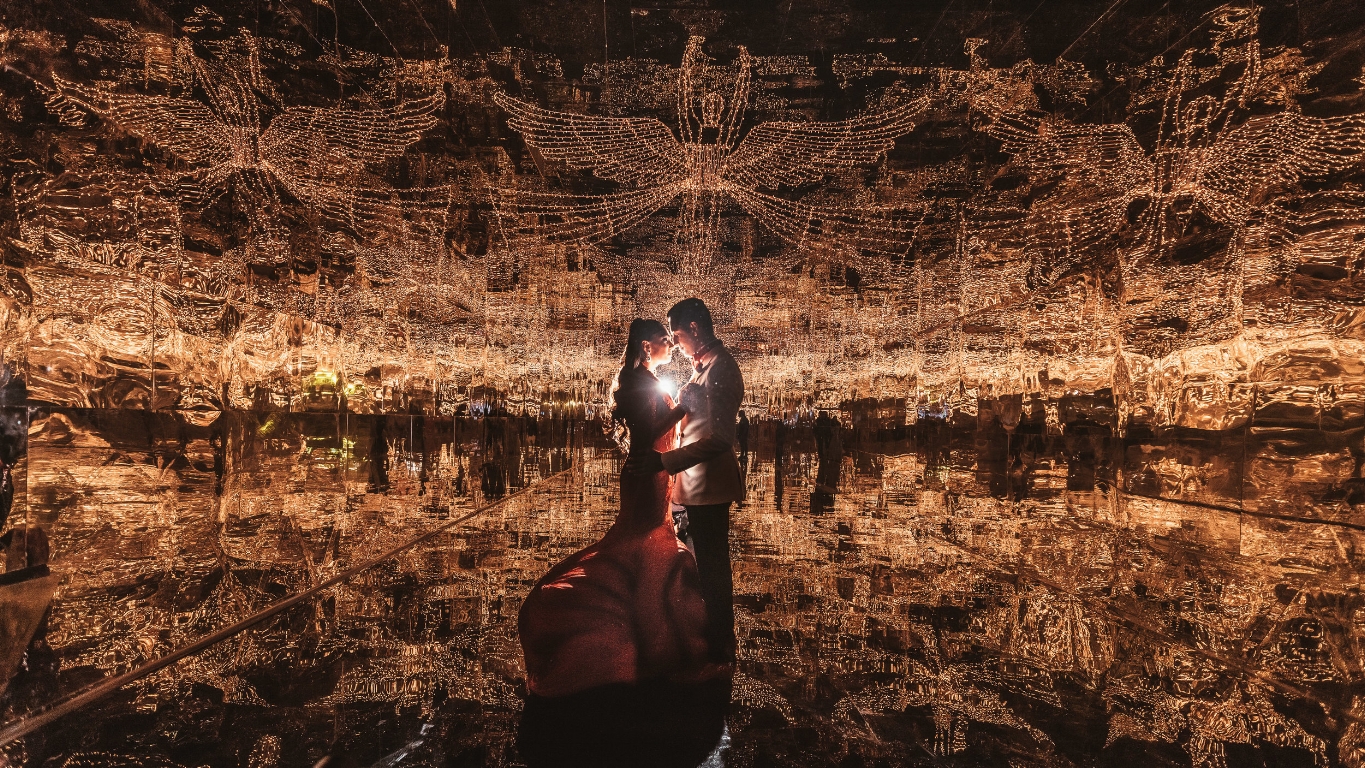
This is a pretty elaborate setup. In this case, the girl is lit from the front while a steel wool burns in the background. There’s also reflection coming into play, adding another dimension or a kind of exposure to the image. Photo by Xuan Nguyen on Unsplash
Light painting brushes are available online for as cheap as $5 online. In the case of which lights to get, purchase lights that are can be directed or angled towards something and don’t spill much. You could experiment using any number of lights. We used a bar light from Yongnuo to expose our subject - you can purchase it here. We also used a plastic tube with tracing paper (to soften the light a little) and attached to it the small torch from earlier to create a nice light tube.

STEP NO 5
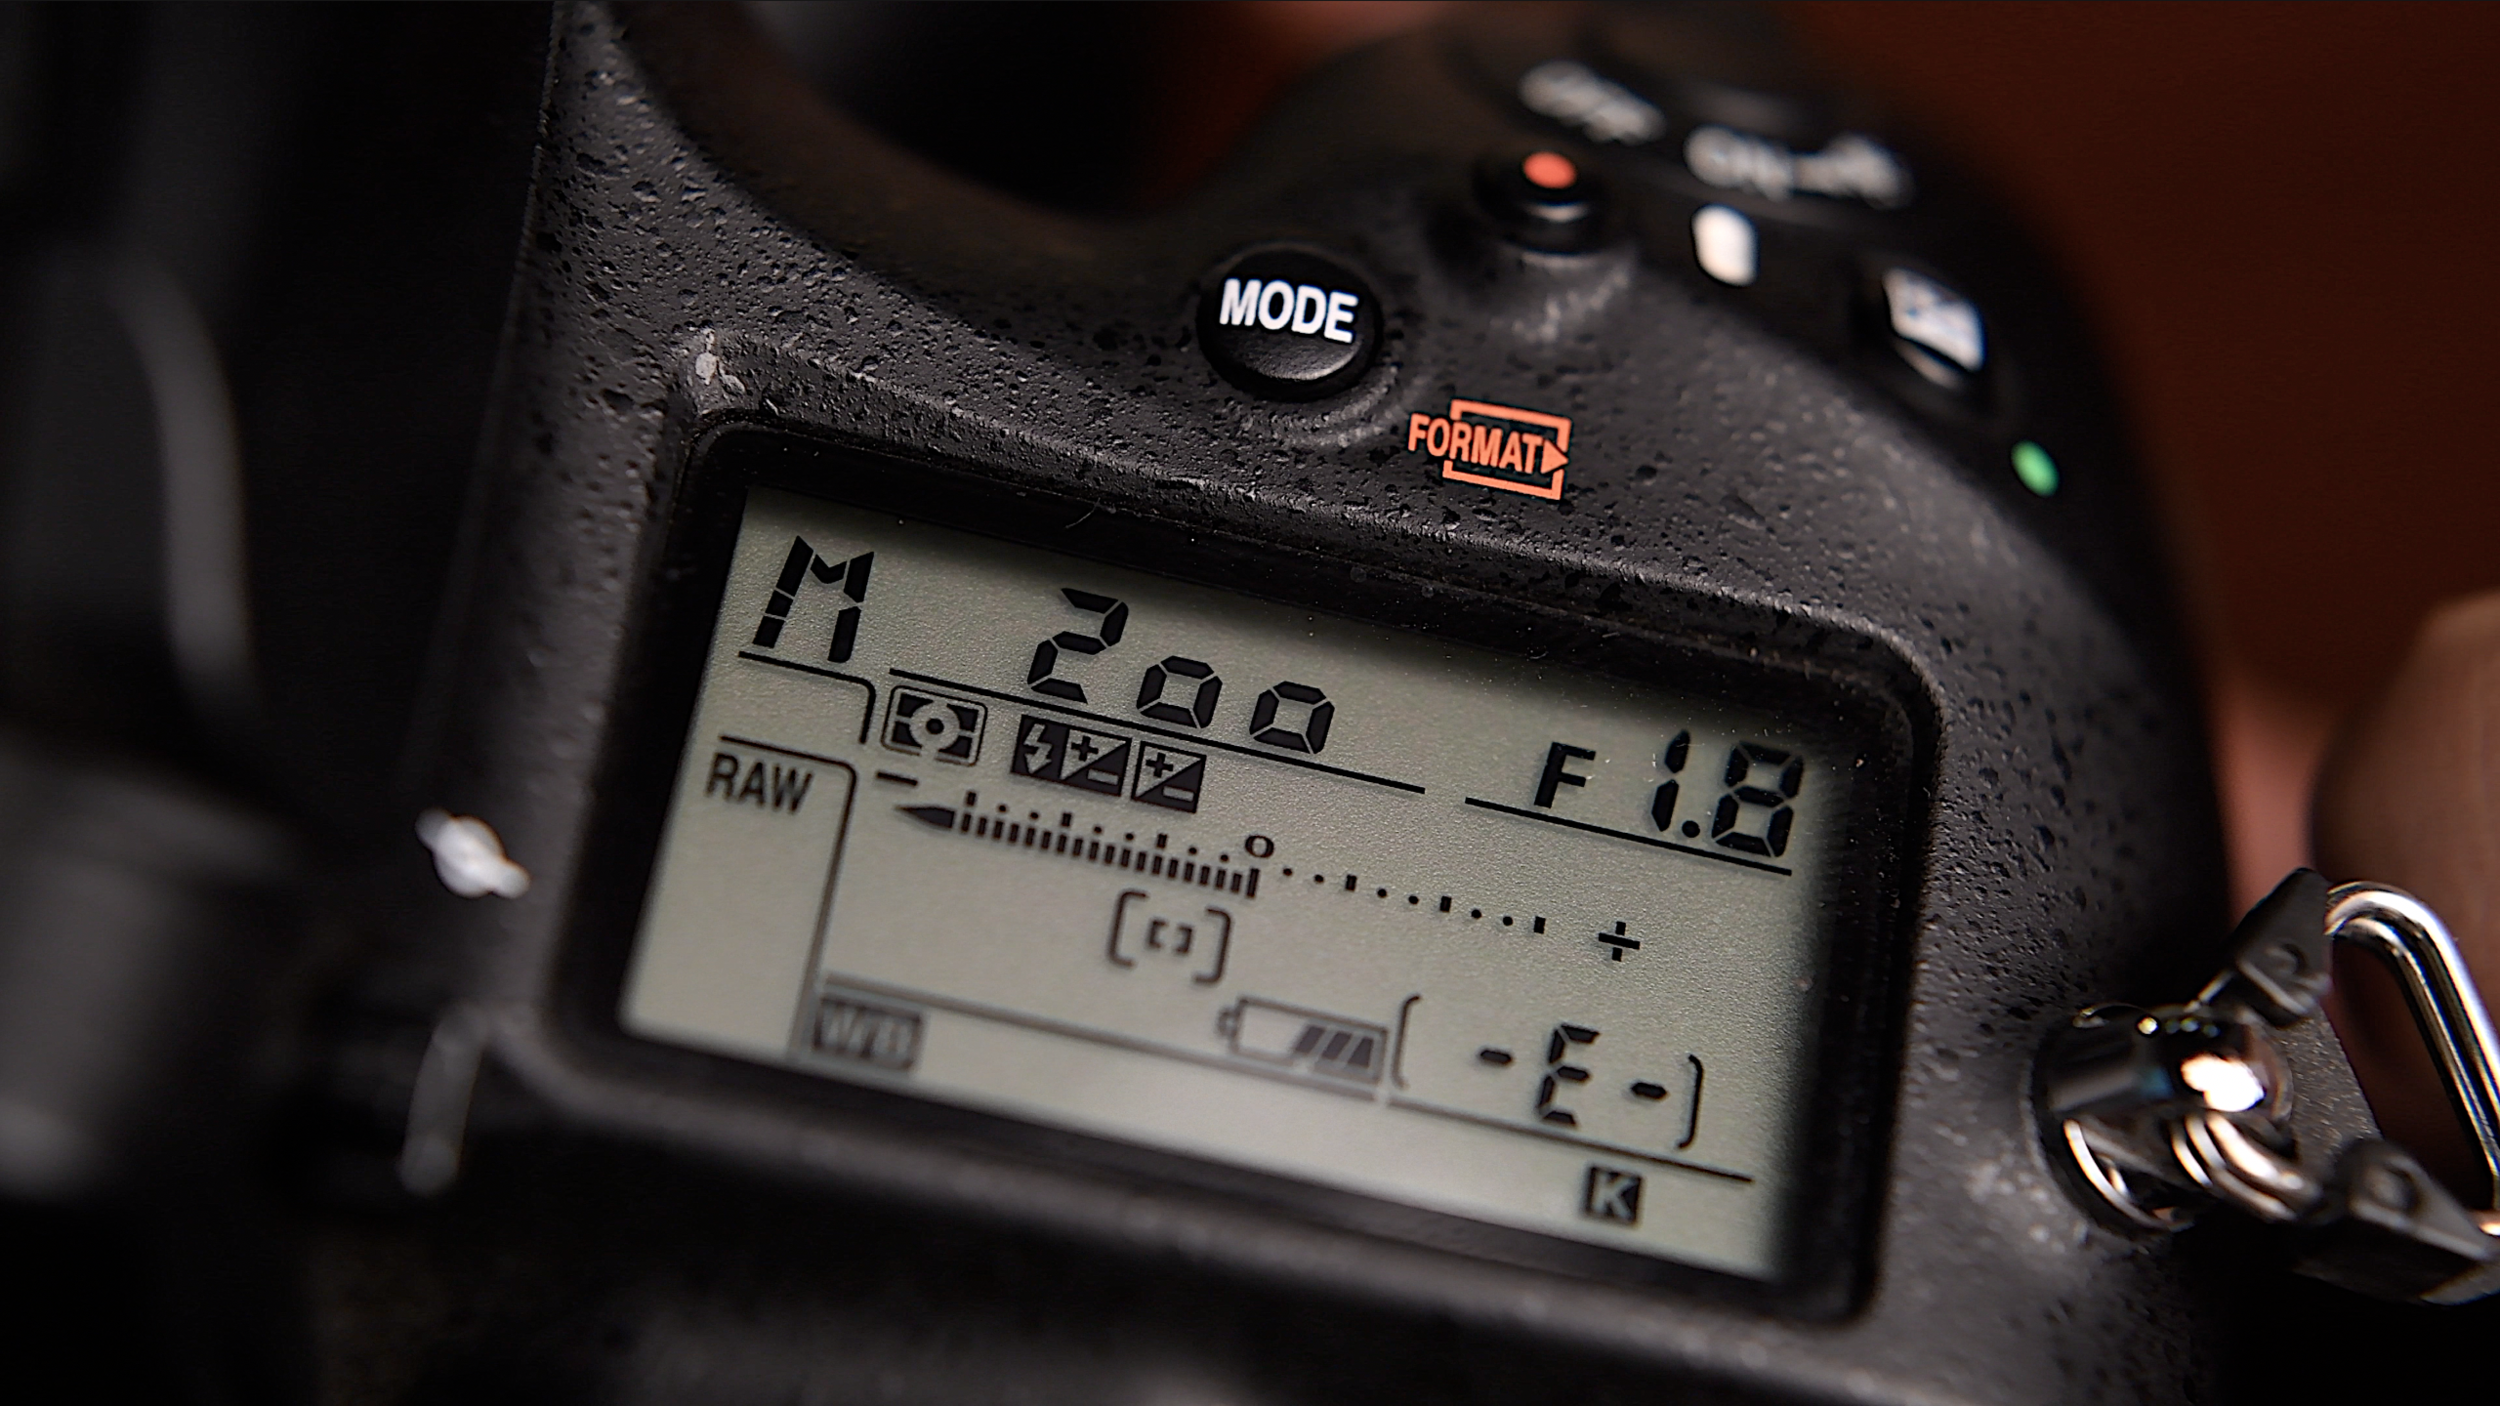
Camera Settings

For reference purposes only. Camera settings vary depending on where you are.
Set the mode on your camera to “BULB”. On bulb mode you can draw the shutter curtain up and down on command. If you’re using an older camera which doesn’t have an app that allows you to control your camera, you could set the shutter speed to 30 seconds or more or use an interval timer and time your shot. This should give you time to paint around your subject. Your aperture has to be f/8 or more if you want the image to come sharp and if you want everything in focus. The ISO should be set depending on how sensitive you want the sensor to be. Keep in mind that the higher you bump up the ISO the more noise there will be.
STEP NO 6
Go Time
Once your frame is set, you’ve talked it over with your model and all, you’ve decided what you’ll be exposing throughout the course of the exposure - the only thing left to do is - do it.
Press the shutter
Expose the subject/frame by turning the light(s) on and then off.
Turn on your lightbrush/tube and paint around your subject making some cool patterns, a halo perhaps. You can go crazy with the patterns before the the shutter snaps. Make sure you’re not in the frame.
The result will be a fabulous/weird/experimental light painting. The more one practices, the better one gets at it.

That should be it for those who like to read.
But for those who want a more visual tutorial on how to create a light painting, click on the video embedded below. Photographer Omkar Kocharekar has created some fabulous light paintings with a little help from us at GMax Studios. That video should clear any doubts on what to do or what not to do. Live a little, click on.

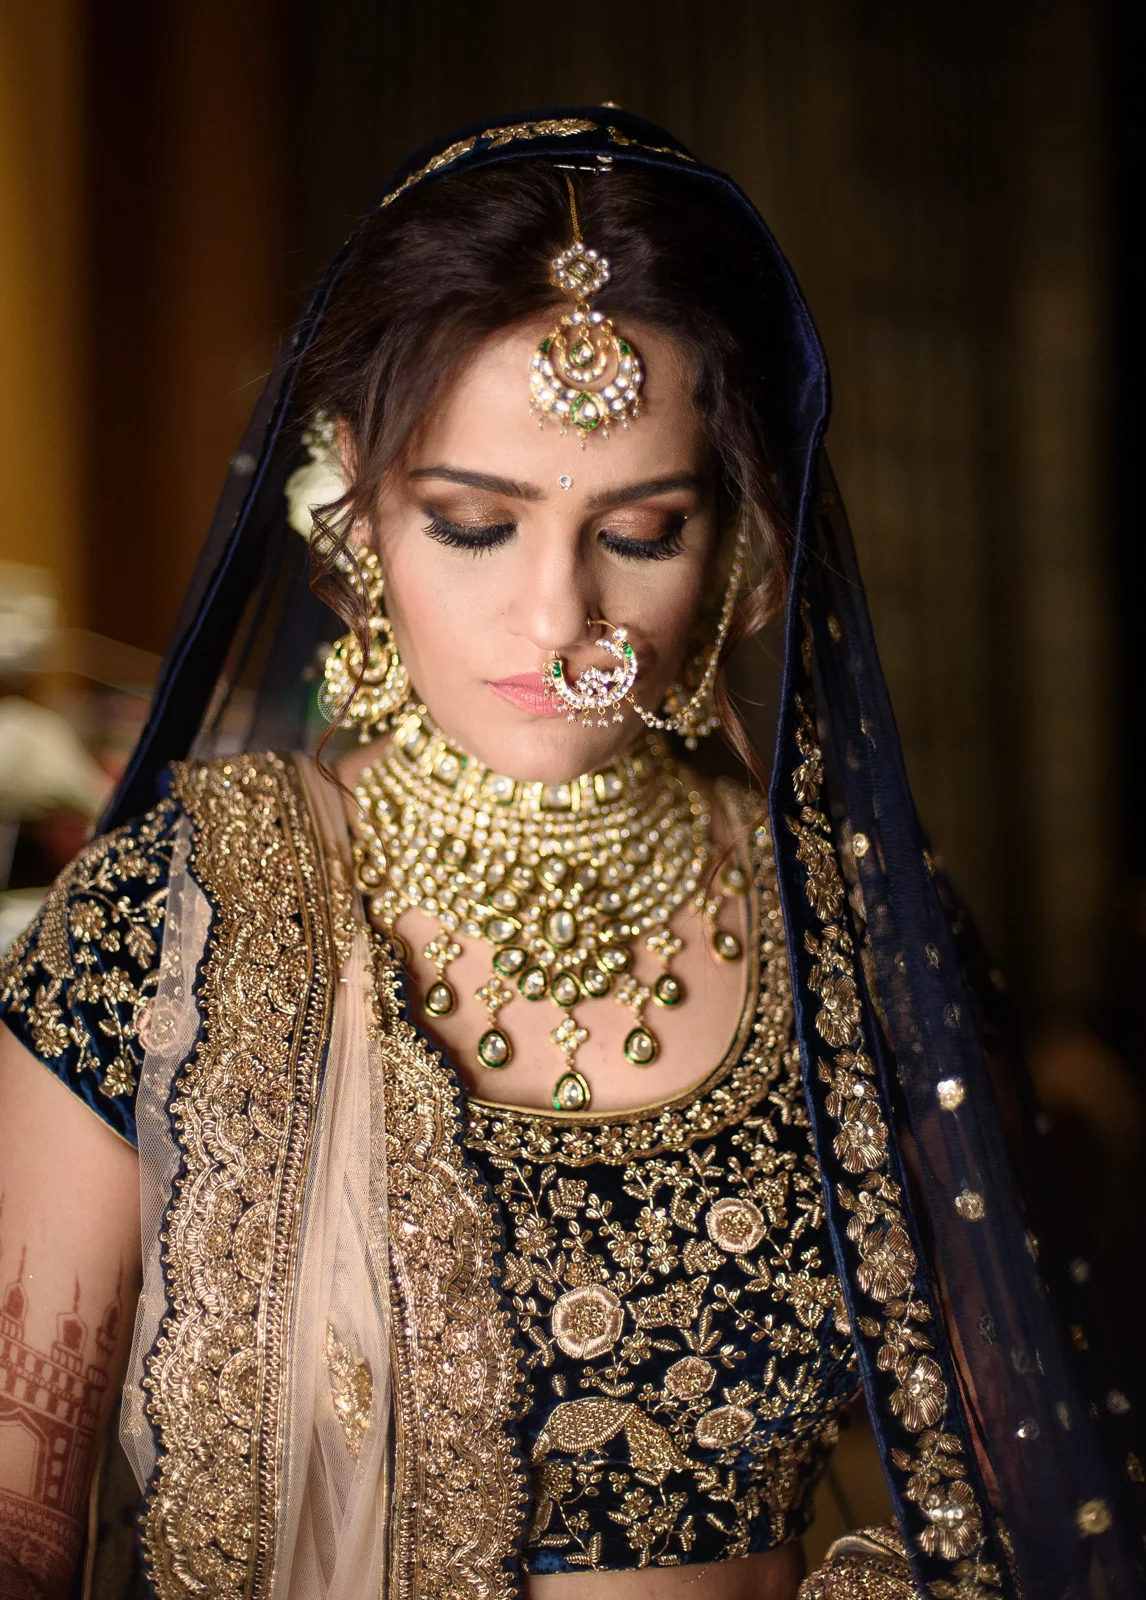
Panorama Portait Photography | Brenizer Method
Using the panarama technique to create unique portraits.
This photography video is a portrait photography tutorial, where we show you just one of the many ways you can shoot a panoramic portrait also known as the Impossible Portrait. This particular style of shooting a portrait is known as the ‘Brenizer Method’ pioneered by wedding photographer Ryan Brenizer.
If you’re new to panoramas or panoramic photography, you should watch this short photography tutorial on how to shoot panoramas correctly here:
The Brenizer Method is an easy to learn but difficult to master photography technique which is also referred to as Bokeh Panorama or Bokehrama. With this creative photography method, you can shoot a ultra wide-angle portrait while retaining the shallow depth of field that is so popular in modern portrait photography and on Instagram.
AMAZON: https://gmxsn.com/amazon
YOUTUBE: https://gmxsn.com/yt
GOOGLE+: https://gmxsn.com/gplus
INSTAGRAM: https://gmxsn.com/instagram
FACEBOOK: https://gmxsn.com/fb
TWITTER: https://gmxsn.com/twitter
TELEGRAM: https://gmxsn.com/telegram
5 Wildlife & Macro Photography Tips For Beginners By Photographer Yuwaraj Gurjar | In Frame With Gorky M, Episode 3
Wildlife photographer Yuwaraj Gurjar shares some important tips for those looking to get into wildlife photography and macro photography.

In the third episode of our latest photography series, ‘In Frame With Gorky M’, one of India’s authority figures on wildlife and macro photography, Yuwaraj Gurjar, sits down with filmmaker and photographer Gorky M - and shares some very important tips and secrets for beginners or those looking to get into wildlife photography and macro photography full-time. Be sure to note these down before going out to photograph.
You Cannot Pursue Wildlife Photography Full Time
Wildlife photography isn’t one of the commercial or the most glamorous photography genres out there. While there is a niche and a demand for it, it is also important that you’re taking up commercial assignments to keep yourself afloat. Wildlife photography is a fascinating genre, but not a high-income genre in photography unless you’re an established wildlife photographer.
Do Your Homework & Come With The Right Gear

According to wildlife photographer Yuwaraj Gurjar, preparation for a wildlife photography expedition begins three to six months in advance.
Going to wildlife sanctuaries and conservatories and photographing animals and birds is fine, but you must read up on your subjects before photographing them. It is important you know how to work your camera and you have the right lenses for photographing the birds and the wild animals you might see. Read the rules, regulations, and brochures of the safari or national park you’re visiting to avoid breaking any laws or committing any offenses, and talk to local guides and figure out where you might find a particular bird or an animal, so you’re in the vicinity when there is an opportunity to photograph them.
READ: Photography Tips From National Geographic Photographer Ira Block!
Having A Love For Nature Is The Bare Minimum

Be prepared to get down and dirty when you’re out in nature. © Yuwaraj Gurjar Photography
Those who pursue wildlife photography and the various genres that it encompasses such as nature, animals, flora and fauna, landscapes, birds, macro - have a genuine love for mother nature. You must ask yourself if you’re passionate enough about it. There will be times when you have to climb hills, photograph in the rain, climb down ditches and unsavory places to photograph, which requires a level of patience and dedication that isn’t always possible. This is why it’s important that you are passionate enough about wildlife photography and only then will you be able to make somewhat of an impact with your work.
There Is Already A Lot Of Work On Tigers and Elephants
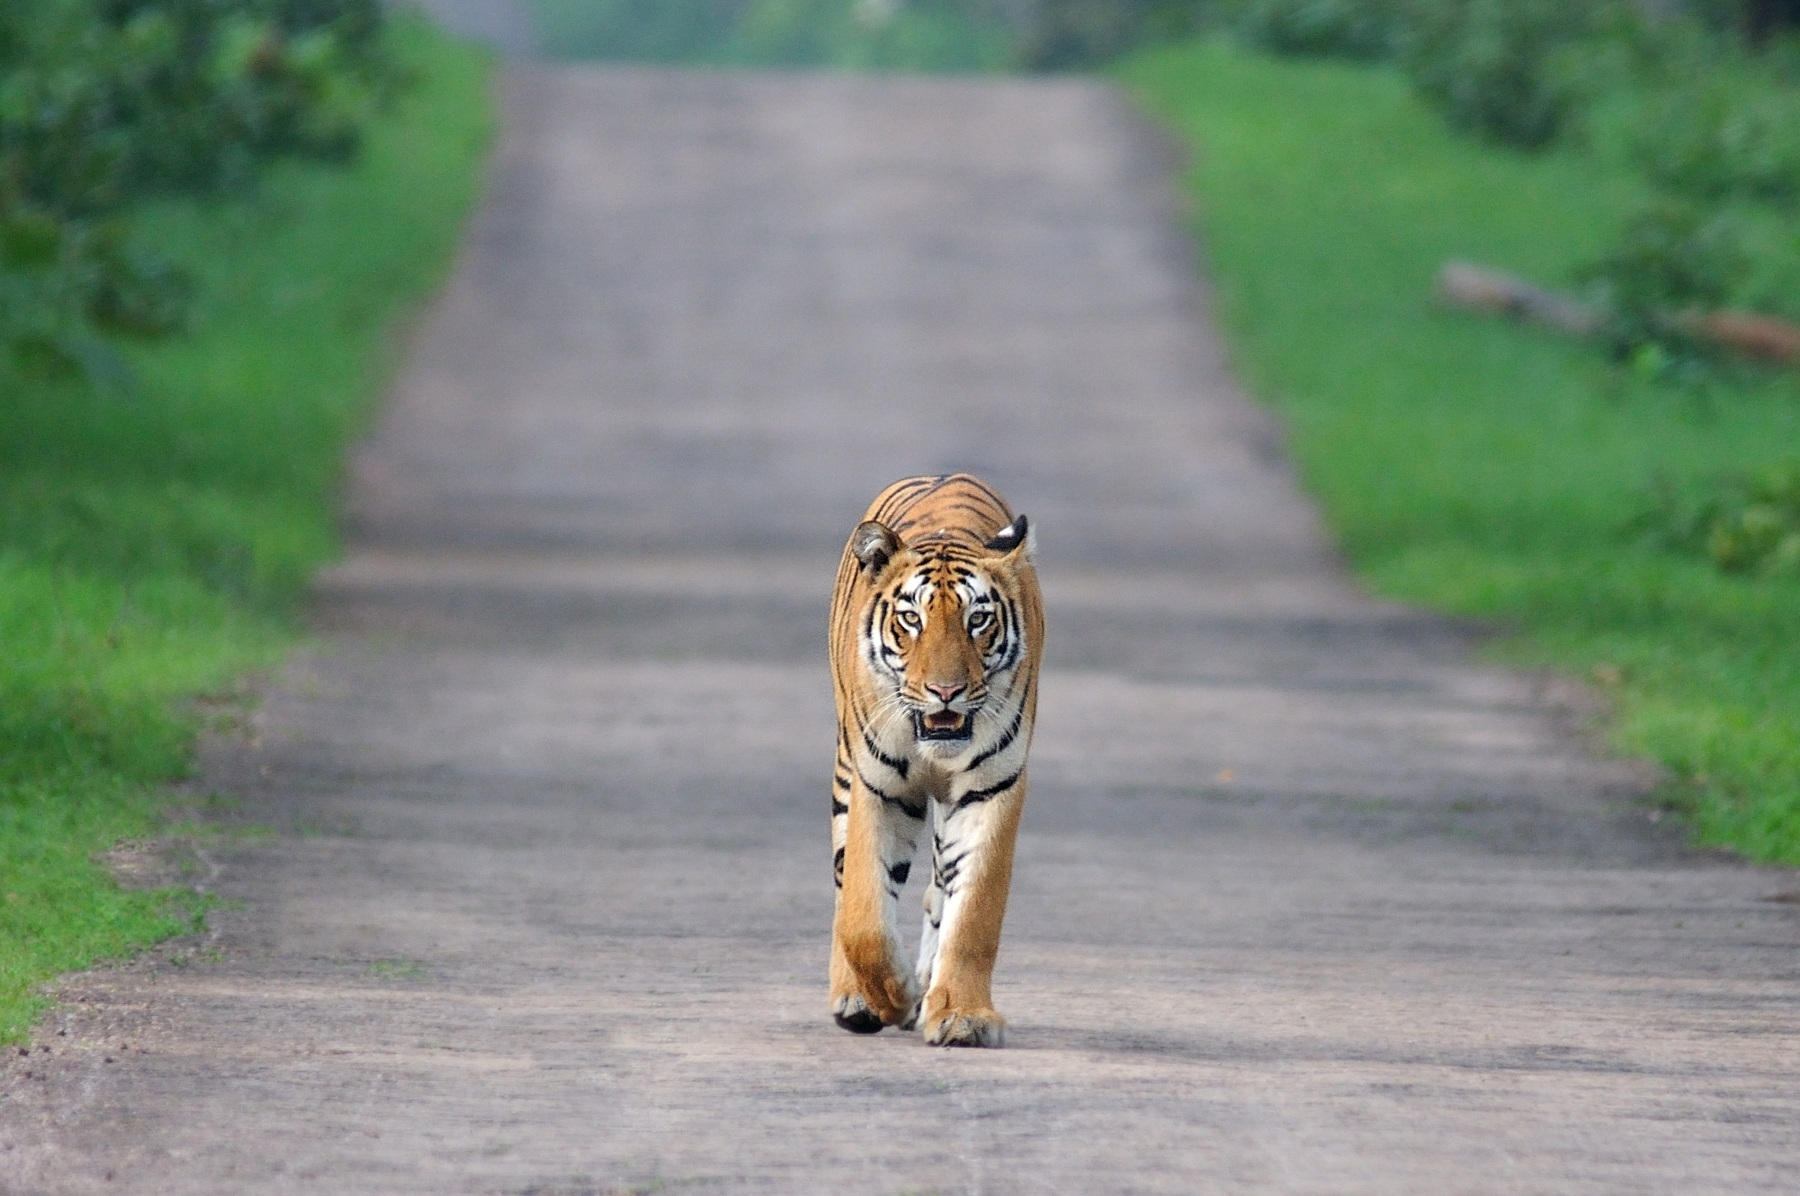
An Indian Tiger Photographed by © Yuwaraj Gurjar Photography
Don’t be discouraged by this, we’re simply saying this so you’re aware. Established wildlife photographers have already done a lot of work on Bengal Tigers, Indian Elephants and Dolphins etc. So make sure, if you’re photographing similar species, that you look at it from a different perspective - so your work is able to stand out. There are also many species that people aren’t looking into. They could be unique to the area you live in, or a variation on the species that are already out there. “People are still discovering new birds in the Himalayas,” says Yuwaraj Gurjar. Maybe you could try Macro photography - where there’s a higher chance of finding something new or coming across a rare species.

Macro shot of a Vine Snake gulping a Frog, © Yuwaraj Gurjar Photography
Macro Photography is a versatile genre of wildlife photography where there are tonnes of species to photograph and new things to find.
Travel With A Group Or An Experienced Professional

Even accomplished photographers prefer to travel in a group on a wildlife photography excursion, says Yuwaraj Gurjar. Image © Yuwaraj Gurjar Photography
This really matters. If you’re looking to learn the ropes of wildlife photography or macro photography, it is better if you travel with an experienced wildlife photographer so you learn more quickly than you would on your own. The cost of a wildlife safari also becomes more manageable when divided between 4-6 people. Not to mention that it is also a safety concern, so traveling to jungles and forests in groups or with local guides becomes essential. The local guides are usually chatty, and if you were to engage them in conversation, they would be more than willing to help you and give you an idea of the species or animals that live in a particular habitat.
And that’s not all. There are many more insights and little tips to help you start your journey as a wildlife photographer in the video below. Yuwaraj Gurjar also has advice on which lenses and camera gear to use for wildlife photography. Be sure to subscribe to us on YouTube if you want to watch more videos like the one below.
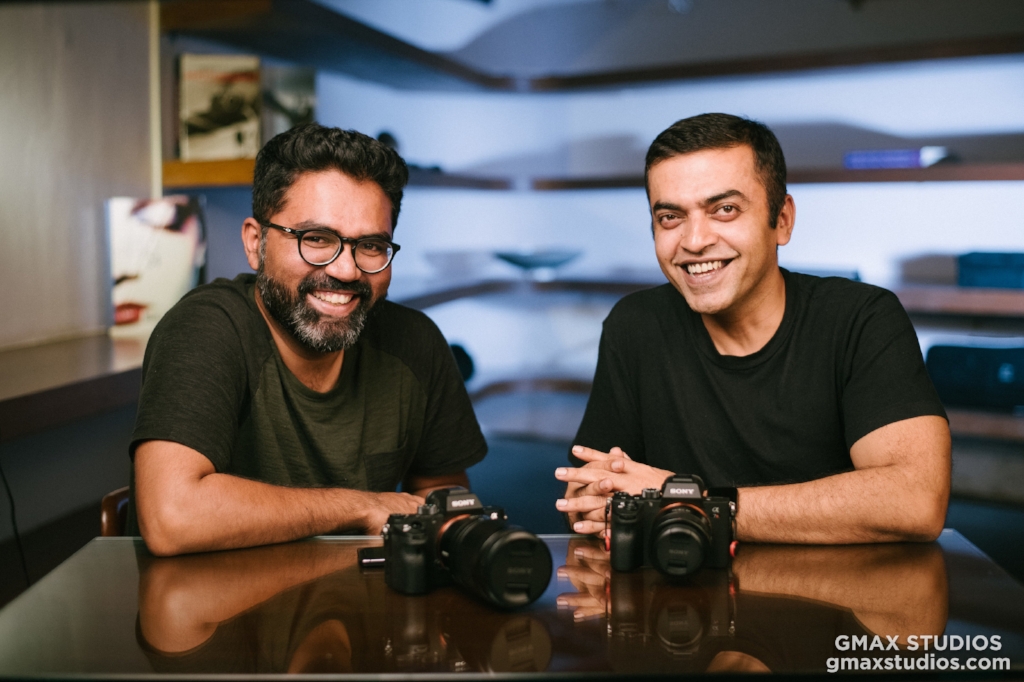
Presenting Episode 3 of the series - In Frame with Gorky M. In this episode, Gorky M. speaks with accomplished wildlife and macro photographer Yuwaraj Gurjar. Yuwaraj Gurjar is one of India's best wildlife photographers and one of the authority figures on macro photography worldwide.


Joseph Radhik Interview | Lessons In Humility And Wedding Photography | In Frame With Gorky M Episode 1
If you’re a wedding photographer, you might not want to miss this.
Wedding Photography has witnessed a massive revival all over the world. These days, wedding photographers can charge as much as they like. This can partly be credited to photographers like Joseph Radhik who’ve taken a different approach to photographing weddings by bringing out a previously unseen art to them. Joseph has won countless awards for his work and is the founder of Stories by Joseph Radhik, a wedding photography firm that’s been featured in magazines like Grazia, Harpers’ and People Magazine. A photographer with an entrepreneurial spirit, Joseph has managed to blow up his craft into a thriving business whilst retaining all of the creativity and passion.
Joseph is the first guest in our latest series, ‘In Frame with Gorky M’ - a half hour tete-a-tete with some of the world’s best photographers. In the video, Joseph talks about how he got into wedding photography, his personal gear and more. The full episode is embedded at the bottom of the post, you can get right to it if you like.
“I worked as a business development manager five days a week, and on a Friday I would shoot a wedding and be back in office on Monday. ”
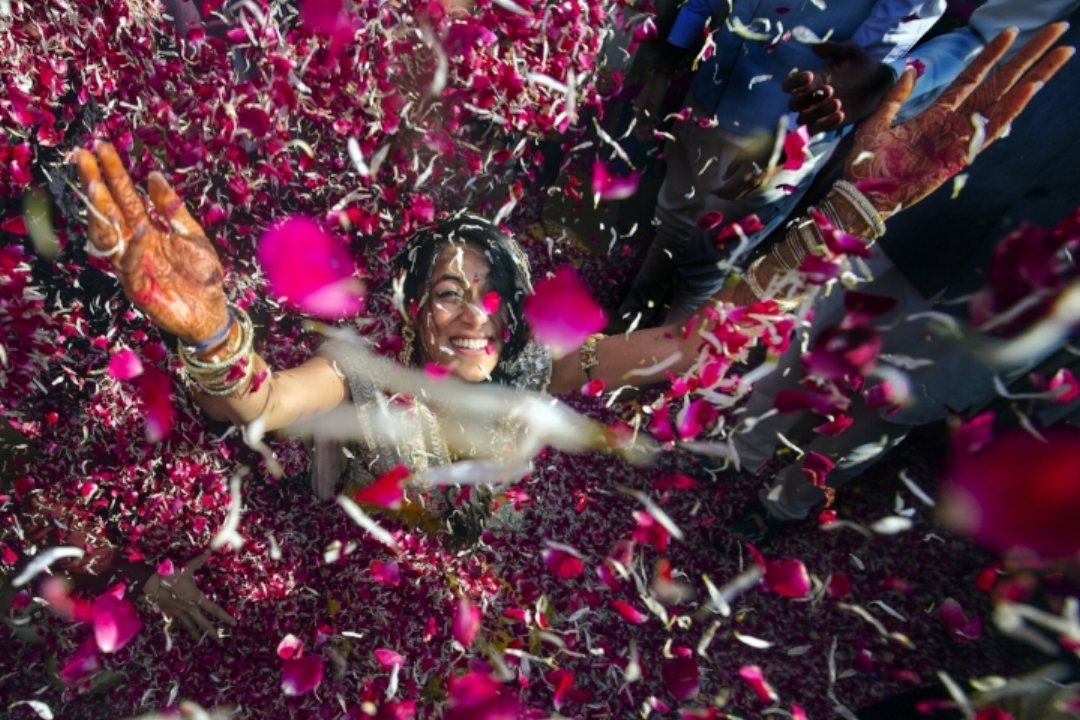
Photograph by Joseph Radhik, © Stories by Joseph Radhik
It’s this attitude and commitment that’s made Joseph the one of the prized photographers in the industry.
And there’s lots we’ve learned about the man these past few months, bumping into him at the Sony A7III launch in Mumbai (He’s also Sony’s Global Imaging Ambassador) and from the time he came over to talk about his passion project PEPx Photocon. He was coming straight from a photo-shoot, so he came with suitcase and all, very much, as we like to call it - in the zone. We were going to be filming our conversation in one hour, and he was going live simultaneously on his PEP Professionals app; his technicians setting up a live-stream that looked technical as hell. In those days we’d go live every Saturday, so we could understand the immense pressure. But Joseph was cool like you’d be on a Sunday morning. He was quick to figure out a solution when a problem arose, answering and hanging up calls at the pace of a stockbroker, at times, on his haunches like a camera assistant.
After seeing what Joseph’s schedule looked like, (putting together a 3-day global photography event, photographing a wedding, giving an interview and going live at the same time on his app) we learned that it’s no more just you and the camera. Photography is a big part of your life but it’s a relatively small part of your business. Most of your time’s eaten up by phone calls, production meetings, preparation and social media. It’s how you fare in those departments that determines if you’ll be remembered for picking up the camera or not.

Real photographers don’t shy away from selfies
In return for creating awareness on PEPx Photocon on our channel GMax Studios, Joseph had invited us to the event. He let us film the entire event, gave us the best seats in the house and also threw in twenty PEPx passes for our subscribers. It was because of this wonderful opportunity that we were able to chat with accomplished and globally renowned photographers such as Ira Block, Dinesh Kumble, Yuvraj Gurjar and Auditya Venkatesh.
PEPx was an unbelievable experience for a photographer. People were practicing photography the halls, students were chatting up their favorite photographers; ambassadors, acclaimed photographers, gearheads, camera companies, vloggers, motivational speakers - everybody was present. It was kind of like an Apple event, but for photographers. Joseph was speaking on all three days, and during the course of the event, we learned just how good an orator he is. His speeches are motivational and he also likes to laugh at some of his own jokes, but he kept the audiences engaged through all of it.

Photograph by Joseph Radhik, © Stories by Joseph Radhik
When asked about the best camera settings for wedding photography, (we know, it sounds absurd) Joseph said that the best setting is getting to the location with your camera. The theater erupted with laughter. While there were other renowned photographers speaking at the event, seeing Joseph get up on stage was always exciting, his jokes and insights being met with much laughter and applause. He was able to harvest every colloquial sentiment to make the people feel at home.
“In 2008, I googled ‘wedding photographers in India’ and it returned zero results.
I chanced upon a genre that I never knew existed.”
Photograph by Joseph Radhik, © Stories by Joseph Radhik
Wedding photography came to Joseph when he was looking for a photographer to shoot his sister’s wedding. At the time, he was photographing flowers and sunsets like every rookie with a D-SLR. (Scroll through some of his older photos on flickr, we’re not lying) “I chanced upon a genre that I never knew existed”, says the the three-time fearless photographer of the year, his eyes lighting up from visualizing the moment. He ended up photographing his sister's wedding, and naturally, he got good at it as he shot more and more. He even began to dress the part. In fact, his photography gear also comprises of waistcoats just so he can blend in better. “I’m working, but it’s still a wedding.” It’s a statement that’s profound because of its simplicity. It can only come from a guy who truly loves to photograph weddings.
“Wedding photography had everything that I loved. Photojournalism, beauty, light, documentary, landscapes. Weddings are also like wildlife. You need perfect timing.”

Photograph by Joseph Radhik, © Stories by Joseph Radhik
As an effort to enjoy himself more, Joseph carries only a handful of equipment - his favorite lenses, a double-camera strap (so he looks like a badass cop) and has a relatively small team helping him out with the lighting and managing of data. While his world is fairly complex, his photography is simple. It’s how he’s able to still love doing what he does despite his phone ringing off the hook. As a photographer, he’s not above shooting group photographs of the couple’s friends and family he says. The truth of that statement hits your chest. It’s a lesson in humility from the guy who shot India’s most talked-about wedding.
Watch the entire conversation between Gorky M and Joseph Radhik below. He talks about his inspirations, shares some valuable trade secrets and even lets us take a peek inside his camera bag.

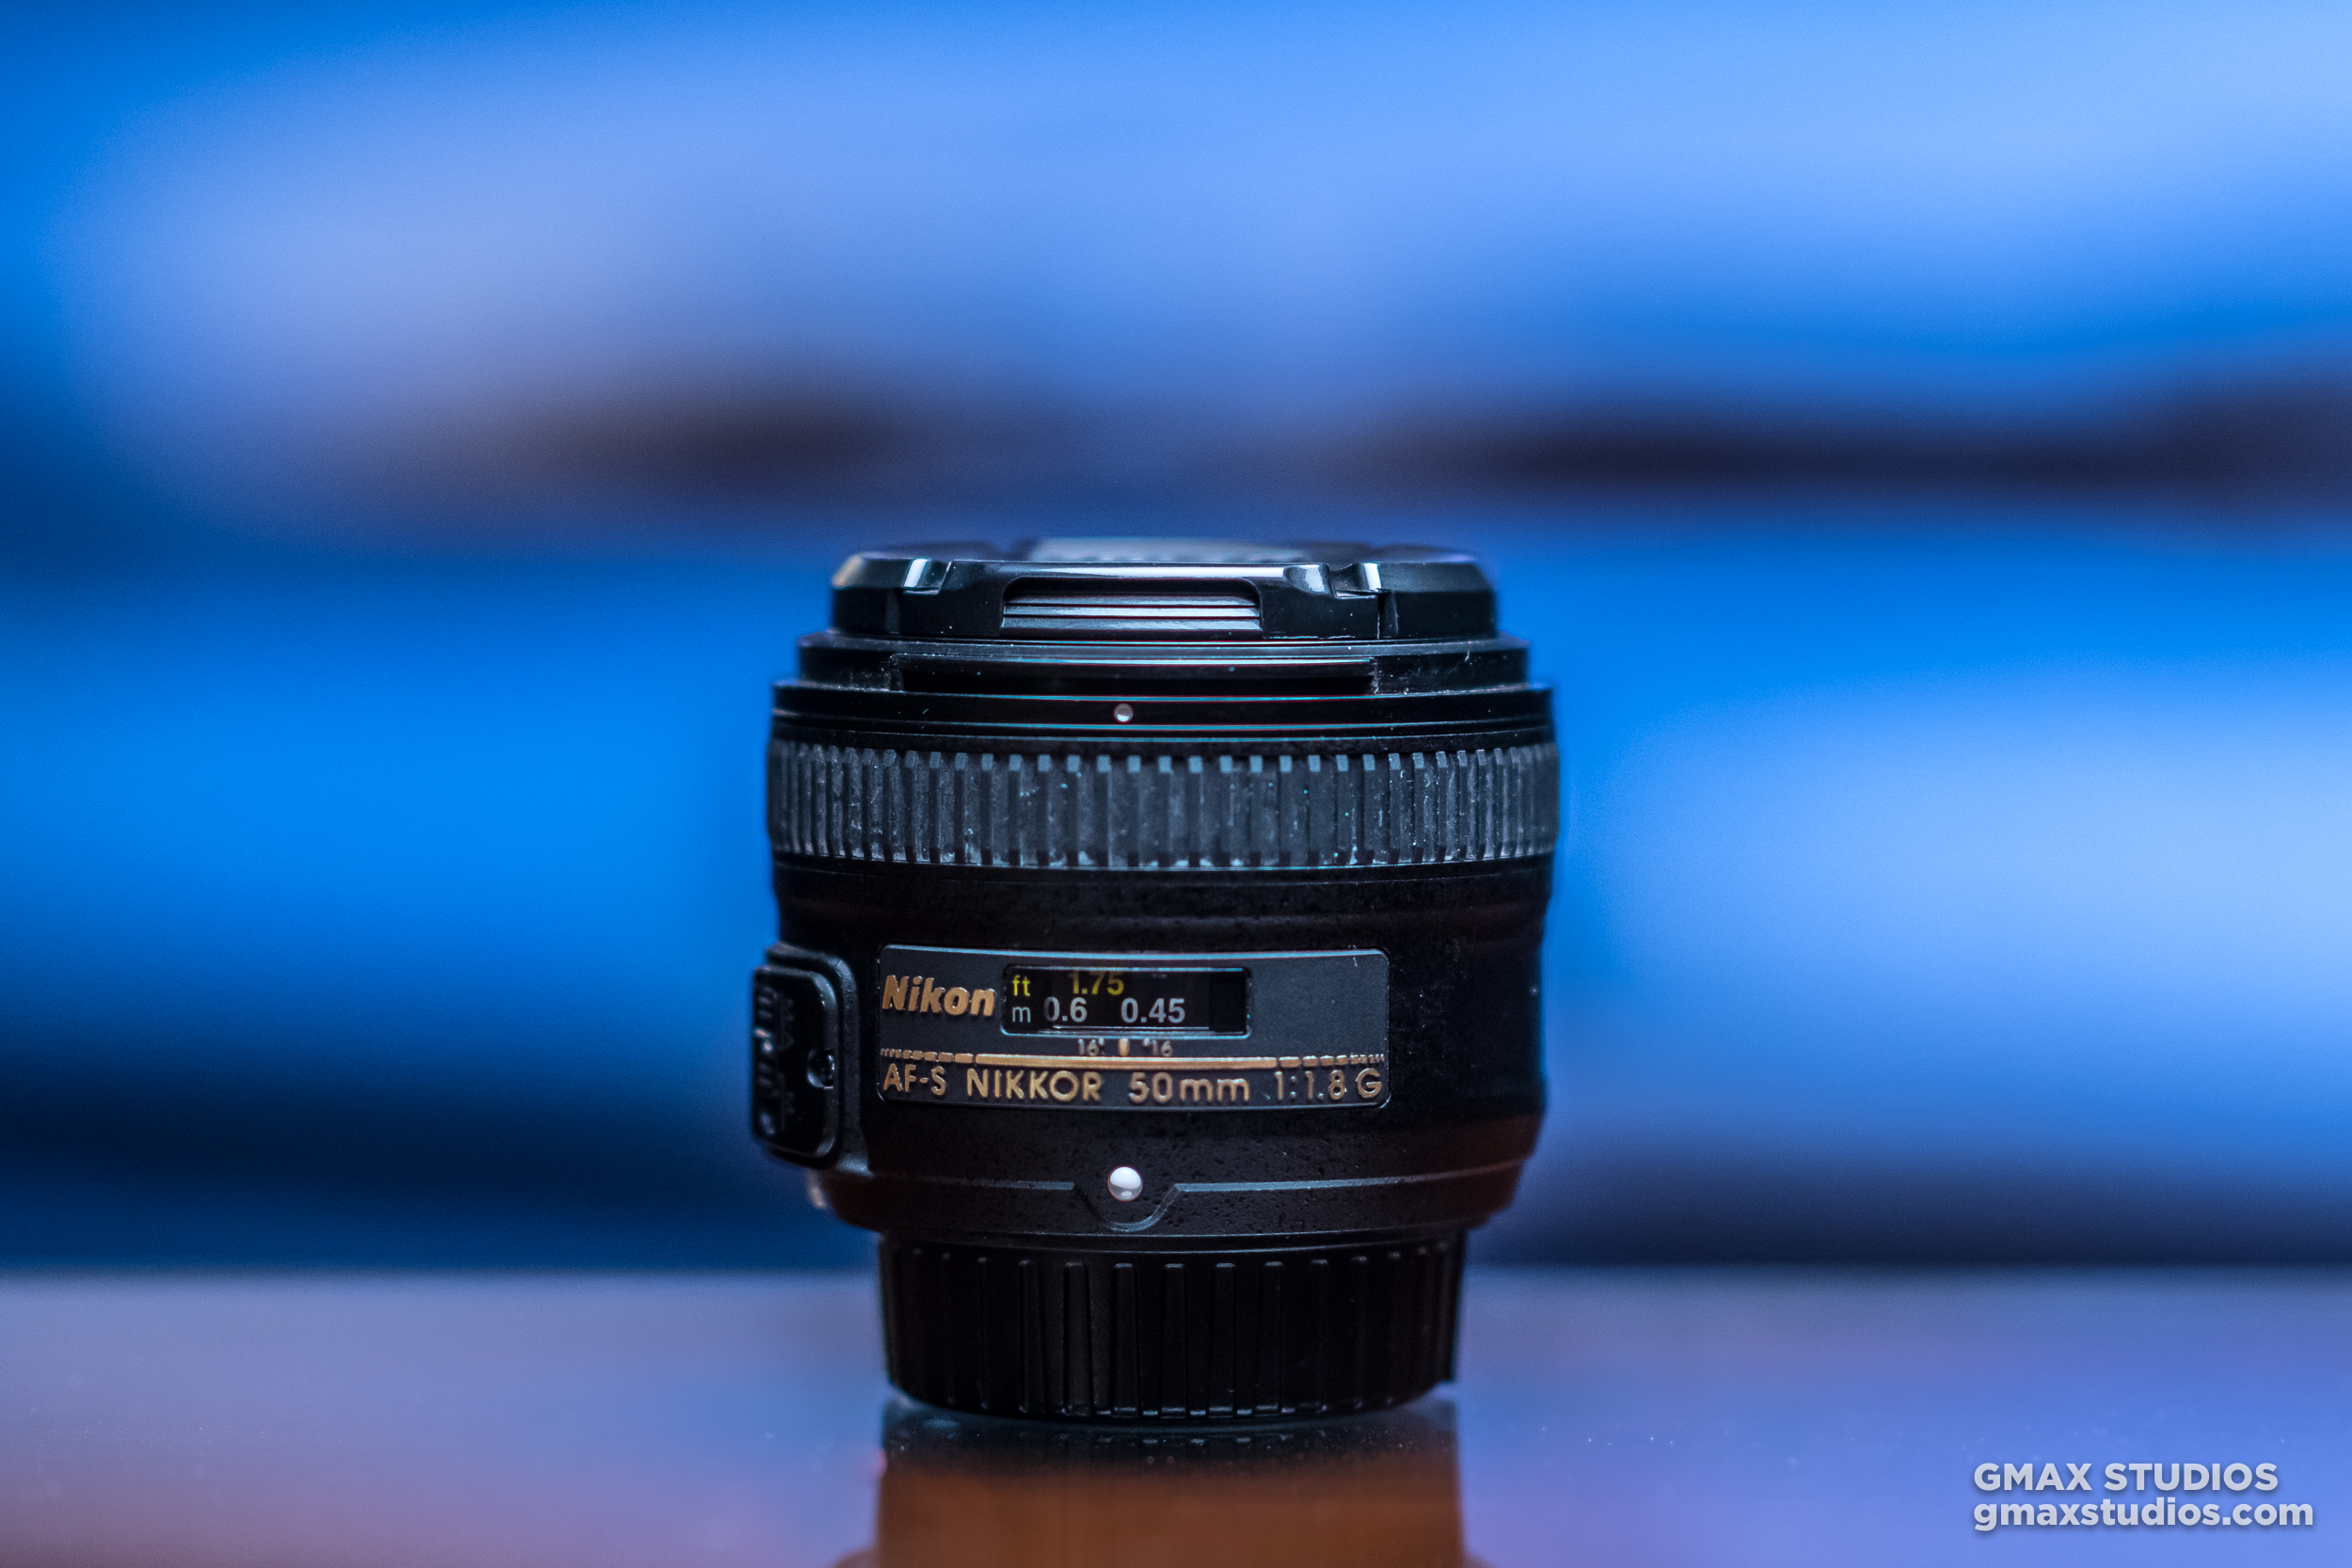
Why is the 50mm 1.8 lens the best lens in the world and why should you buy it!
It’s been a while since you’ve had this DSLR but your photos just don’t stand out. They seem to be missing something. You can change that today.
It’s been a while since you’ve had this D-SLR but your photos just don’t stand out. They seem to be missing something. That finesse. That x factor. That punch.
That ‘D-SLR look’ you’ve seen on Instagram.
Mind you, If you’re not getting the kind of shots you want, it could make you fall out of love with photography. At the end of the day we do things to get results. And if you’re putting in the time and you don’t think it’s yielding anything substantial, it can turn you off big time.
Here’s what happens. You’re getting great natural light on your subject. You might even think that the picture has a kind of mood. You compose your shot, hold your breath and click the shutter release button. Nice.
Later, you see the image on your computer and you can’t believe it’s the same picture. It looks ordinary. You scratch your head and go, “I thought I’d get quality images with a D-SLR.”
But here’s the thing. Image quality and sharpness often depends on the kind of lens you’re using and its aperture (aperture is the opening of the lens, which is denoted by the f number. For example, f.4 or 5.6.) The lower that f number is, the wider the aperture will be.
A wider aperture allows more light to enter the lens, and this allows your camera to render focus areas much better.
The 18-55 kit lens that comes “free” with your D-SLR may seem good enough to start with, but it has an aperture range between f/4 and f/5.6
If you’re looking for beautiful bokeh, sharper image quality, a 50mm prime lens with a 1.8 aperture is a great lens to buy.

Background blur has mostly to do with your aperture
The 50mm 1.8 prime lens is also called a ‘nifty fifty’ because of how nifty or useful it is to photographers. It's light, cheap and almost every camera company makes it. It's also a fast lens, (lenses with wider apertures are called fast lenses) which means you can shoot at higher shutter speeds, and you don’t need to bump up the ISO too much. In terms of quality, the nifty fifty is best bang for your buck.
Here are a few reasons why we think it’s a great lens.
The nifty 50 is the personification of “good things in small packages”
It’s Light and Easy to Carry
Weighing between 150 to 200 grams, the 50mm 1.8 will have your shoulders thanking you for it. It fits right in to any camera bag, and you can take it anywhere without attracting much attention. If you had to pick one lens to travel with - this would be the one.
It’s Versatile
The nifty 50 is the Johnny Depp of camera lenses. It can practically be used in every genre of photography. Portraits - check. Landscapes - check. If you’re into street photography, it’ll be hard to top the functionality of this lens.
Everything Looks Right
A 50mm lens is also called a normal lens. At a focal length of 50mm, its field of view is similar to what the human eyes perceive. Everything looks as it should, there’s not much distortion like in the case of wide lenses or the feeling of distance when you take a photograph using a telephoto lens.
It’s a Fast Lens
Like we mentioned earlier, fast lenses allow you to shoot using high shutter speeds - which means less camera shake resulting in sharper photographs. You can shoot in low light conditions easily. So feel free to step-out past 6 pm and photograph as much as you want, and the next time your friends come over for a party and whip out their samsung, tell them to put it aside because you have them covered.
It’ll Give You That D-SLR Look.
Chin up. You’ll finally get that D-SLR look you’re after. By that we mean pictures that have a shallower depth of field, where the subject is separated from its background to a greater degree. We all love those blurred backgrounds, don’t we? Well, the depth of field depends on your aperture and it isn’t a trick some photographer came up with.
Increased Sharpness
The 50mm lens is incredibly sharp. If you’ve been shooting with zoom lenses, the sharpness you’ll get from a prime lens will surprise you.
You'll have no trouble taking fashion or commercial shots with the 50mm 1.8 lens.
It’ll Make You a Better Photographer
Yes that's correct. If you’re used to taking photographs with a zoom lens, it’s quite possible that the constant zooming in and out might have pampered you a little bit. Because you can zoom in or out whenever you want you don’t work as hard, like you would with a prime lens that has a fixed focal length.
A prime lens isn’t a wide lens and it isn’t a telephoto lens. It’s somewhere in between. Which means you’ll have to travel back and forth to frame your subject correctly. This will teach you how to compose, get creative and think out of the box.

Photograph by Himanshu Singh Gurjar
If you’re still not convinced - check out this video on the nifty 50. It’s quite likely that it’ll become your favorite lens in the world too. Leave us a comment if you have any questions.


How to shoot a panorama
With the help of proper techniques and post-processing software, anybody can get near-perfect panoramic shots.
You’re out with your friends, and you’re standing on top of a mountain from where the view seems great. But your camera just won’t cover it all. There’s also no space to go back, and you’re not carrying a wide angle lens. This is where panoramas come in handy. They allow you to photograph an entire scene and not just part of it.
In the old days, photographers would create panoramas on manually by panning across a scene and taking a couple of exposures on film, then printing and stitching them in a lab. Or you got yourself one of those super expensive panorama cameras like the Hasselblad X-Pan.
It was far from ideal, and it was far from easy.
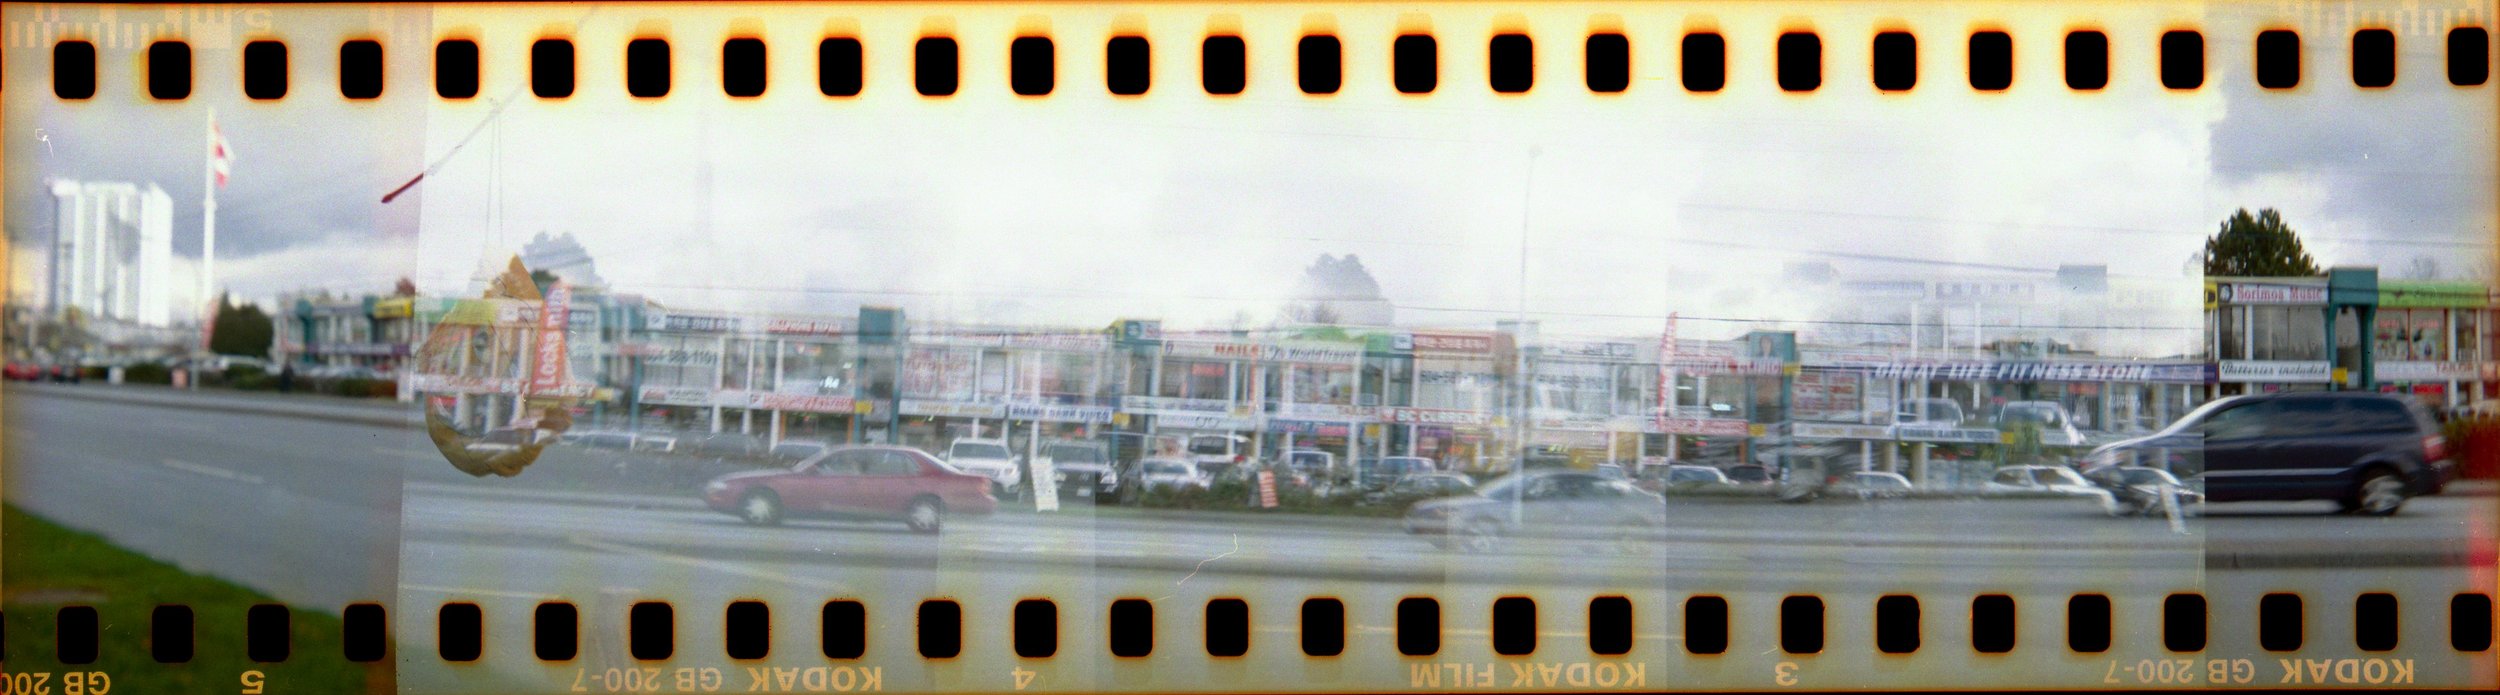
Panorama on film is very tough to achieve
But now, with the help of proper technique and post-processing software, you can get near-perfect panoramic shots. Some photographers stitch over a hundred photographs to create gigapixel panoramas.
WHAT IS A PANORAMA?
Panorama, or panoramic photography is wide-format photography in which you take multiple exposures and merge them together to create a massive picture, sometimes 180 degrees or more. Panorama was introduced by early painters who wanted to give a wider view of the scenes they were trying to project in their paintings.

Panoramic Painting By Maerten van Heemskerck
HOW DO YOU SHOOT A PANORAMA?
A panorama is created in two parts
Photographing the scene via your camera
Using post-processing software for e.g. Adobe Lightroom to merge them together
EQUIPMENT
While there are people who can shoot a panorama handheld, a tripod will allow you shoot images along one horizontal plane easily. You can also get a panoramic head or an L bracket if you’re into real estate or architectural photography. But for our purposes, a tripod should do just fine.
With a tripod, your images will remain level and steady
SETTINGS
Making a panorama look like one photograph is the hard part. Which is why you have to adjust settings manually. The computer in your camera doesn’t know that you’re trying to shoot a panorama, and will expose each shot differently if you left the job of setting the exposure to it.
Switch your camera to manual mode and set the exposure manually to avoid varying exposures in every photograph
Focus
Focusing should also be done manually. Your focus should be set to a distant object that you're photographing or at infinity. This way, your camera won't change focus each time you take a picture.
Aperture
Because we want everything in focus, the aperture should be set to a higher f-stop, preferably f.8 or above.
Shutter Speed
Try to find a sweet spot in the center of the photograph using your camera's metering options. Take a few pictures to ensure the bright and dark areas of the photograph are exposed to your liking and not based on the automatic values suggested by your camera.
ISO
Set your ISO manually and use the same ISO for each picture.
White Balance
Because light reflects off each object differently, auto white balance could make your photograph look like a shade chart. Set and lock the white balance manually, like you did for your focus.
Shoot In RAW
Set your file format to raw, so it’s easier to correct exposure and color in post-processing. To fully understand the possibilities of shooting with a RAW file format, click here.
PHOTOGRAPHING THE SCENE
The next bit is taking the photographs. Once you’ve mounted your camera on the tripod, make sure the horizon is aligned correctly in your viewfinder.
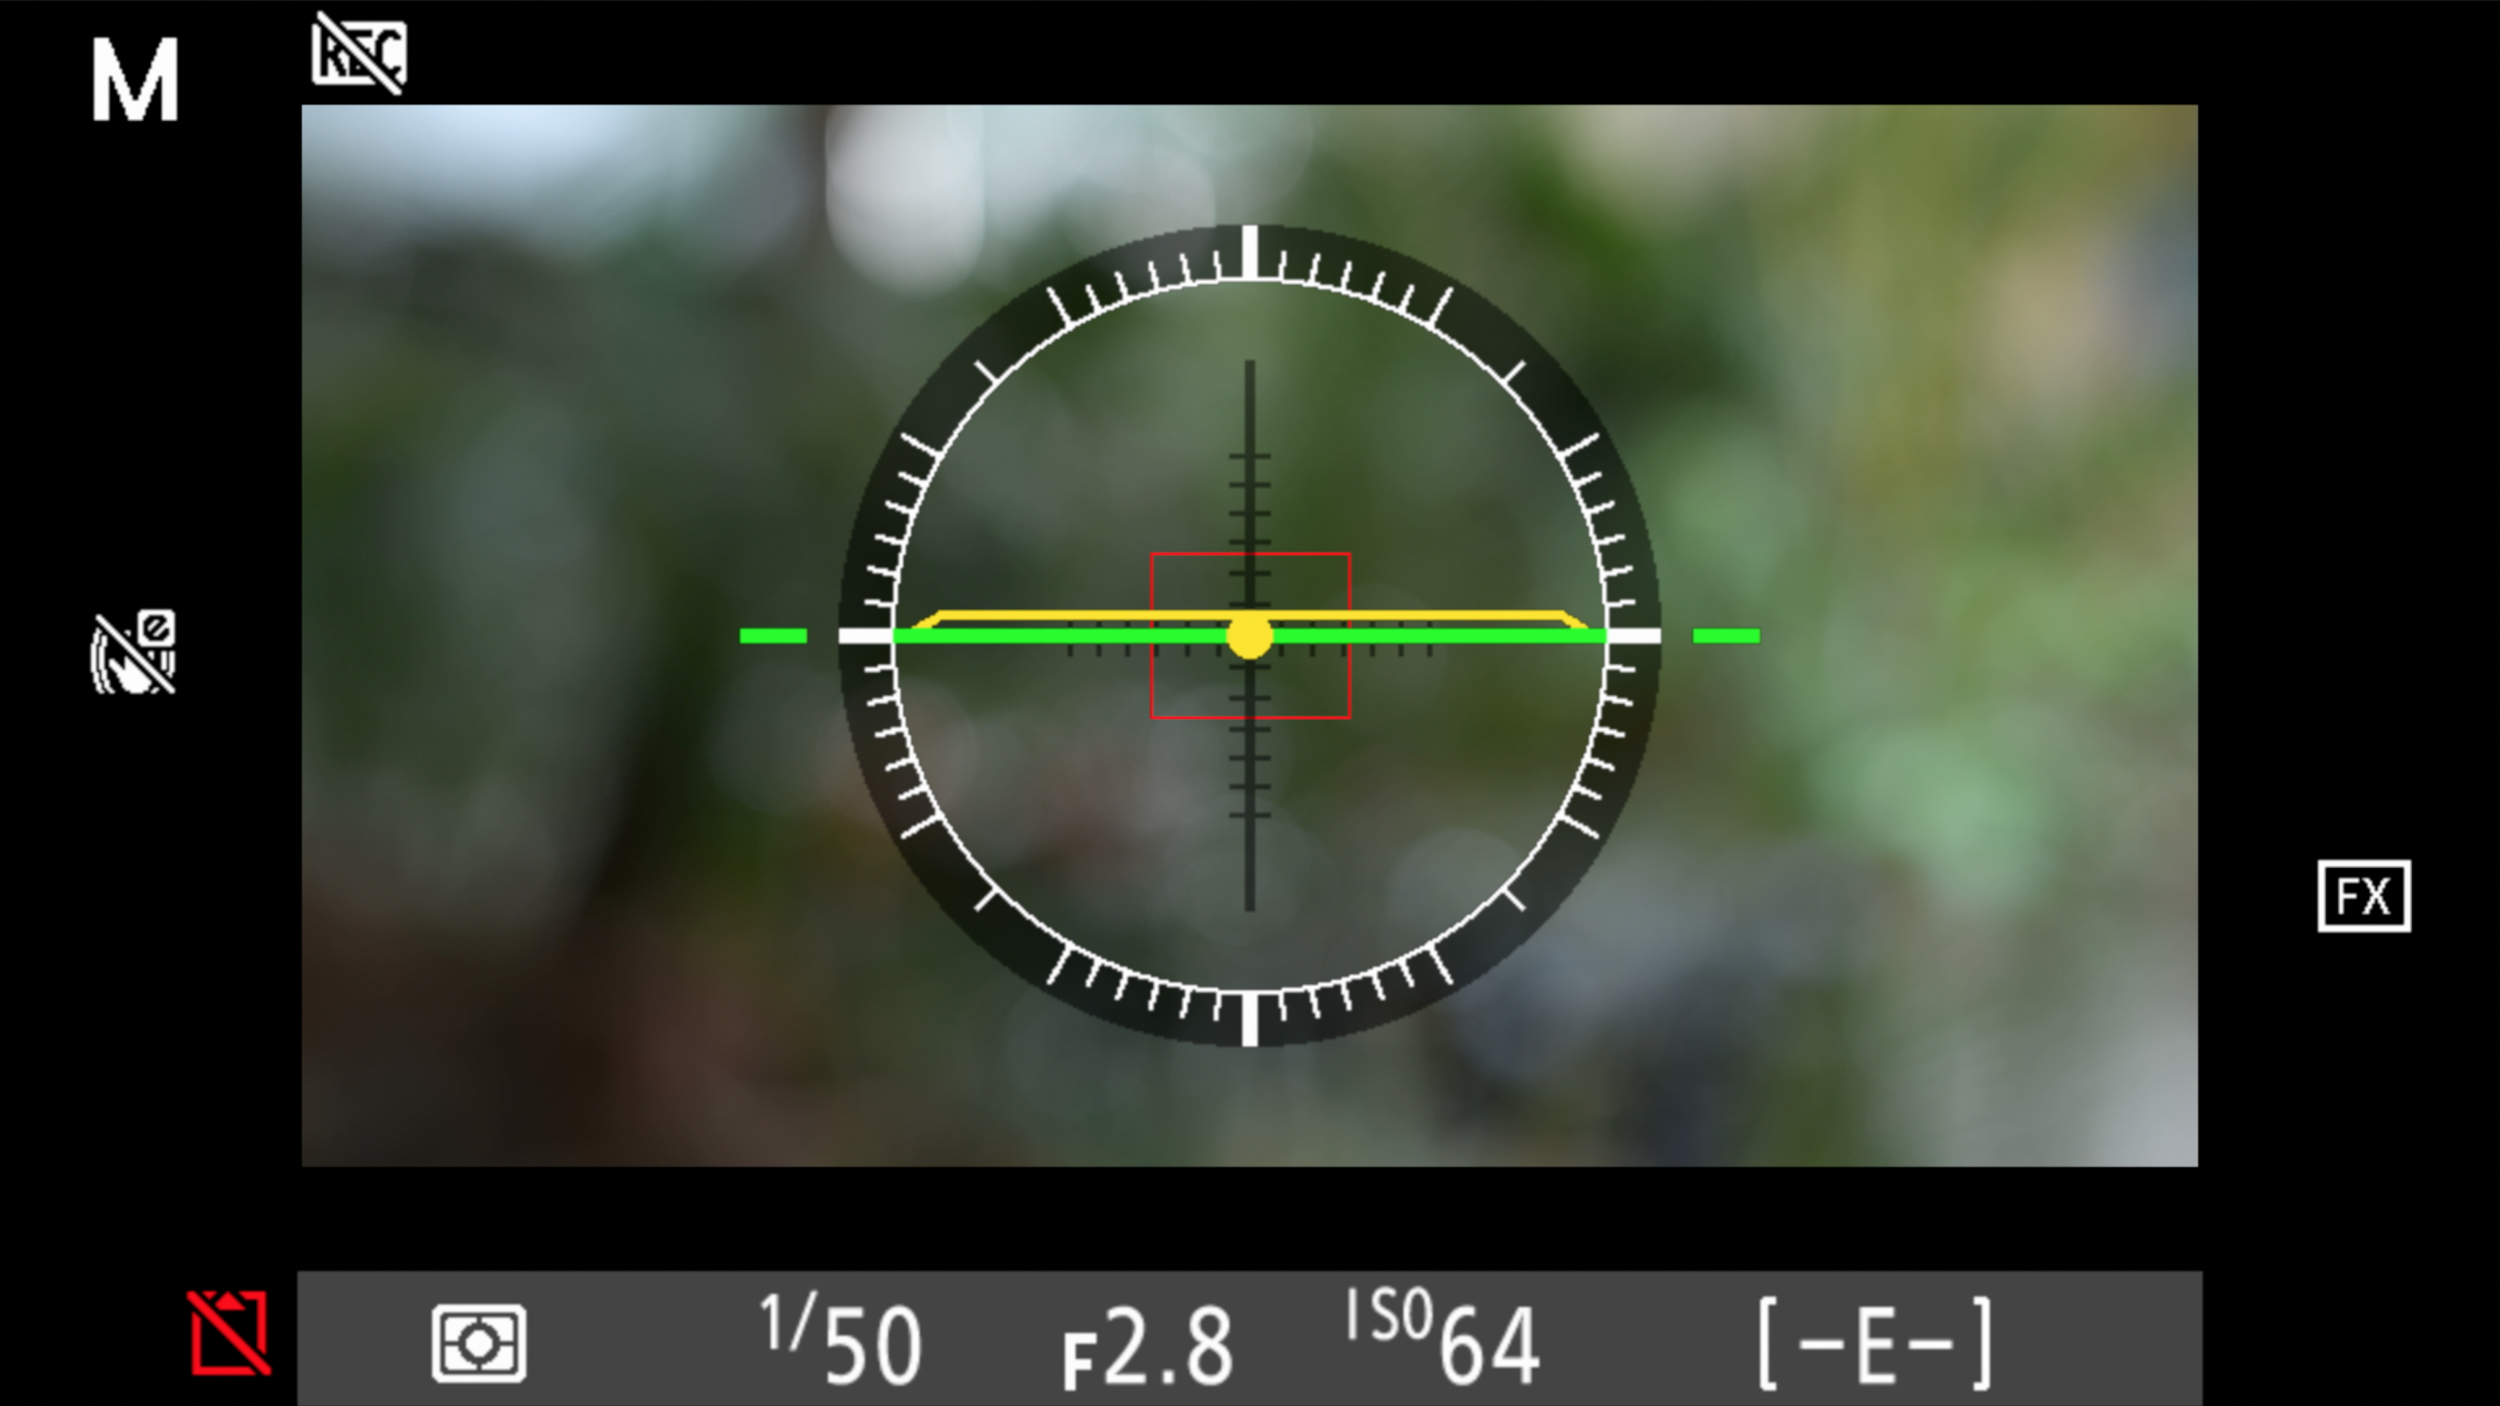
A leveled horizon brings you a step closer to getting the perfect panorama
Simply pan the camera across the scene you want to photograph and click a few pictures. Make sure that each image overlaps the other by 30% to maintain focus across the entire picture, and to make your panorama look like one image.
Watch out for wind and moving objects when taking pictures. It can spoil the evenness of your panorama. Half of it will look like it’s moving while the other half might be still.
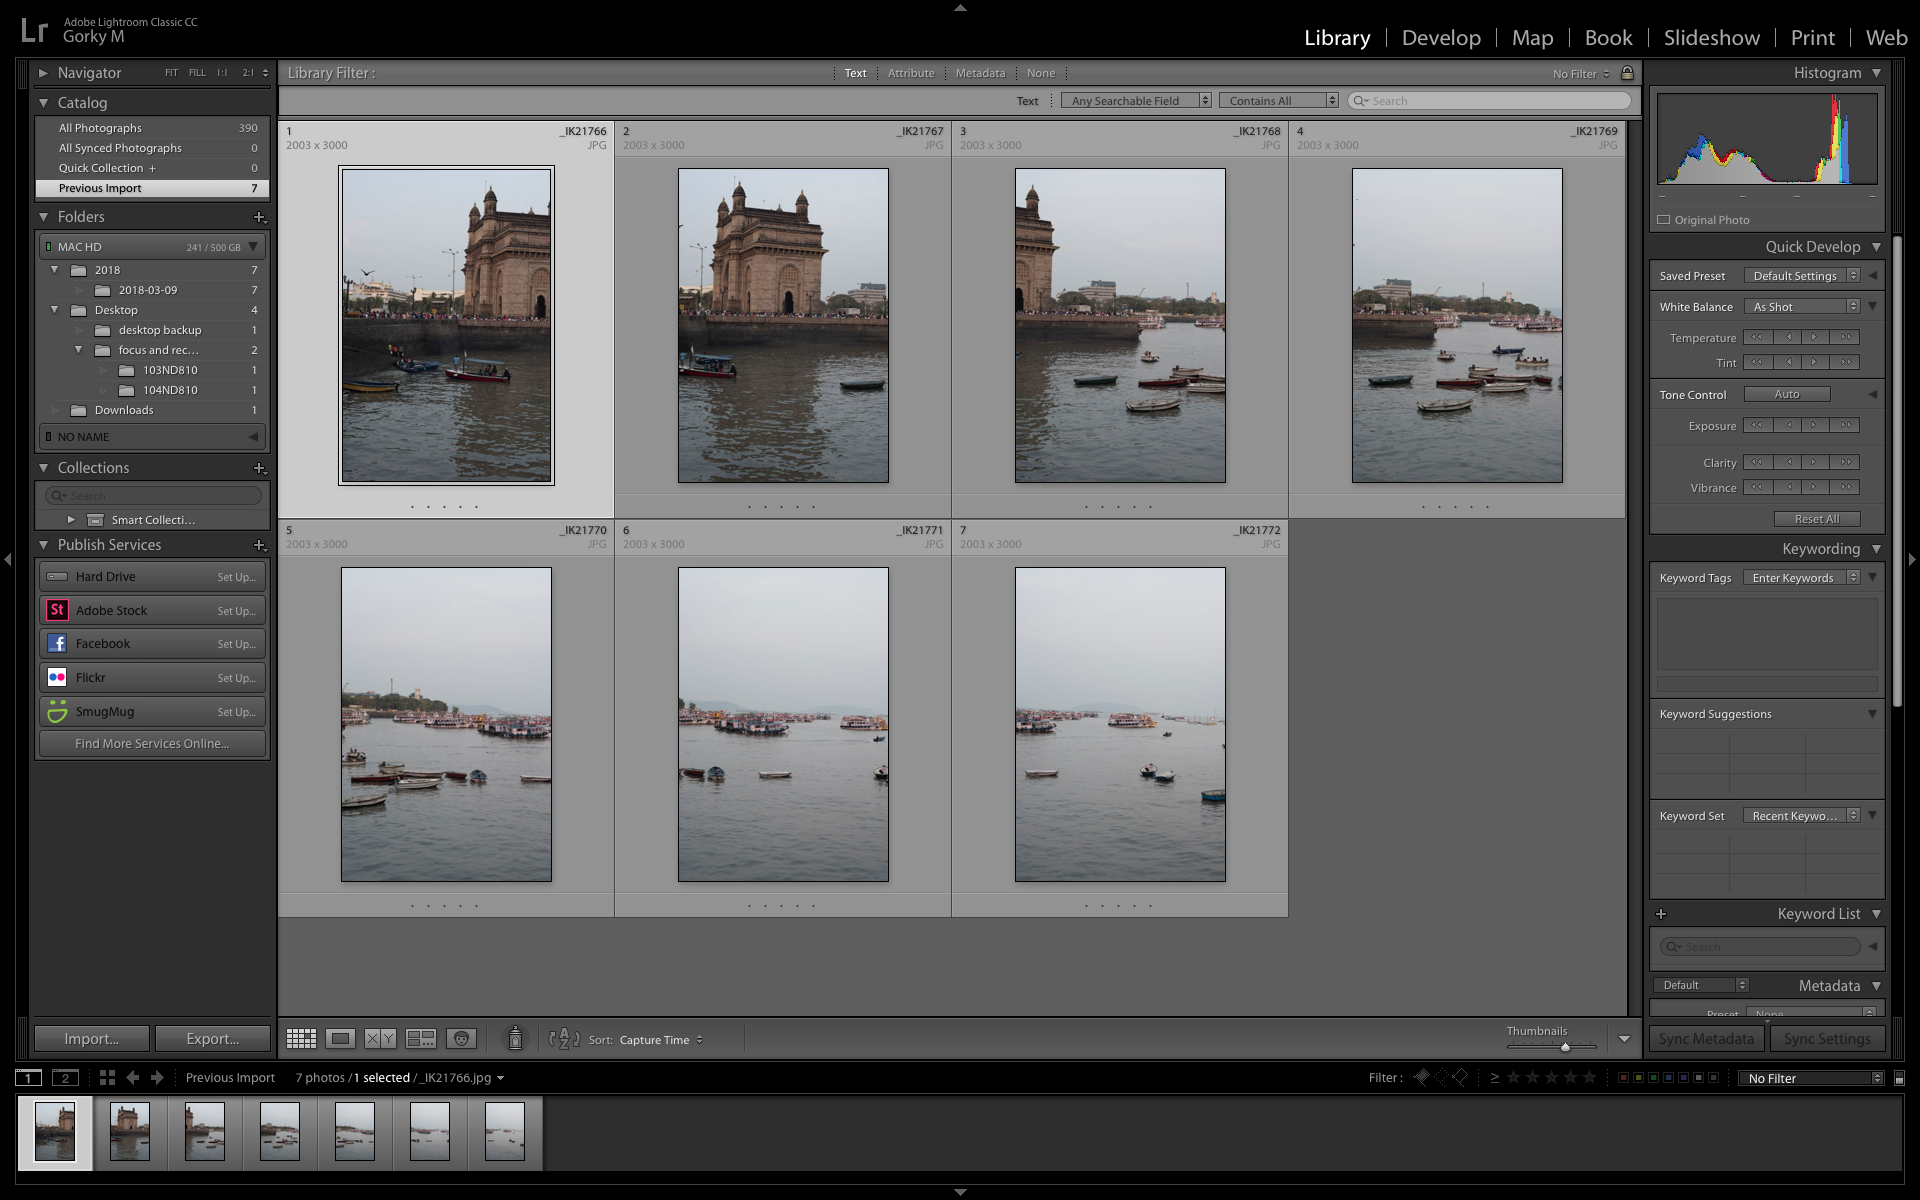
PROCESSING THE IMAGE
The second part of creating a panorama is the processing. There are tons of free software on the web for panoramic photography such as Hugin and Image composite editor, but we personally use Adobe Lightroom to stitch the images together.
One image has to overlap the other by at least 30% for maintaining focus and seamlessness
Open the images in Adobe Lightroom, then click on the ‘photo’ option and merge the images together.
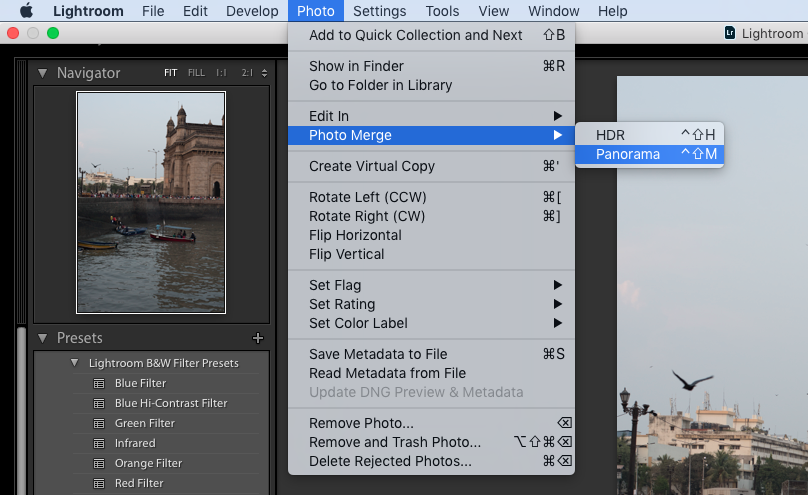
You can straighten it a bit more, or crop it to your liking and that’s about it.
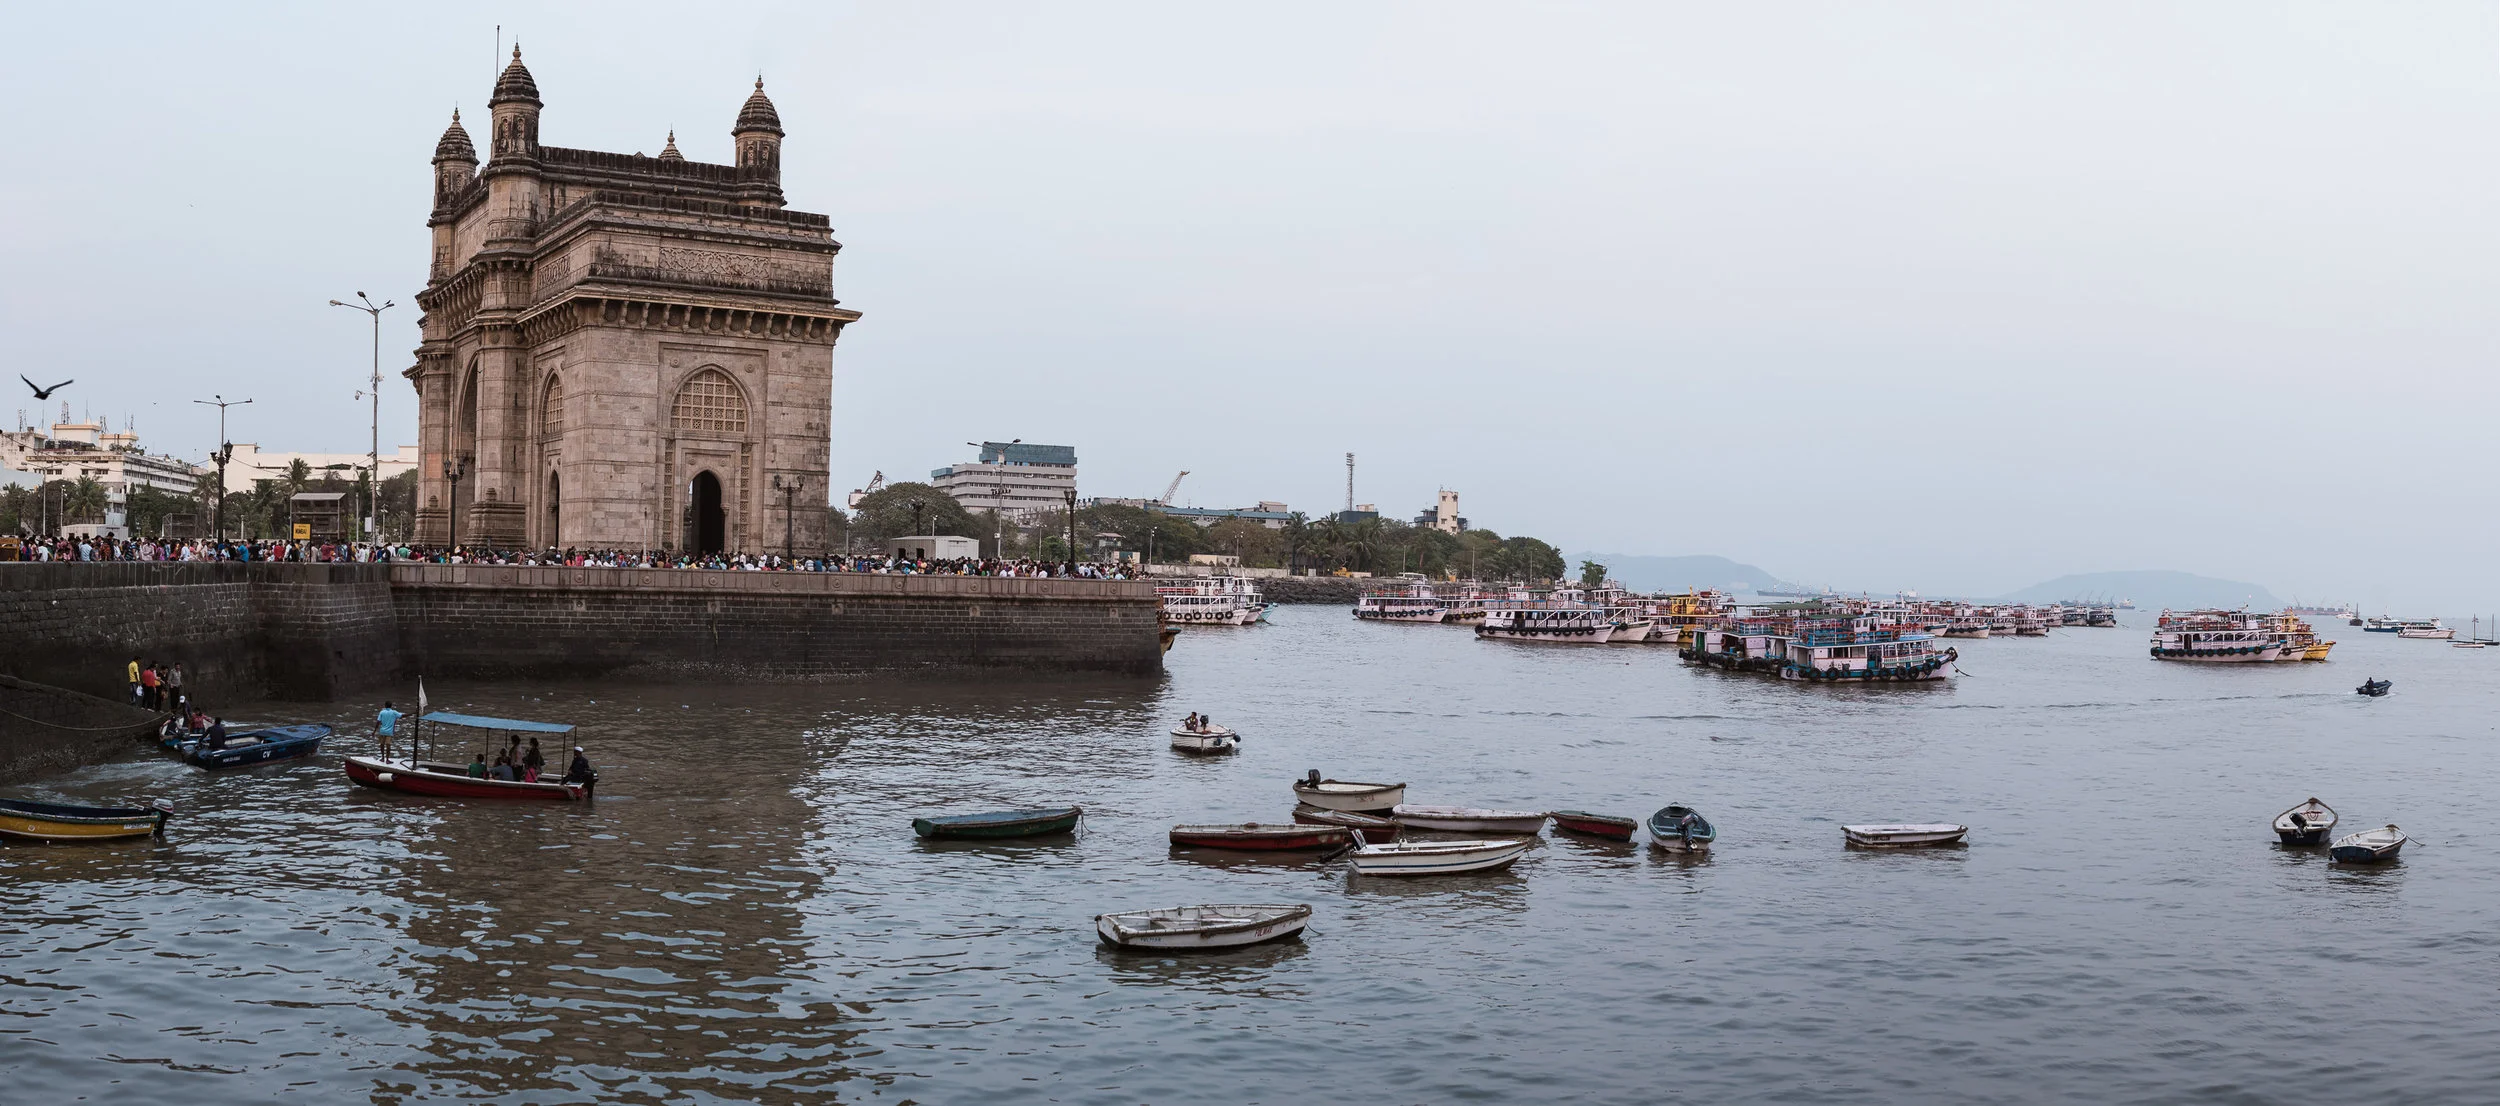
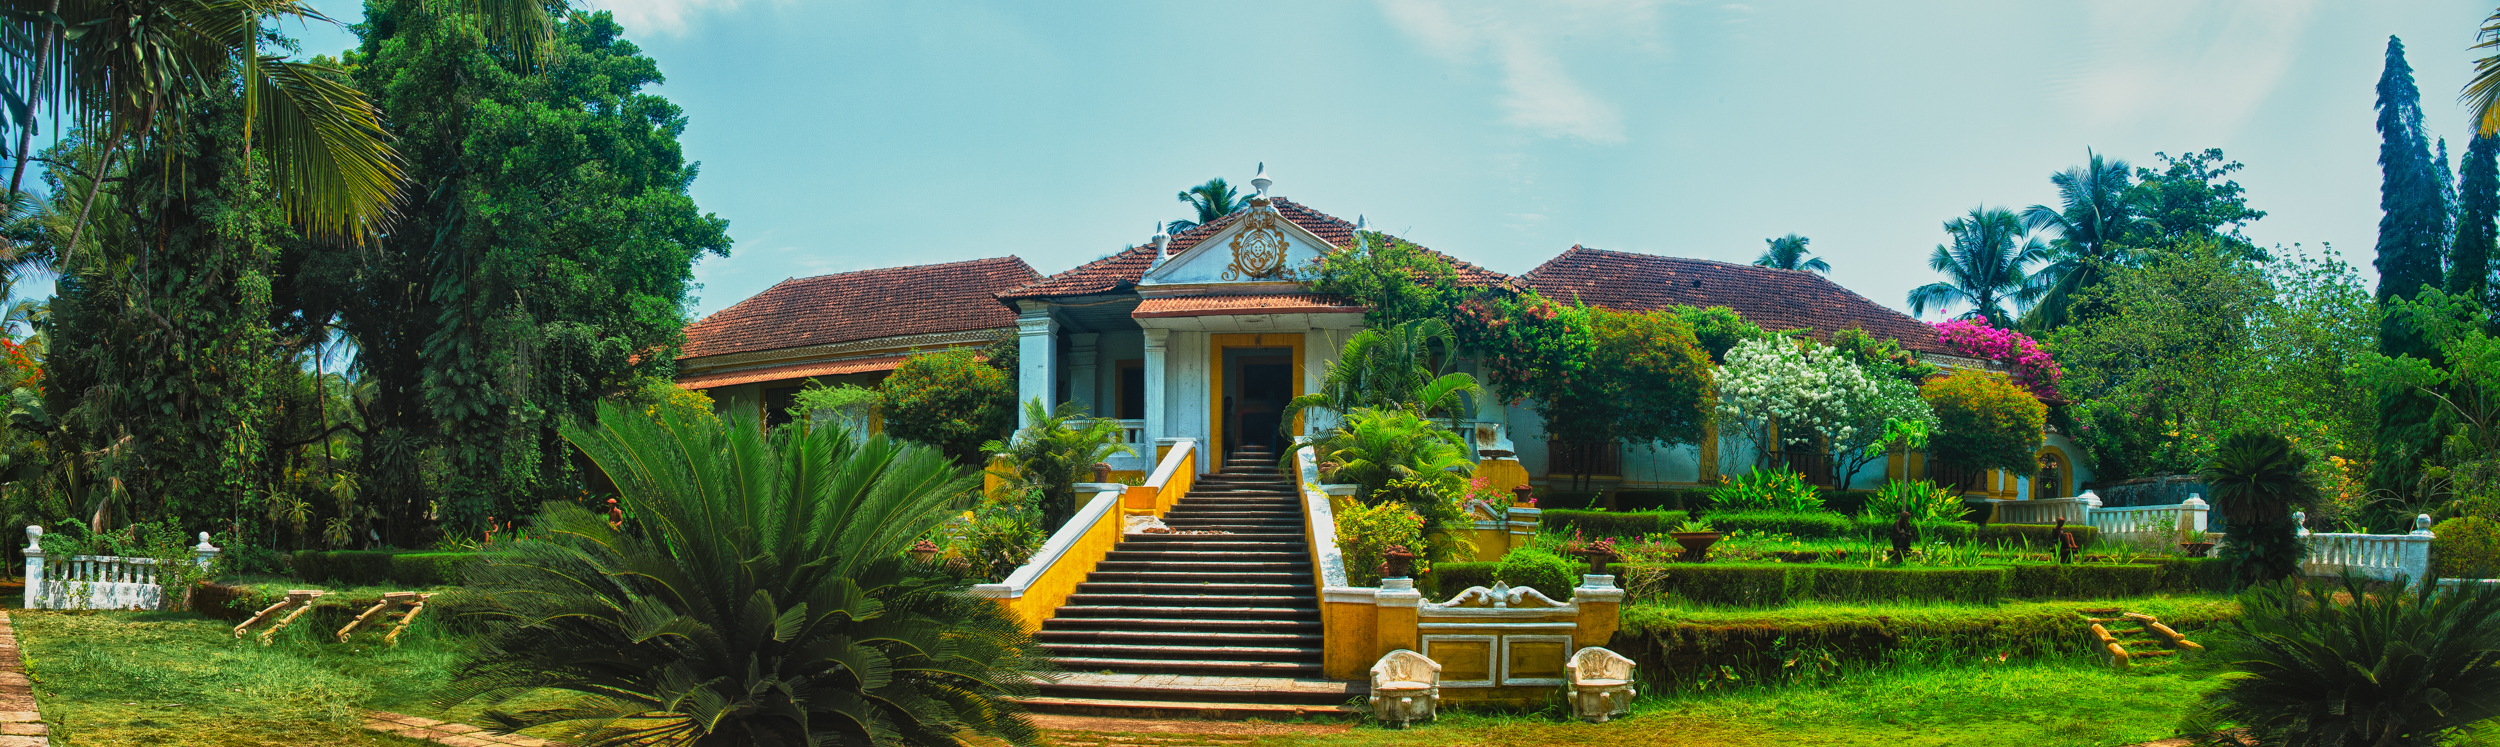
A panorama of the Gateway Of India
If you’d like an in-depth tutorial on how to create the perfect panorama, click on the video below.


Aperture
Aperture - Learn photography
Imagine in your mind, how the camera works. For you to make a good photograph, a certain amount of light needs to hit the sensor. Let us assume this amount of light to be hundred units. If the light hitting the sensor lesser than the amount of light required, the photographs will be dark or “underexposed”. Similarly, if the amount of light hitting the sensor is more than the amount of light required, the picture will be over-bright or “overexposed”.
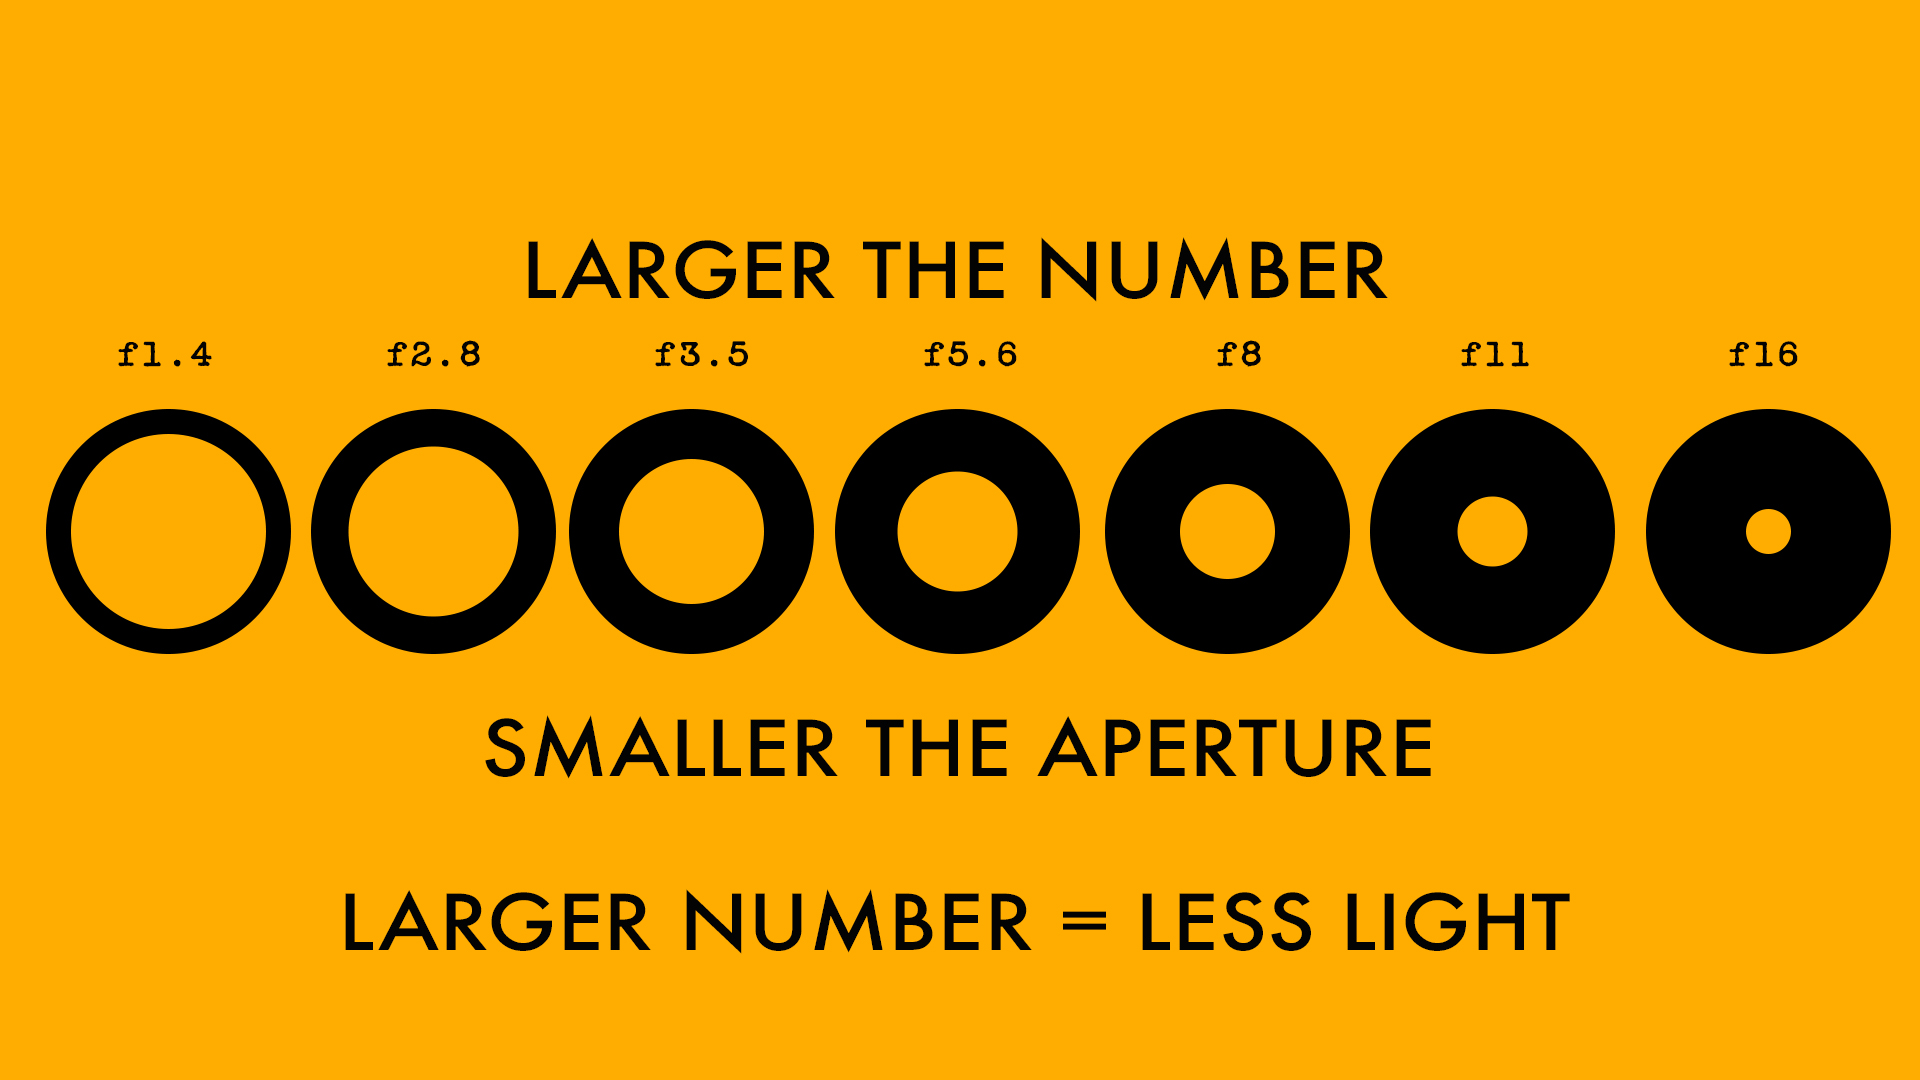
There are two ways of controlling the amount of light hitting the sensor-via the aperture or with the shutter speed.
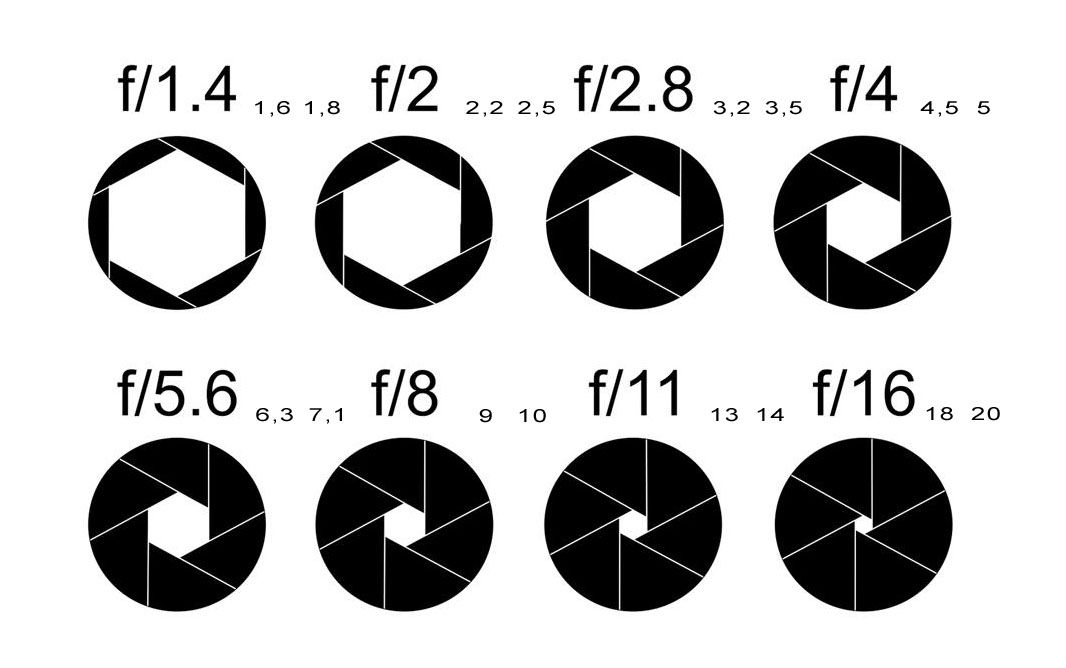
The aperture is nothing but the hole in the lens through which the light enters the camera. For the time being, all you need to know about the aperture is that smaller the number [1.4 or 1.8], the bigger the aperture and similarly, the larger the number will [16 or 22], the smaller the aperture or the size of the hole on the lens. All these numbers are often referred to by using the alphabet F in front of them. So 1.4 is referred to as F1 .4 and 16 is referenced to as F-16. This is just another way of trying to sound cool. There is actually no difference if you say 16 or F-16. Just remember, the smaller the number-the bigger the whole AND the bigger the number, the smaller the pool. This is all that you need to remember about the aperture. This will become second nature as time goes by but it is crucial that for the time being, you remembered this!!!