
Learn How To Paint With Light In 6 Easy Steps | Light Painting Tutorial
Prepare to blow everybody away once you’re through with this one!
Light painting, or painting with light might seem like rocket science but it really isn’t. Just about anybody can paint with light following the easy steps given below.
Falling somewhere between fine art photography and long exposure photography the art form has boomed in the last couple of years with over a million hits on the #lightpainting hashtag on Instagram as of today.
Also known as light drawing, the art form goes back to the year 1889. Ever since scientist and physiologist Étienne-Jules Marey and inventor Georges Demeny laid down human emotion in the first ever light painting, some real maestros have come forward and used the technique to express themselves. Some photographers have dedicated their entire lives to this art-form.
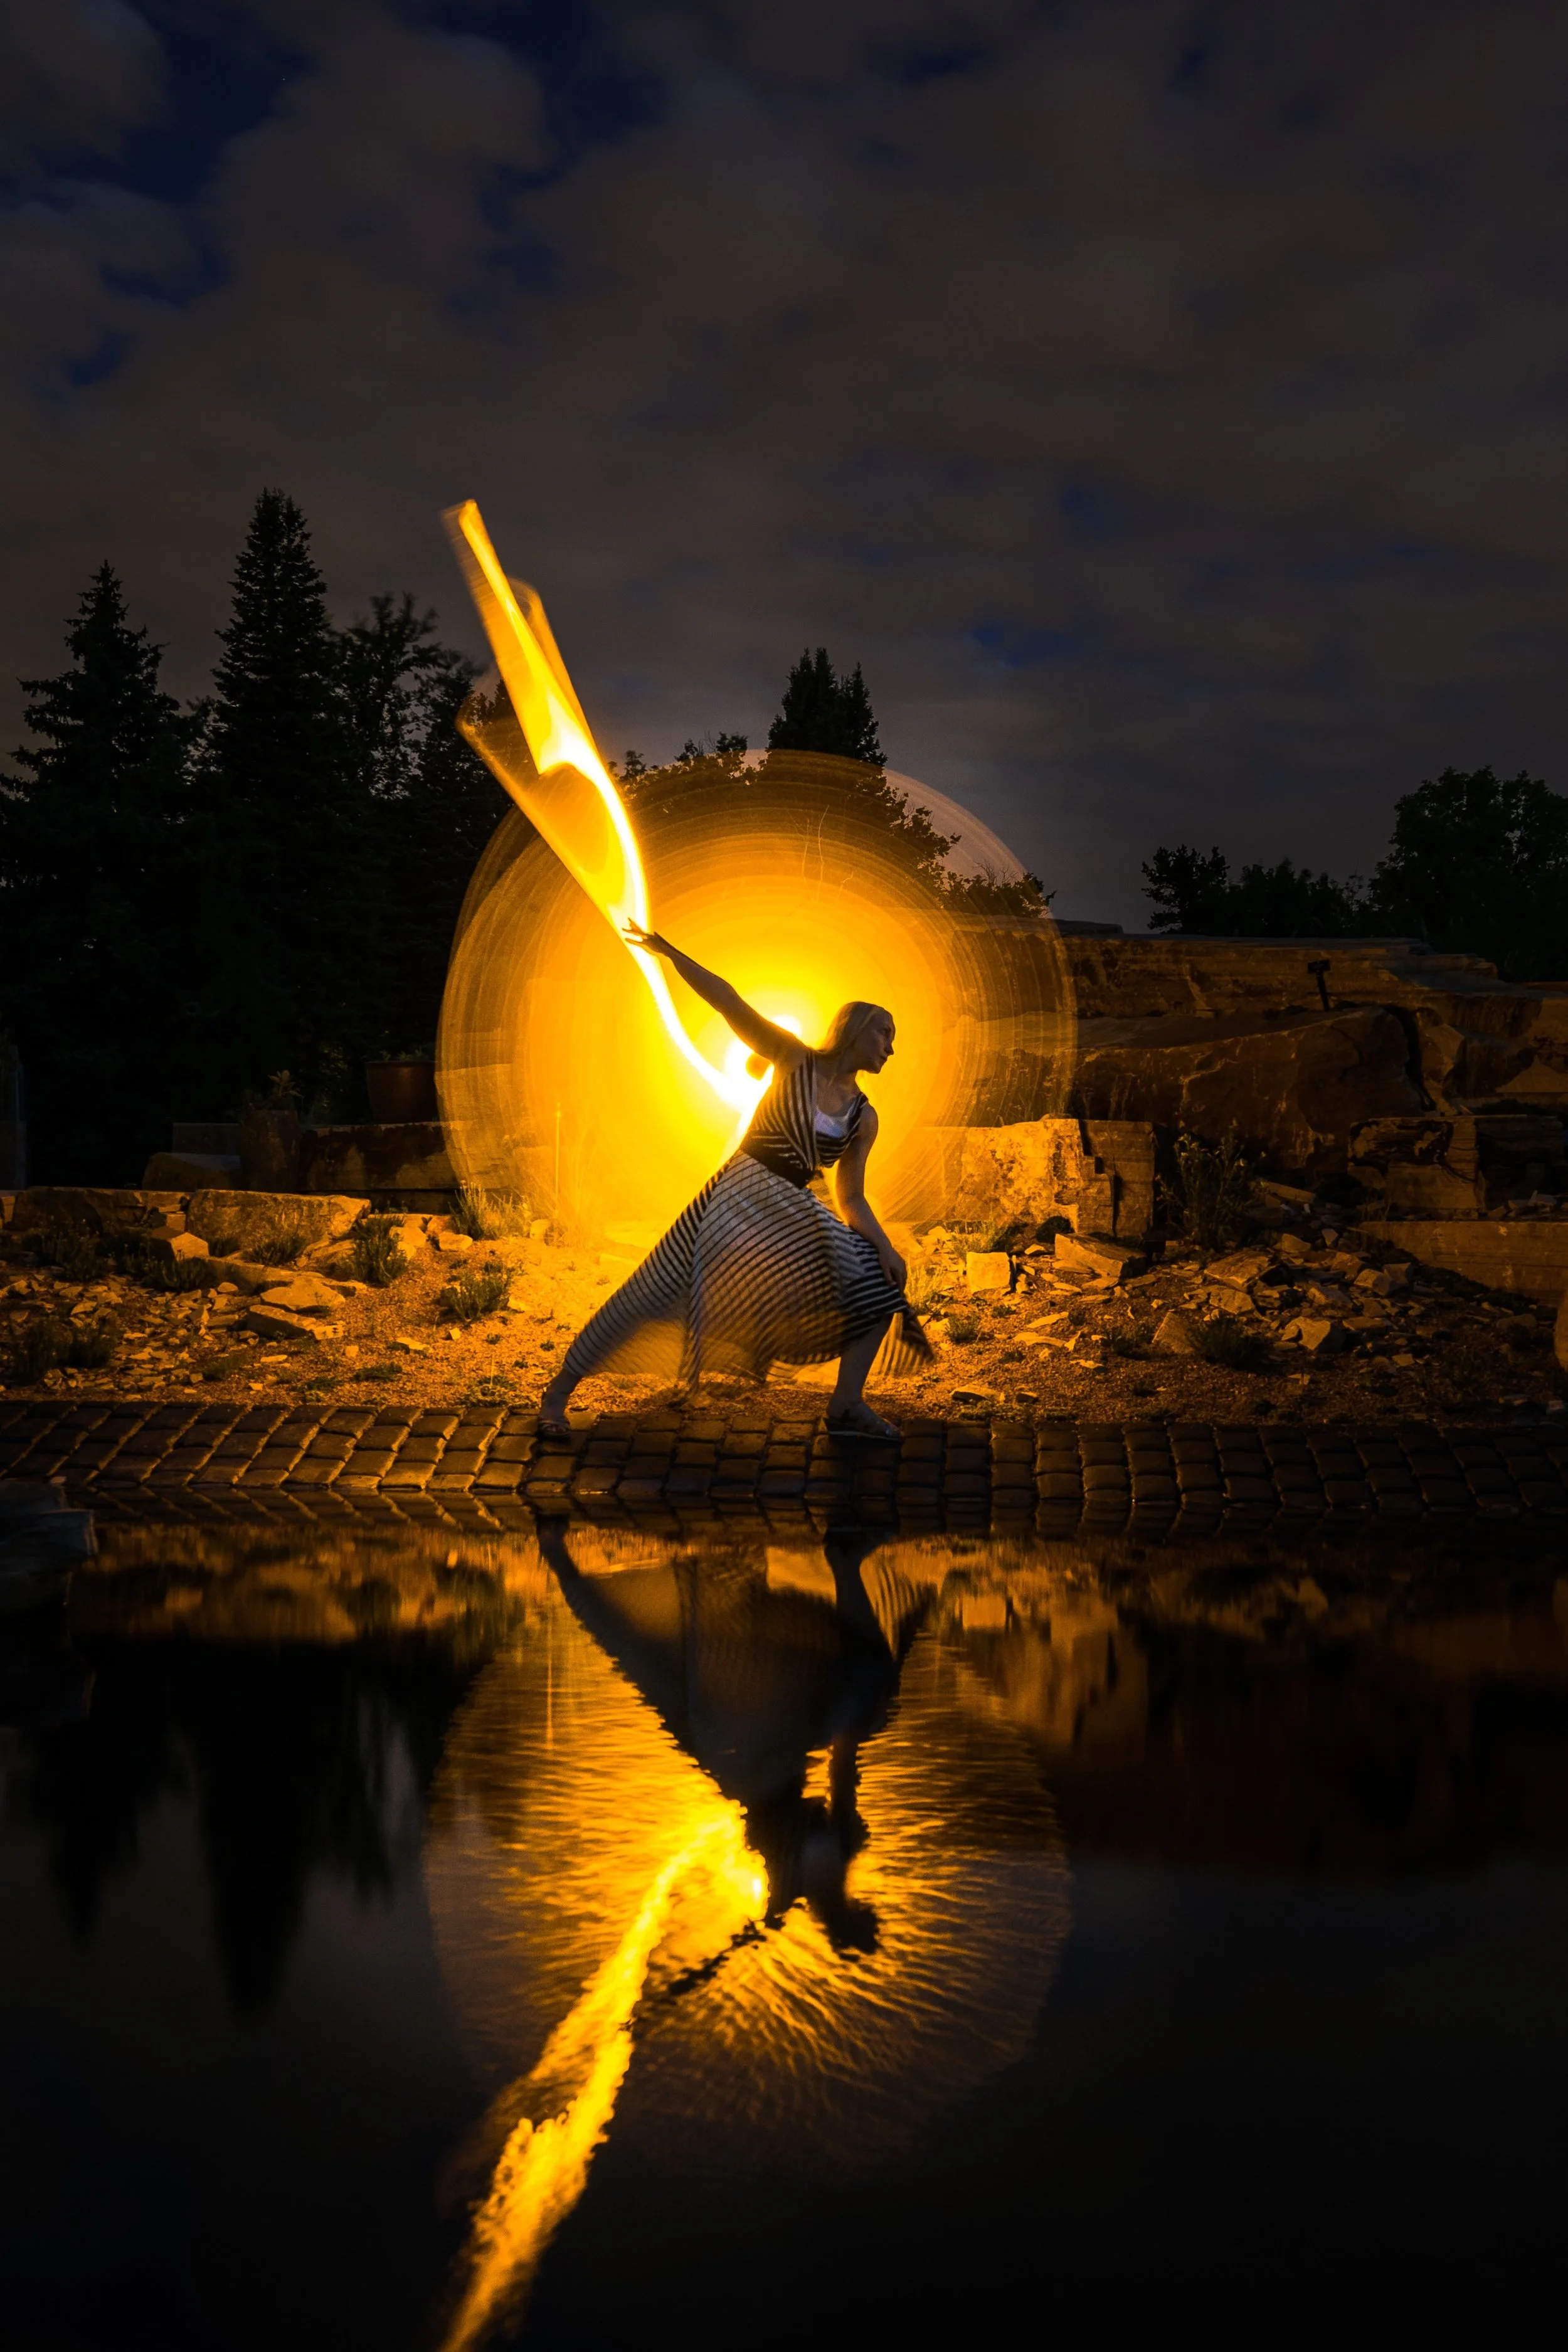
Photo by Xuan Nguyen on Unsplash
The simple idea that light could be manipulated and painted with much like a paintbrush and the sensor being the canvas has captured the imagination of many down the years.
Contemporaries like Eric Pare are leading the way with their fine art portraits today.
We sought to use the same technique for our portraits and the result leaves you truly wanting for more.
While it is an interesting way of doing portraits, it can be time consuming. Those who care enough to put in the effort will not leave disheartened.

Things You Will Need
Camera
Tripod
Off Camera Flash (optional)
Tracing Paper
Gaffer’s Tape
Acrylic Tube (they’re plastic tubes really, you can find them at a departmental store)
Small Torch
Bar Light
STEP NO 1
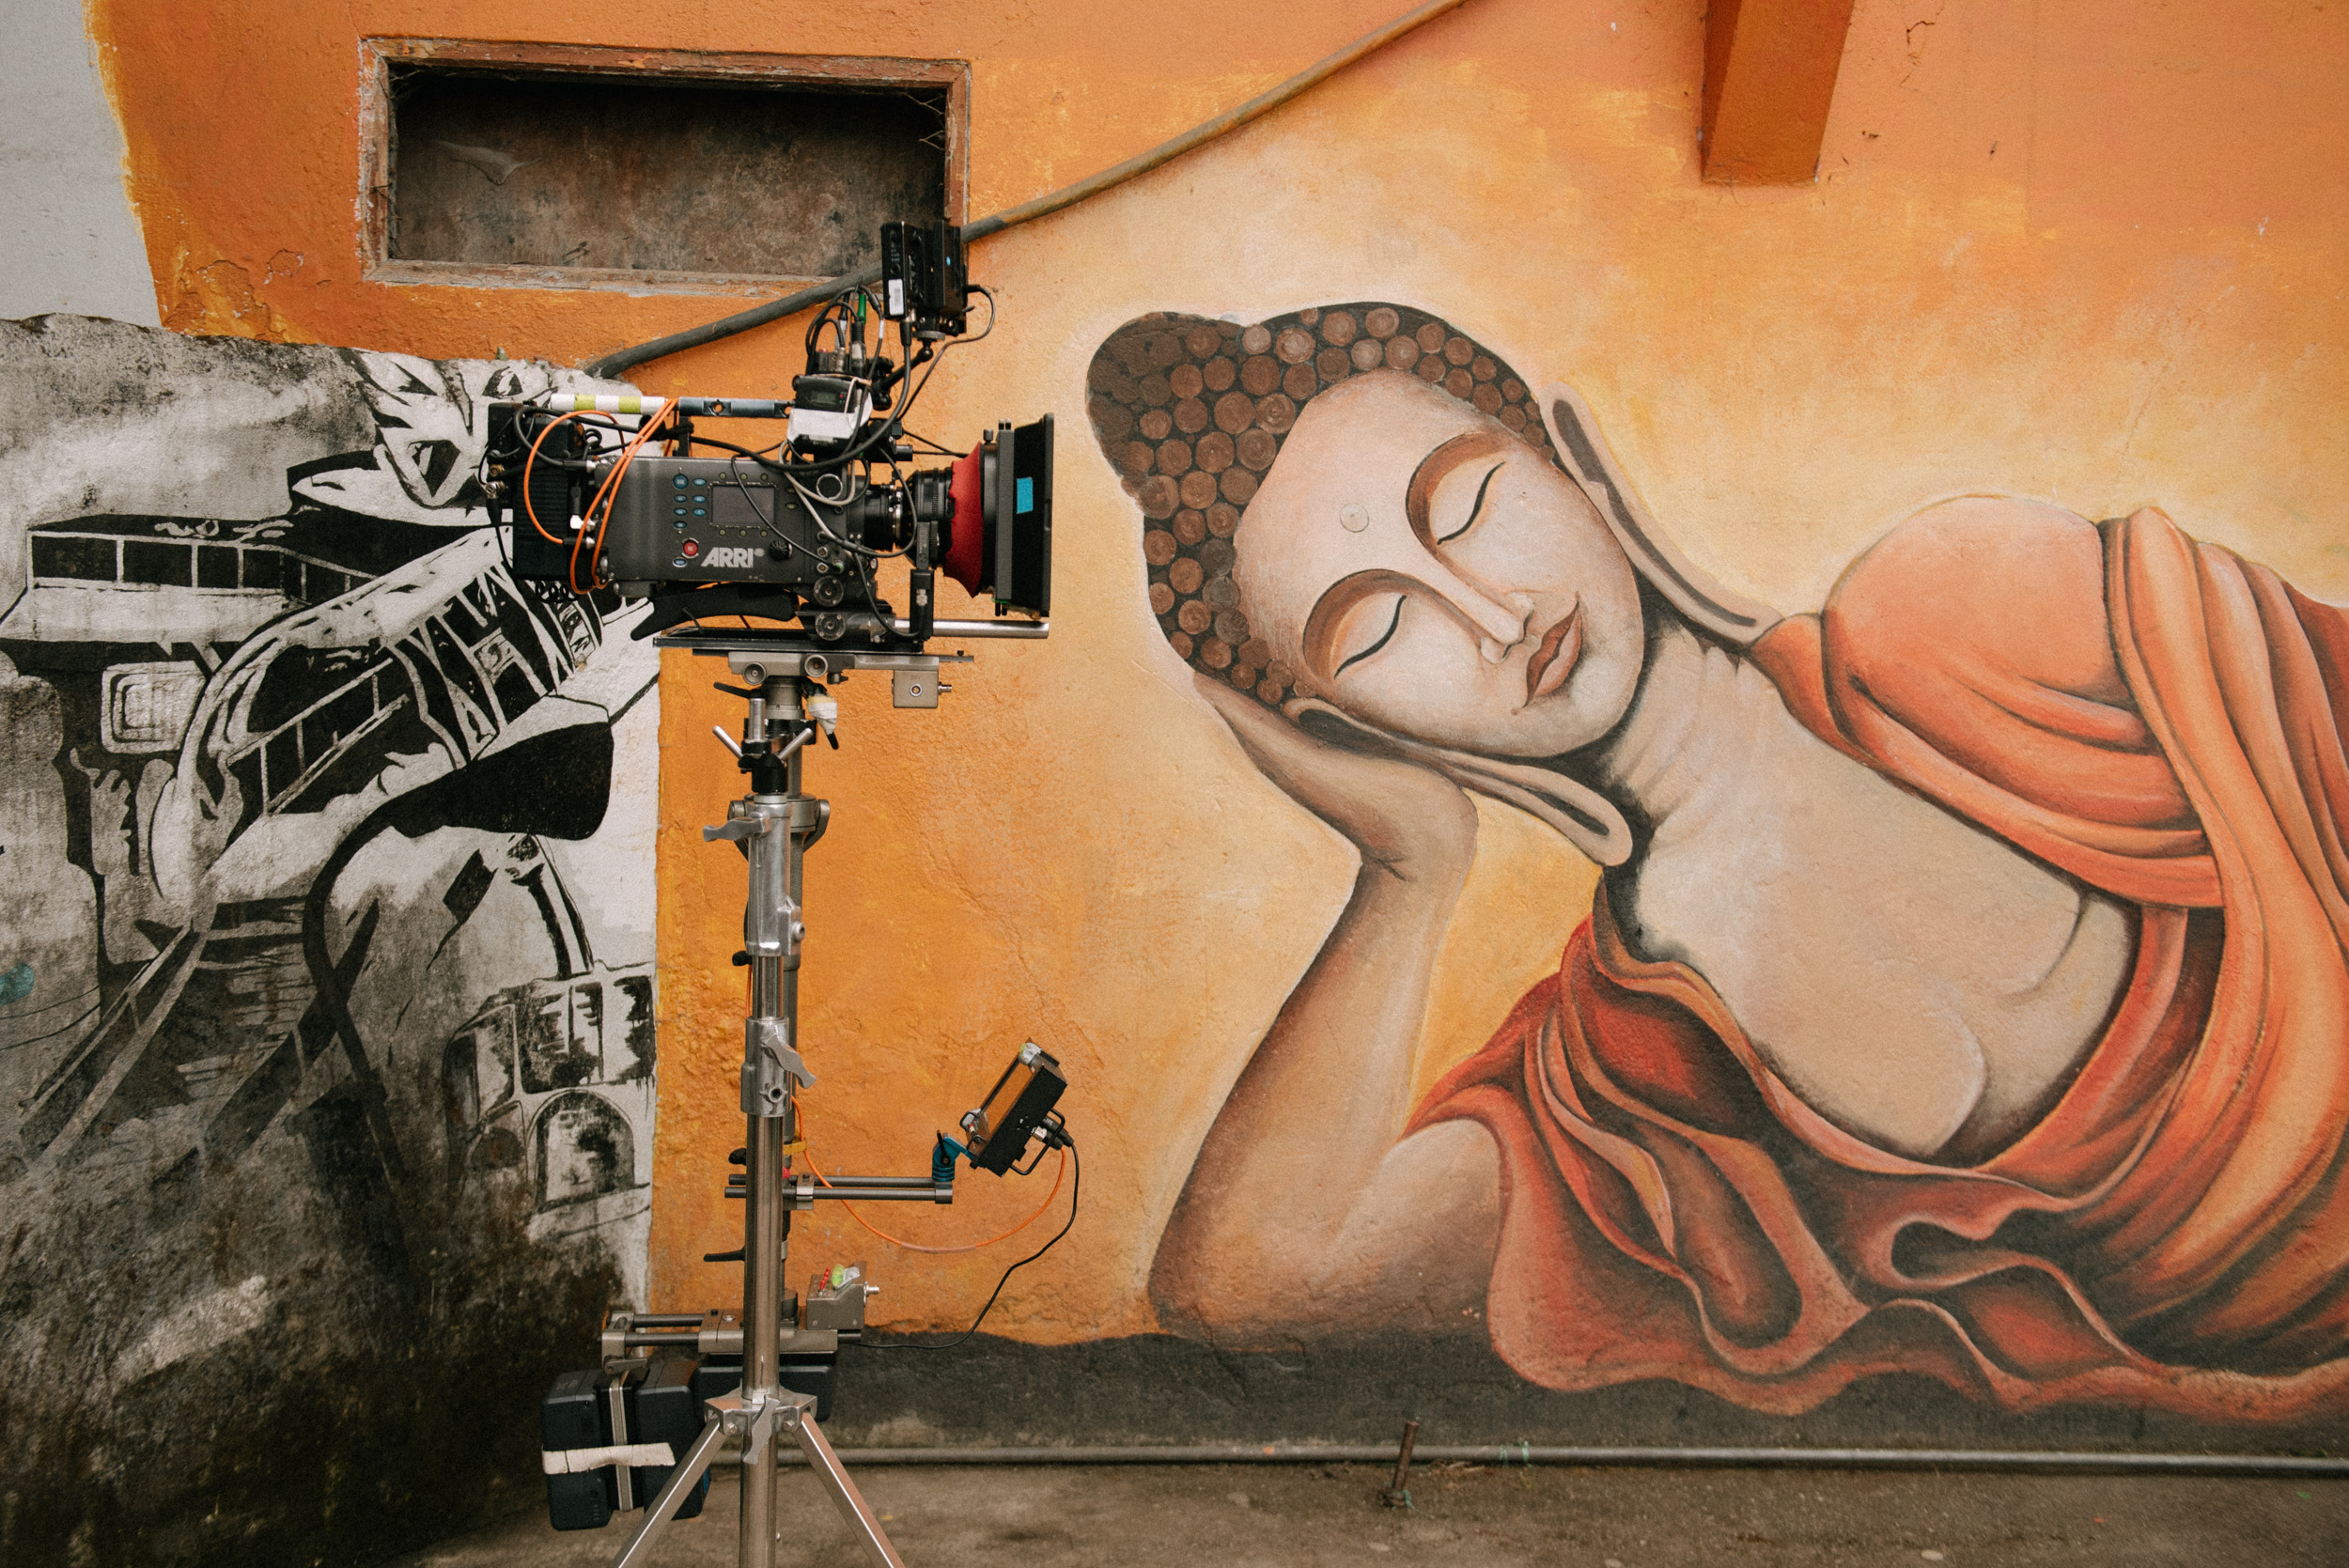
Find a good location
Painting with light is a kind of long exposure photography except you don’t need all of the lights. You have to be in a location that’s free of light pollution, where you can control the light. You can either do this in a studio where the light is under your complete control or you can go to a nice exterior location that’s free of extraneous light sources. This means no street lamps, no lights from oncoming vehicles, homes etc. A countryside location that’s away from the humbug of the city, where you can see the night sky perhaps?
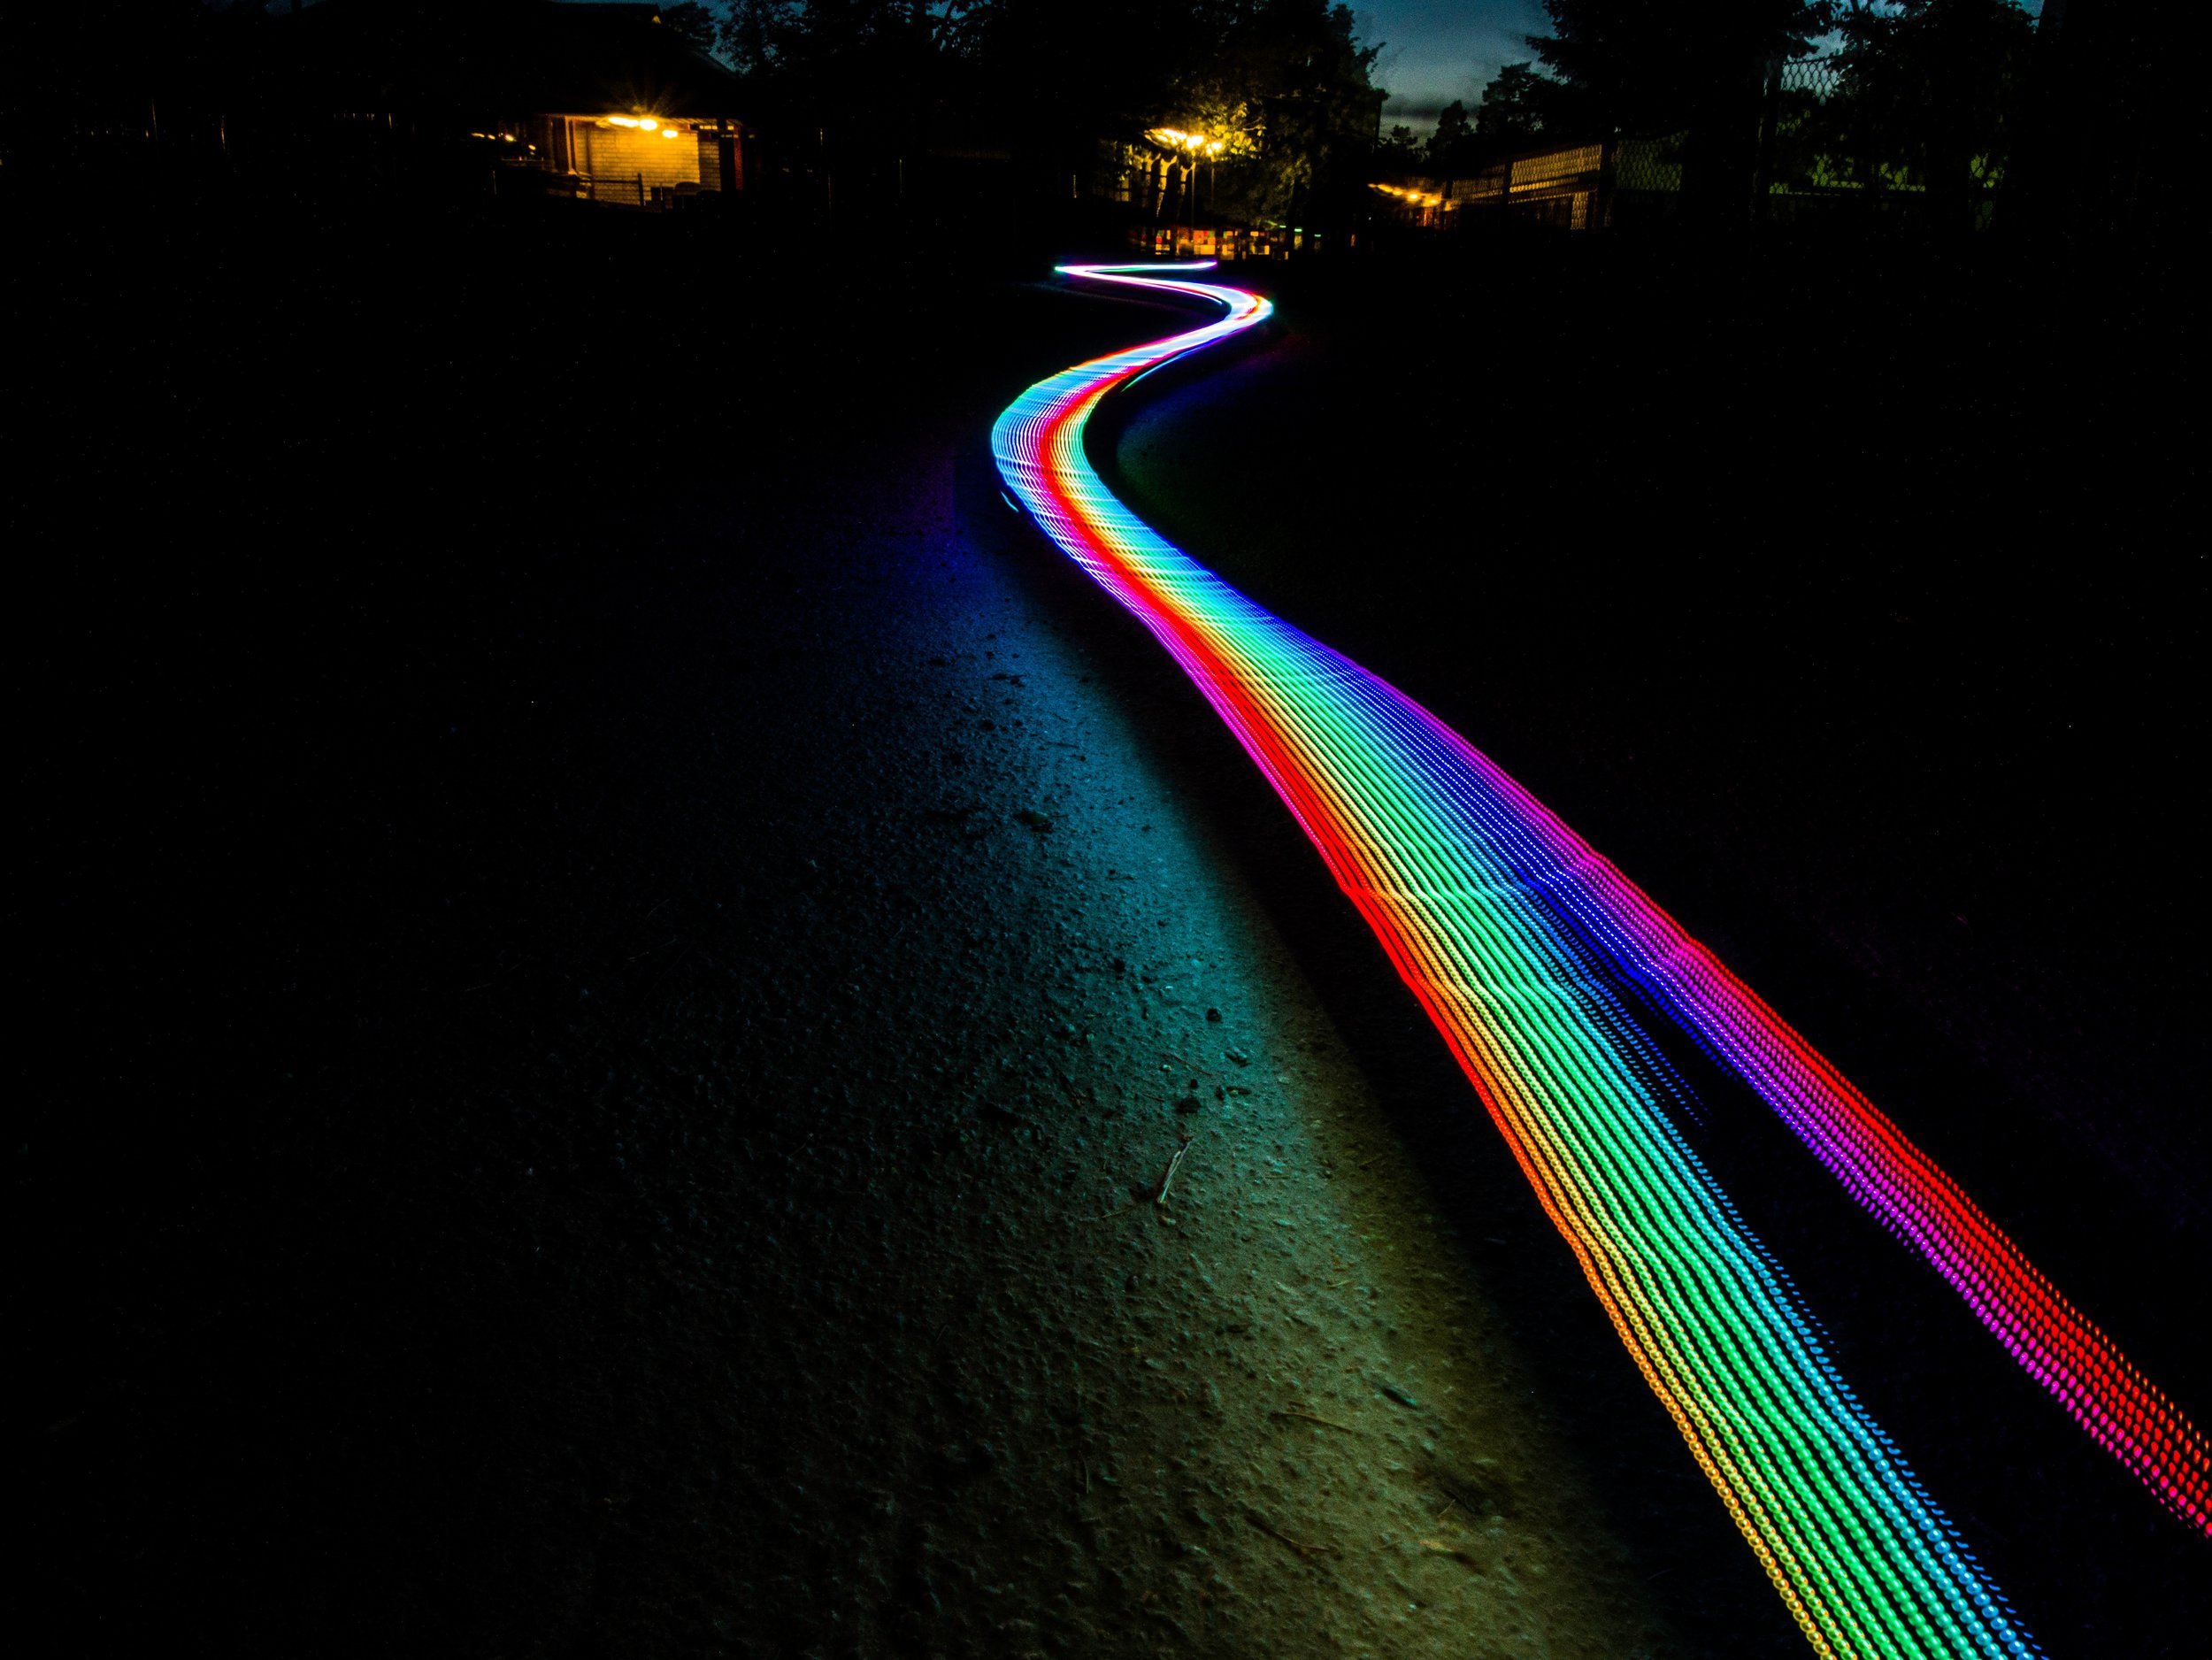
Photo by Tobias Carlsson on Unsplash
STEP NO 2
Find a good subject
This often gets overlooked. Are you looking to paint on a human subject or are you just looking to draw a shape or write something? Knowing this is very important. Plan beforehand about the kind of shot you’re looking to get and look up some references online.
When shooting with a human subject, you need someone who understands how to strike and hold a pose. Since the shutter on your camera will be open at least 20 seconds, you’ll need someone who can hold a pose while you’re painting around them and look good through it all.
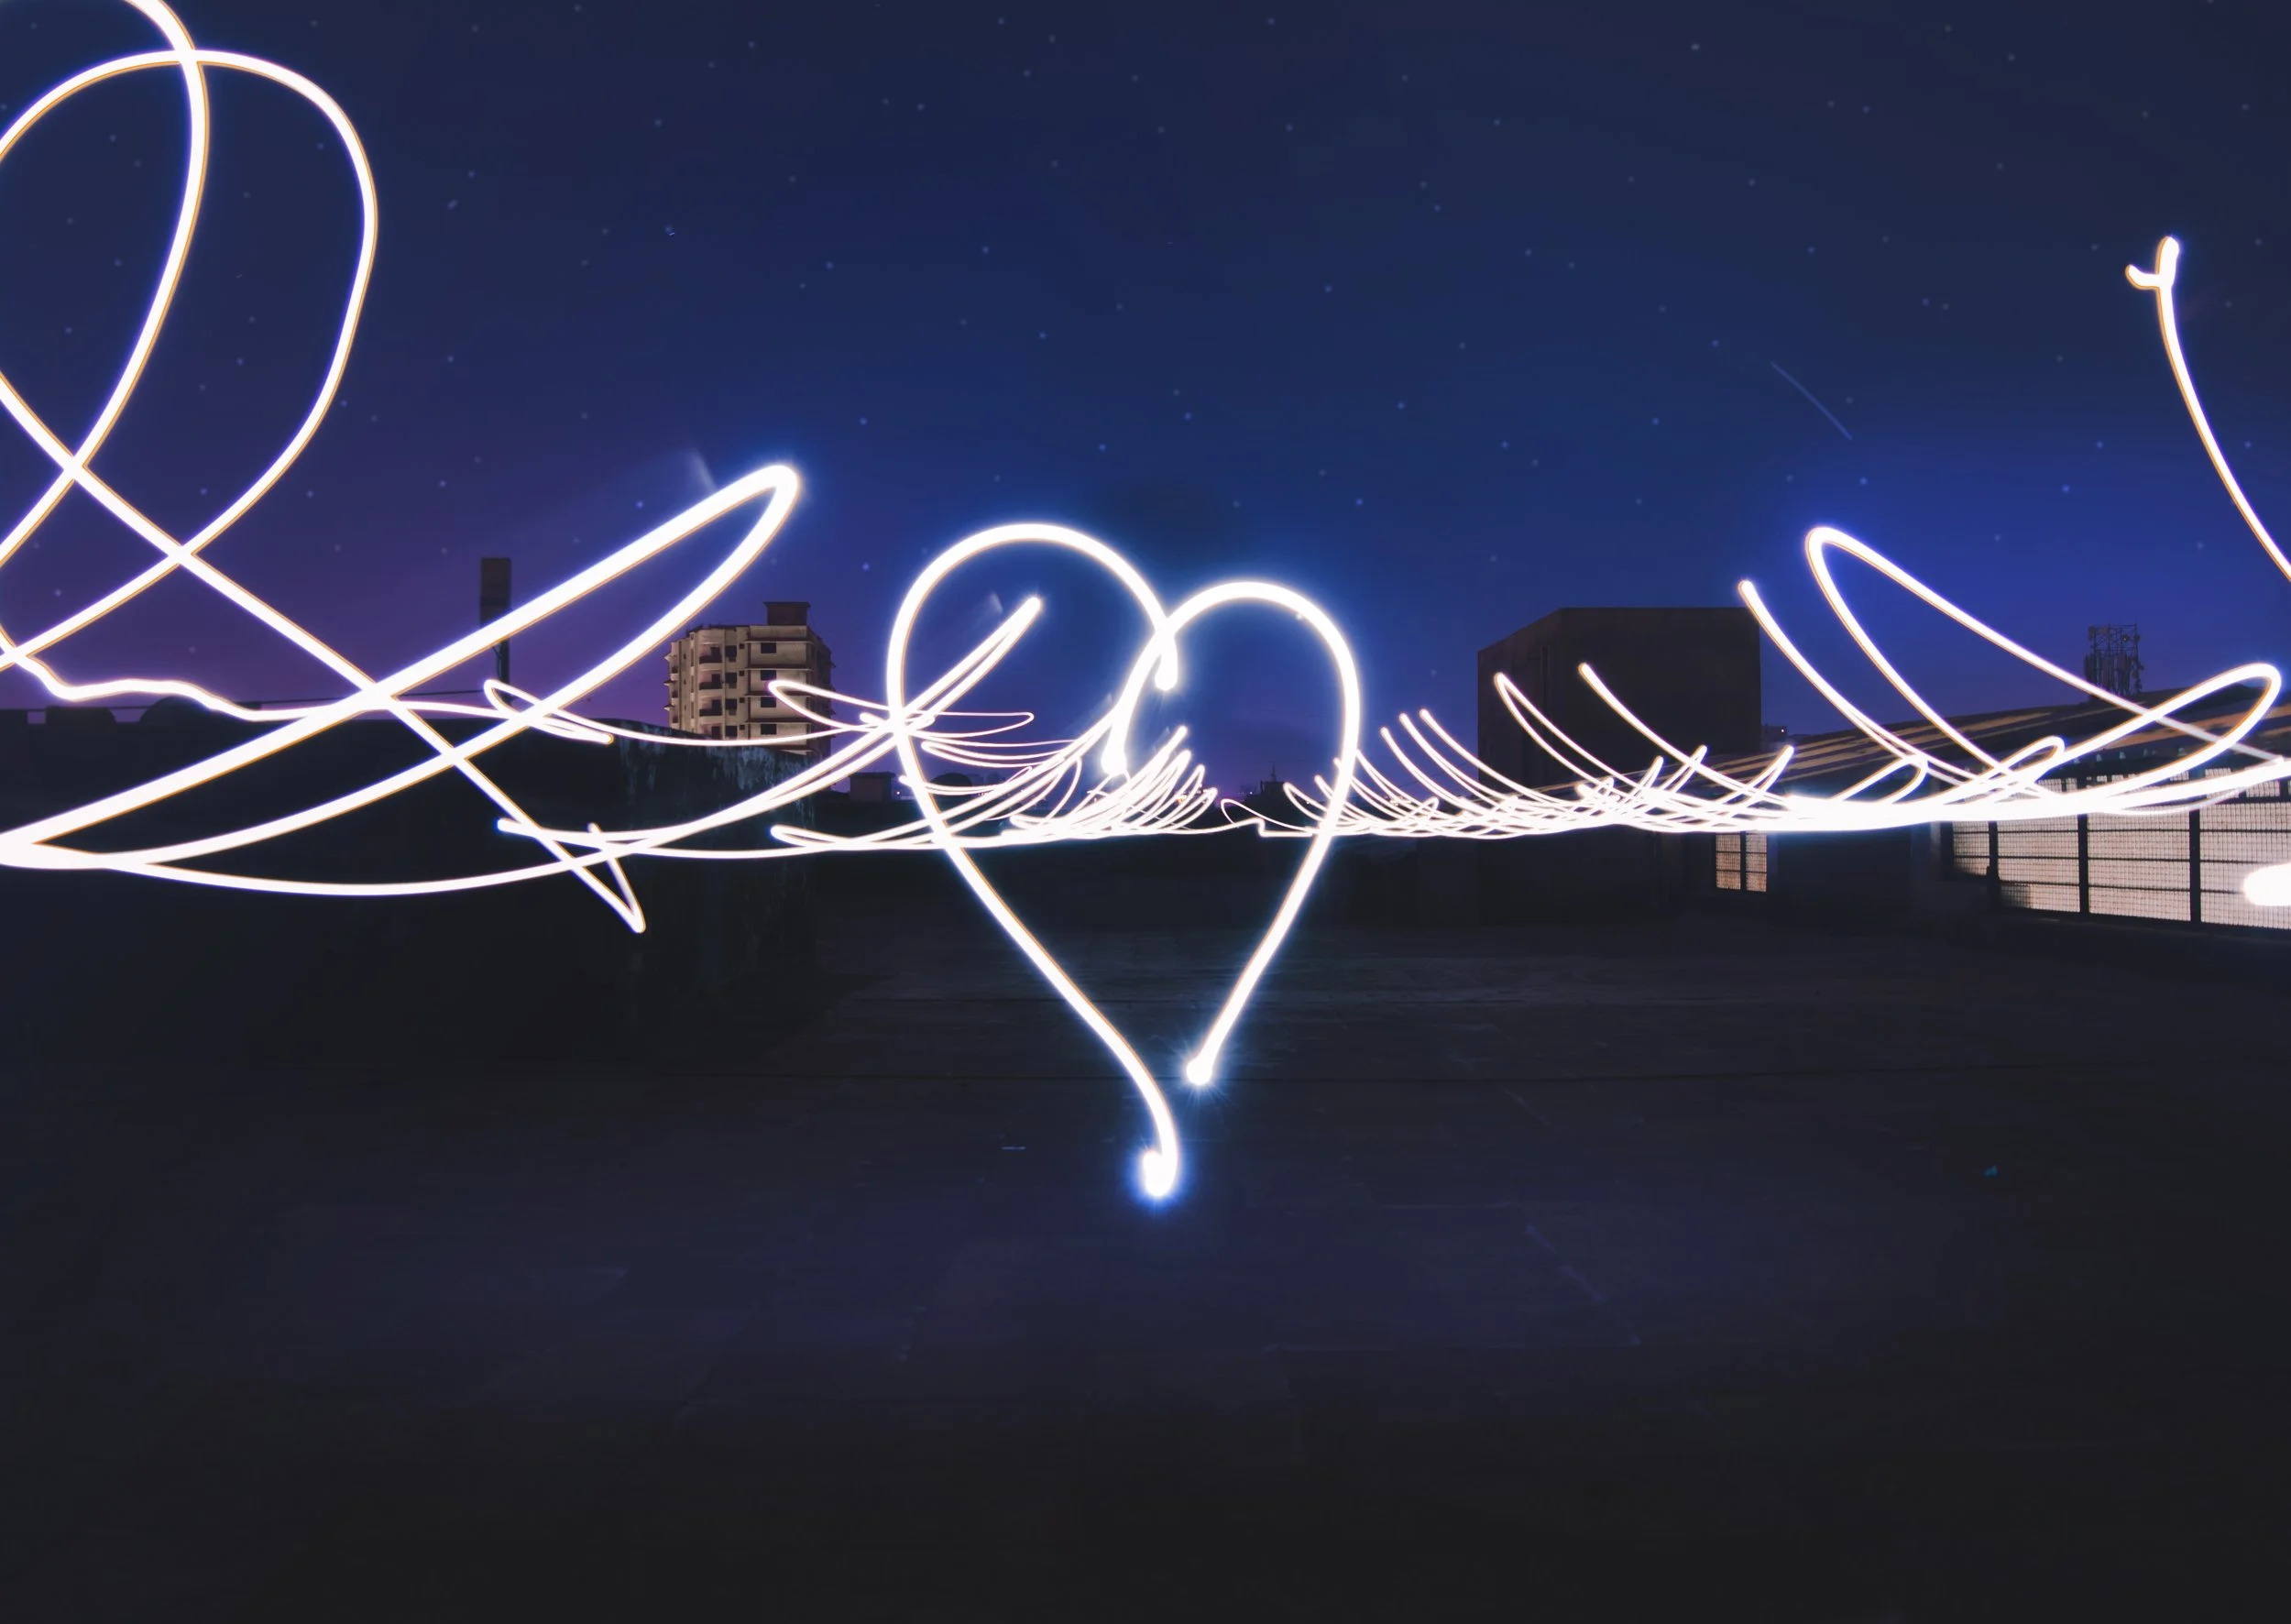
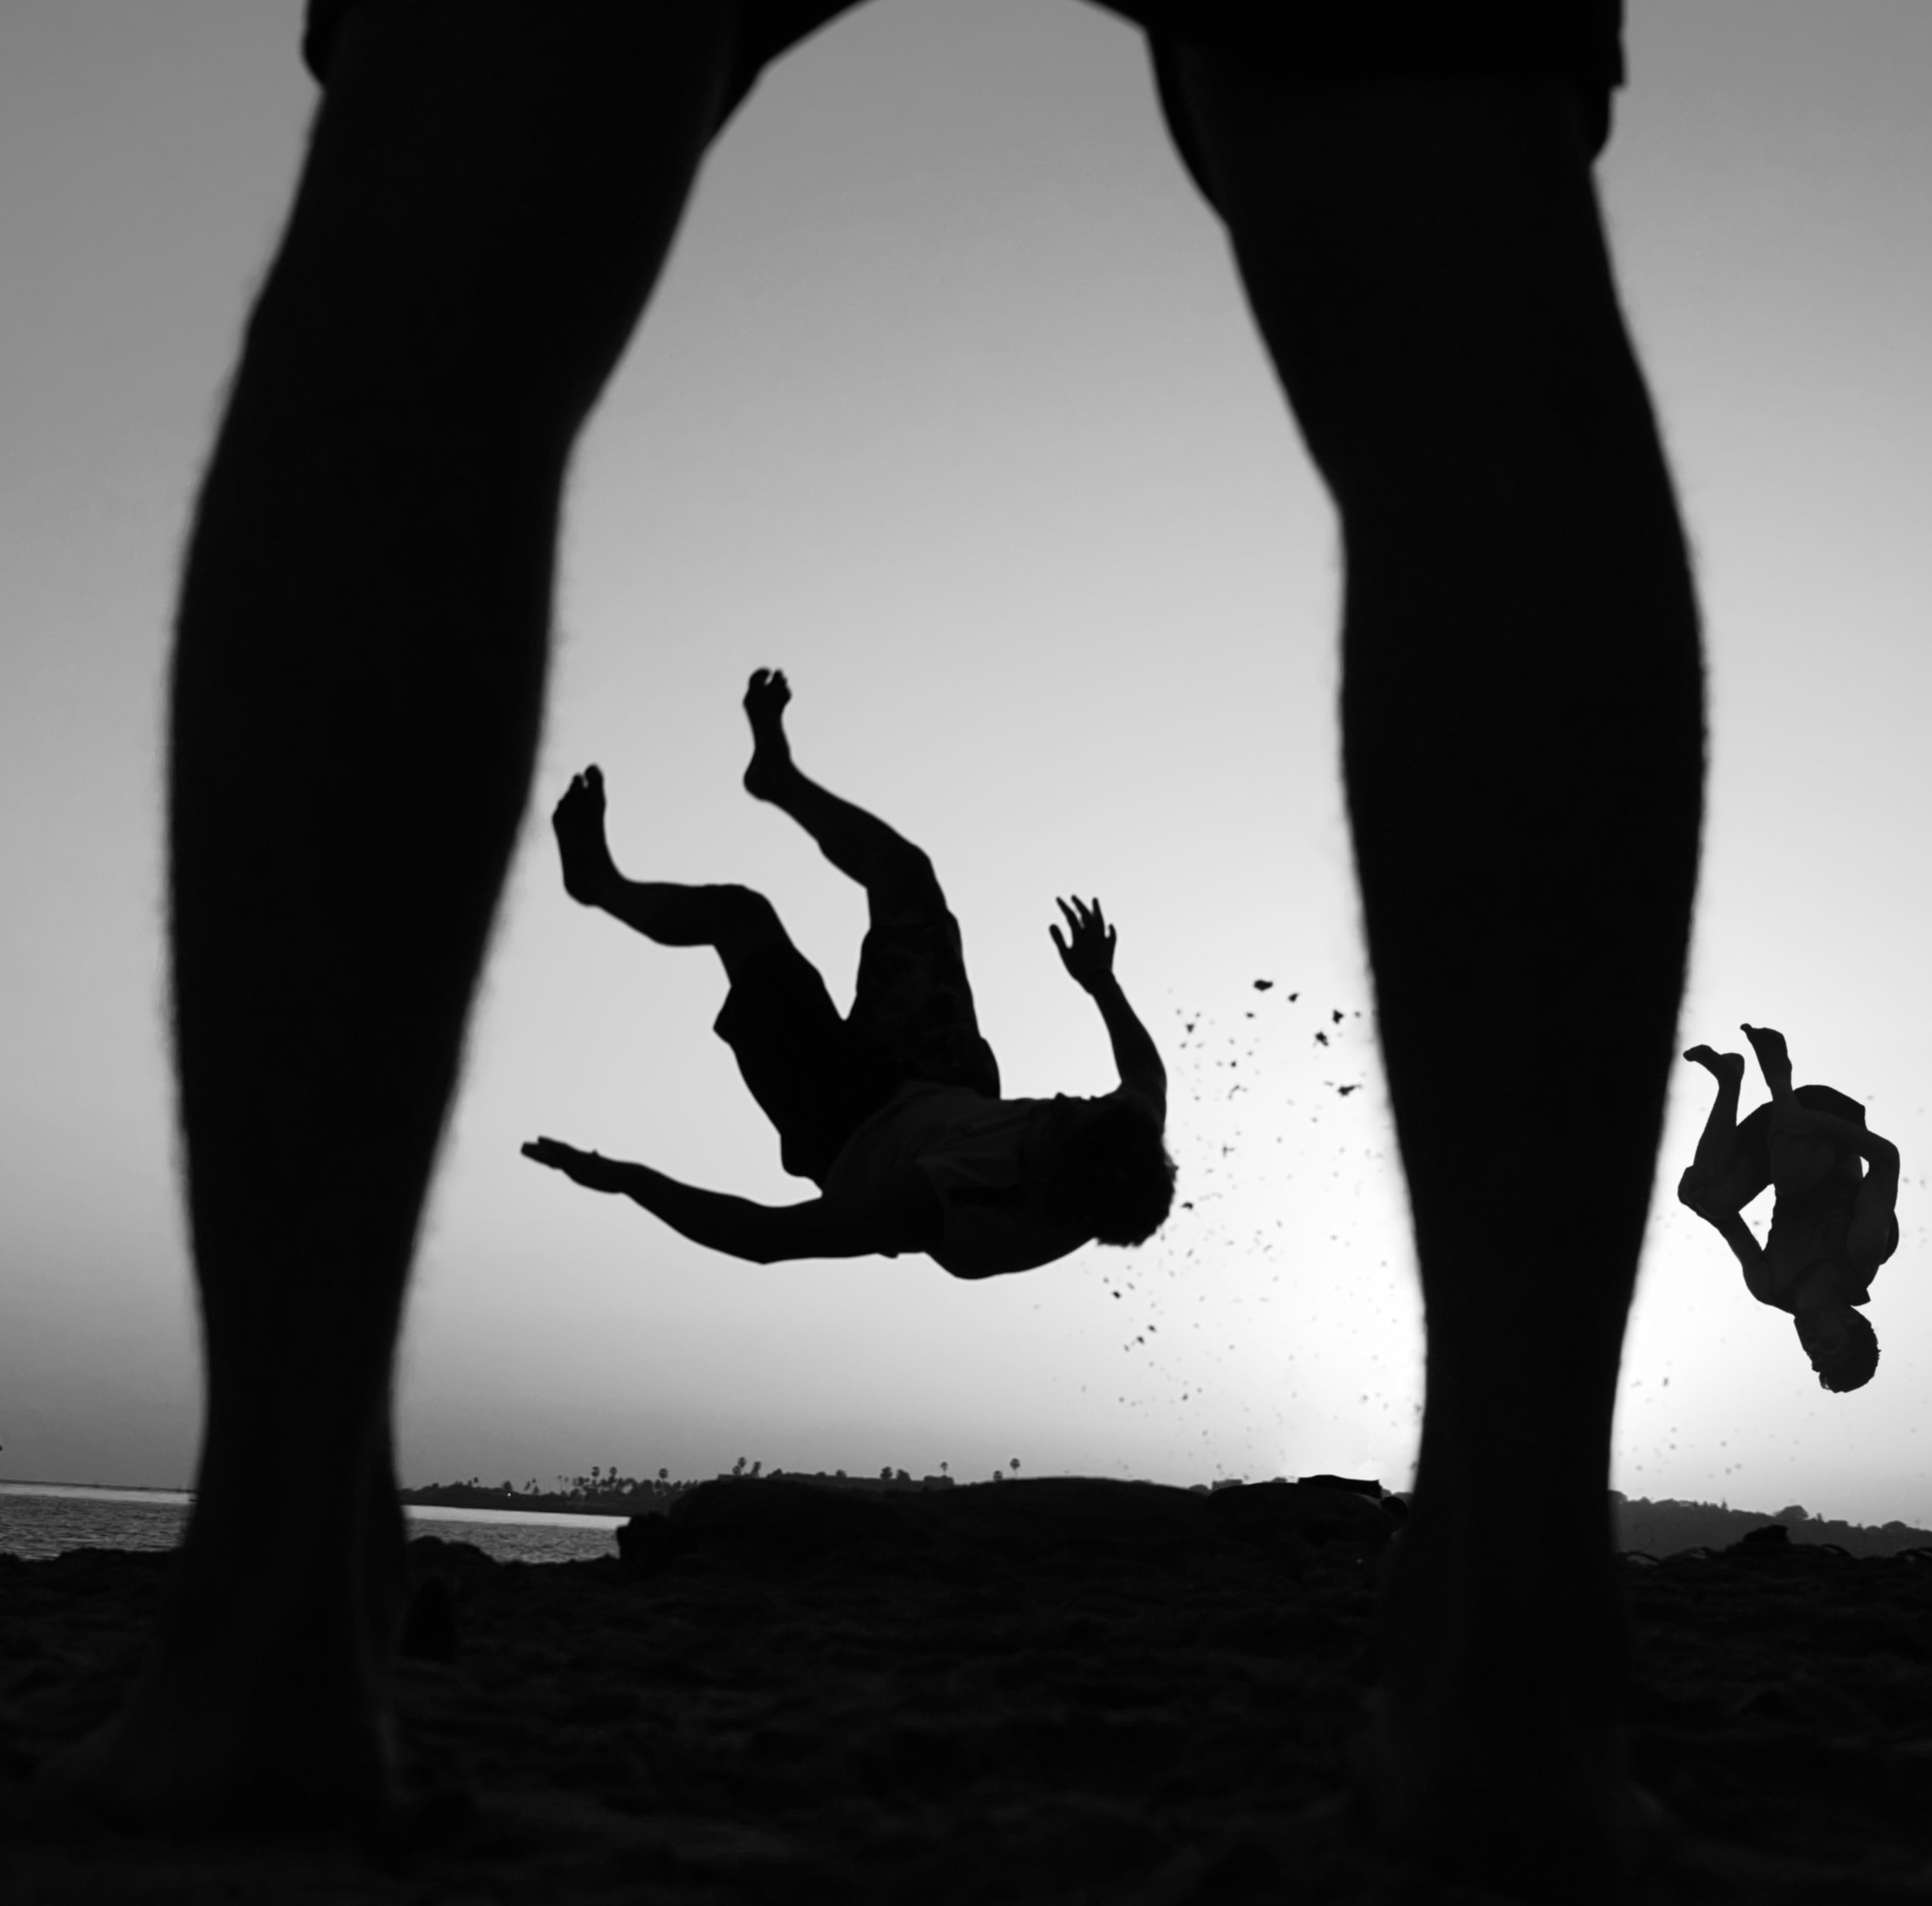
Photo by Akshar Dave on Unsplash
STEP NO 3
Tripods are our friends
Once you’ve found your model/subject, the next thing you do is mount your camera on a tripod. We want the photo to be as sharp as possible so we’ll be avoiding any kind of camera shake. If it helps, use a shutter release cable for this purpose. If you don’t have one, download your camera app and see if it allows you to record or press the shutter using the app. You can also use the interval timer mode on your camera and set it to twenty seconds or more depending on your exposure.
STEP NO 4
Decide your light/Equipment
When it’s dark out - how are you going to expose your subject? What else will you be exposing while the shutter remains open? Maybe you want a little bit of the background to be exposed as well. Settle on all of this and then figure out how you’re going to light all these elements.
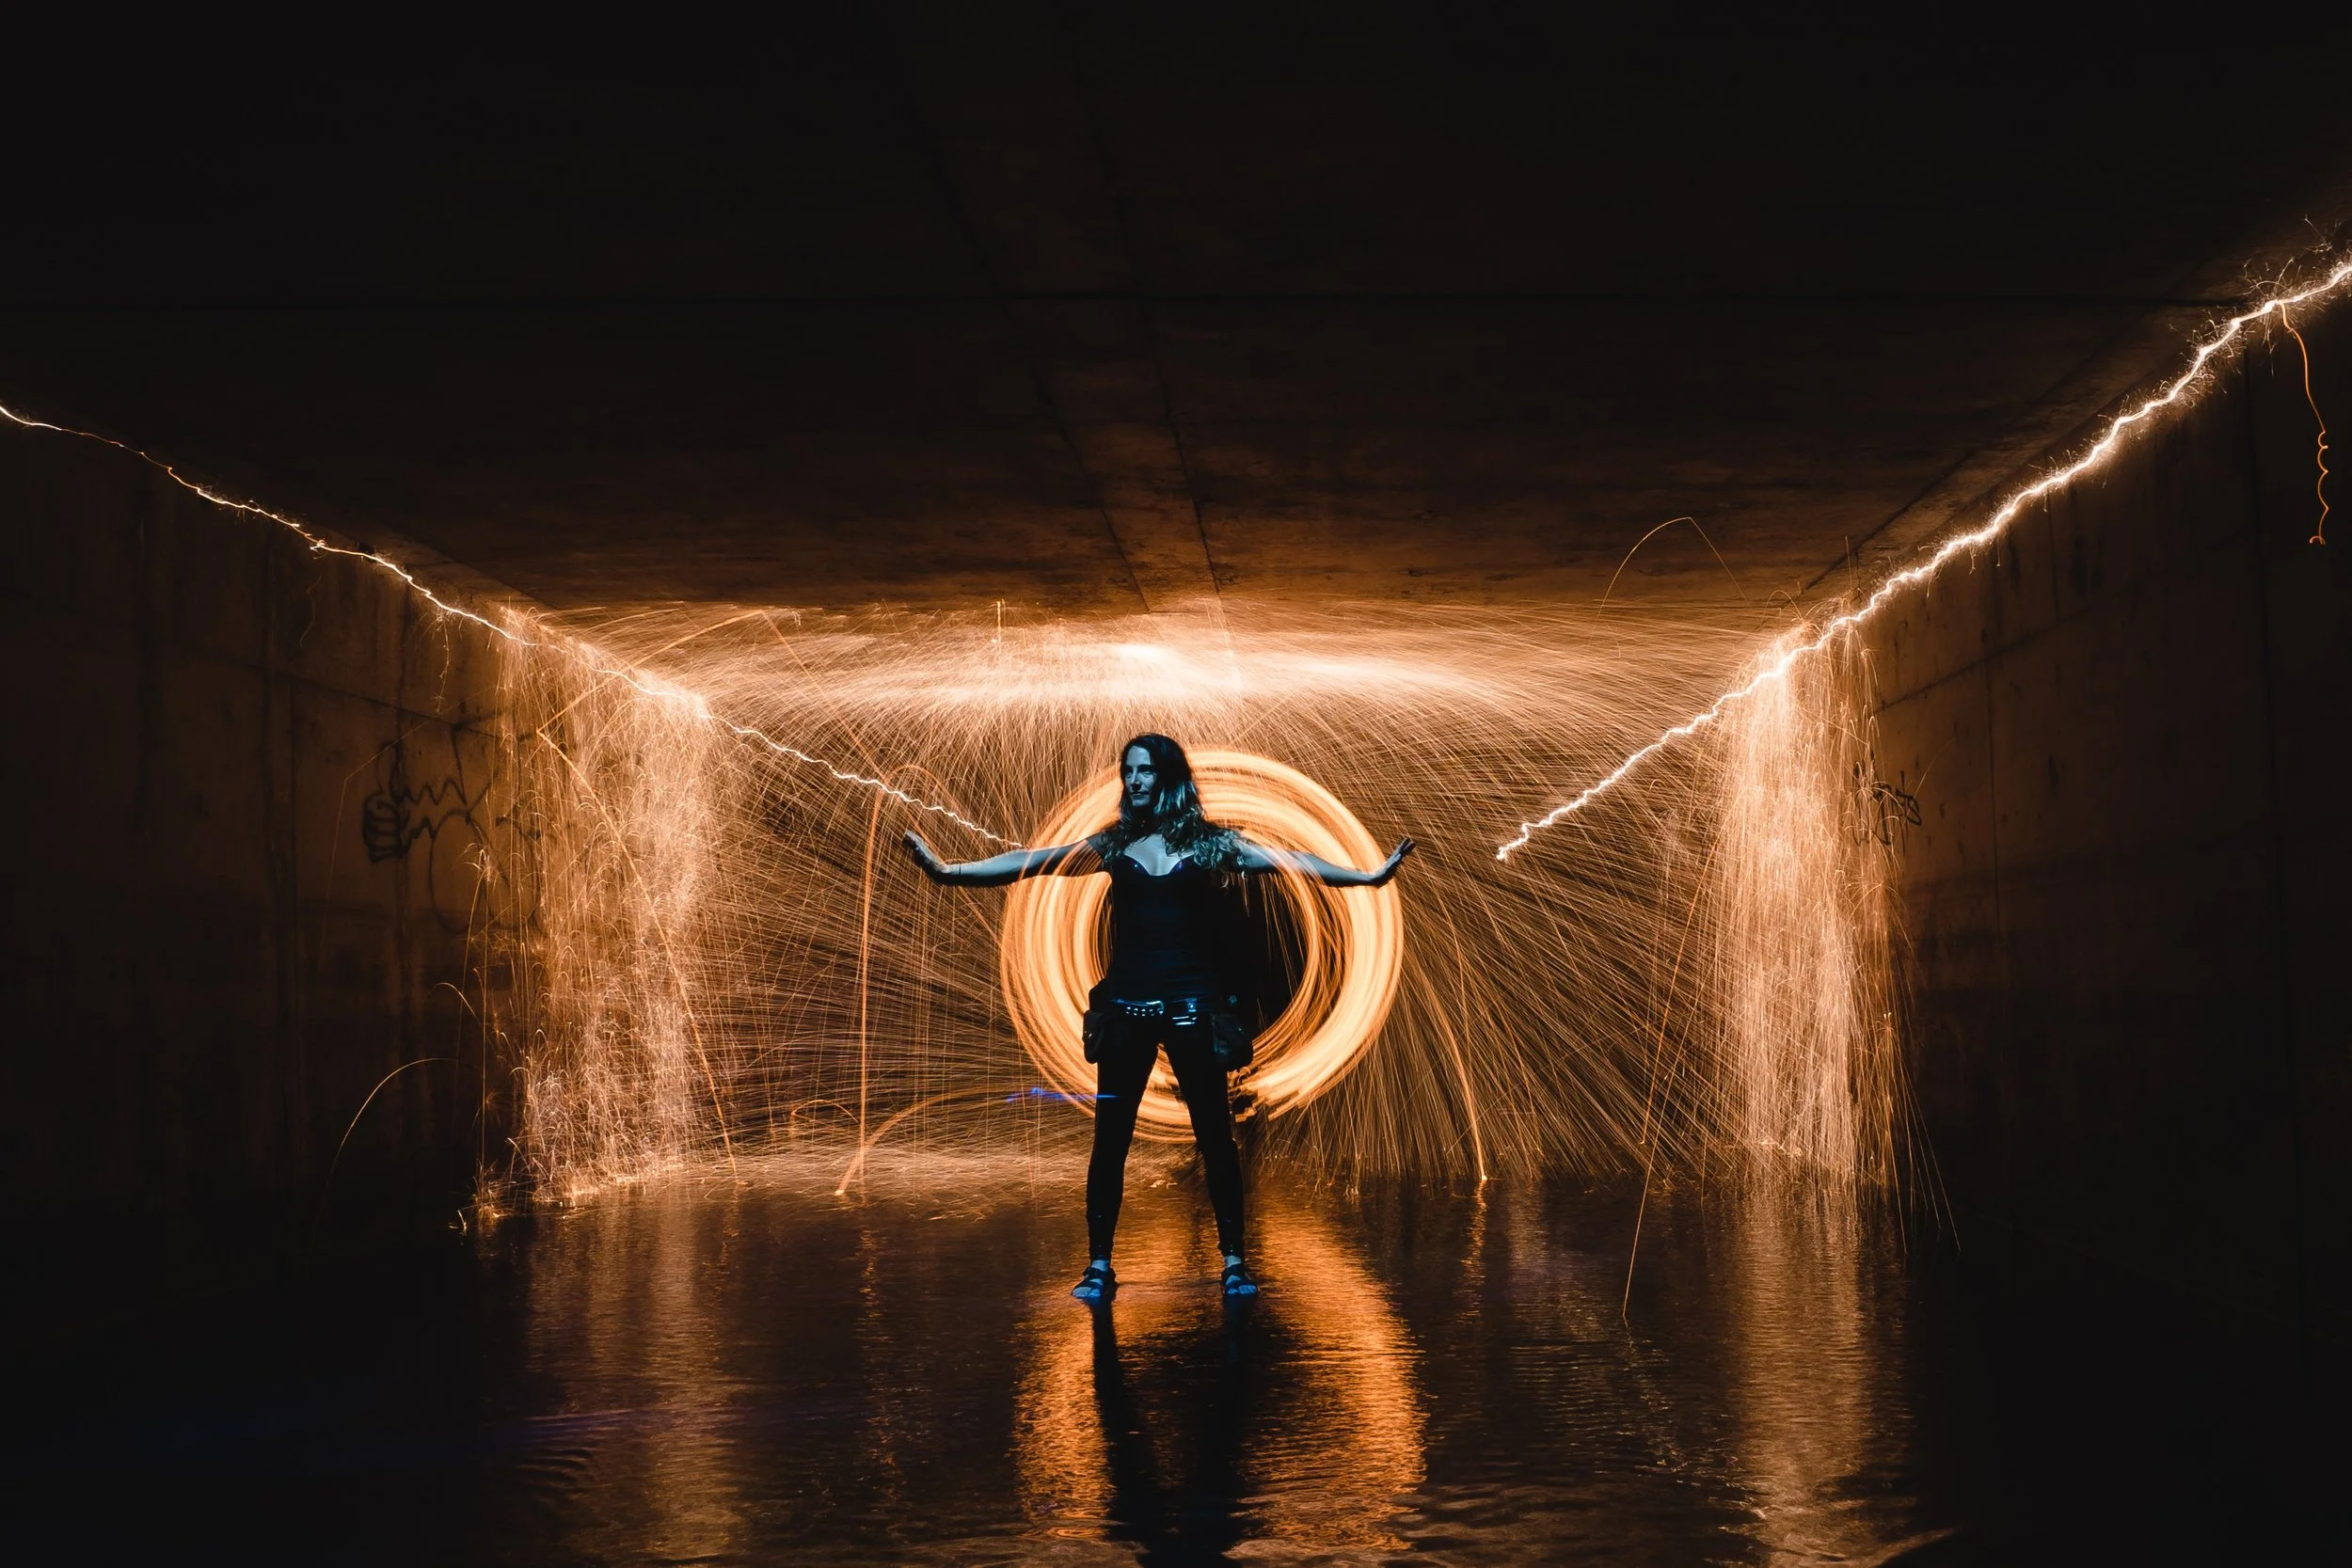
This is a pretty elaborate setup. In this case, the girl is lit from the front while a steel wool burns in the background. There’s also reflection coming into play, adding another dimension or a kind of exposure to the image. Photo by Xuan Nguyen on Unsplash
Light painting brushes are available online for as cheap as $5 online. In the case of which lights to get, purchase lights that are can be directed or angled towards something and don’t spill much. You could experiment using any number of lights. We used a bar light from Yongnuo to expose our subject - you can purchase it here. We also used a plastic tube with tracing paper (to soften the light a little) and attached to it the small torch from earlier to create a nice light tube.

STEP NO 5
Camera Settings

For reference purposes only. Camera settings vary depending on where you are.
Set the mode on your camera to “BULB”. On bulb mode you can draw the shutter curtain up and down on command. If you’re using an older camera which doesn’t have an app that allows you to control your camera, you could set the shutter speed to 30 seconds or more or use an interval timer and time your shot. This should give you time to paint around your subject. Your aperture has to be f/8 or more if you want the image to come sharp and if you want everything in focus. The ISO should be set depending on how sensitive you want the sensor to be. Keep in mind that the higher you bump up the ISO the more noise there will be.
STEP NO 6
Go Time
Once your frame is set, you’ve talked it over with your model and all, you’ve decided what you’ll be exposing throughout the course of the exposure - the only thing left to do is - do it.
Press the shutter
Expose the subject/frame by turning the light(s) on and then off.
Turn on your lightbrush/tube and paint around your subject making some cool patterns, a halo perhaps. You can go crazy with the patterns before the the shutter snaps. Make sure you’re not in the frame.
The result will be a fabulous/weird/experimental light painting. The more one practices, the better one gets at it.

That should be it for those who like to read.
But for those who want a more visual tutorial on how to create a light painting, click on the video embedded below. Photographer Omkar Kocharekar has created some fabulous light paintings with a little help from us at GMax Studios. That video should clear any doubts on what to do or what not to do. Live a little, click on.
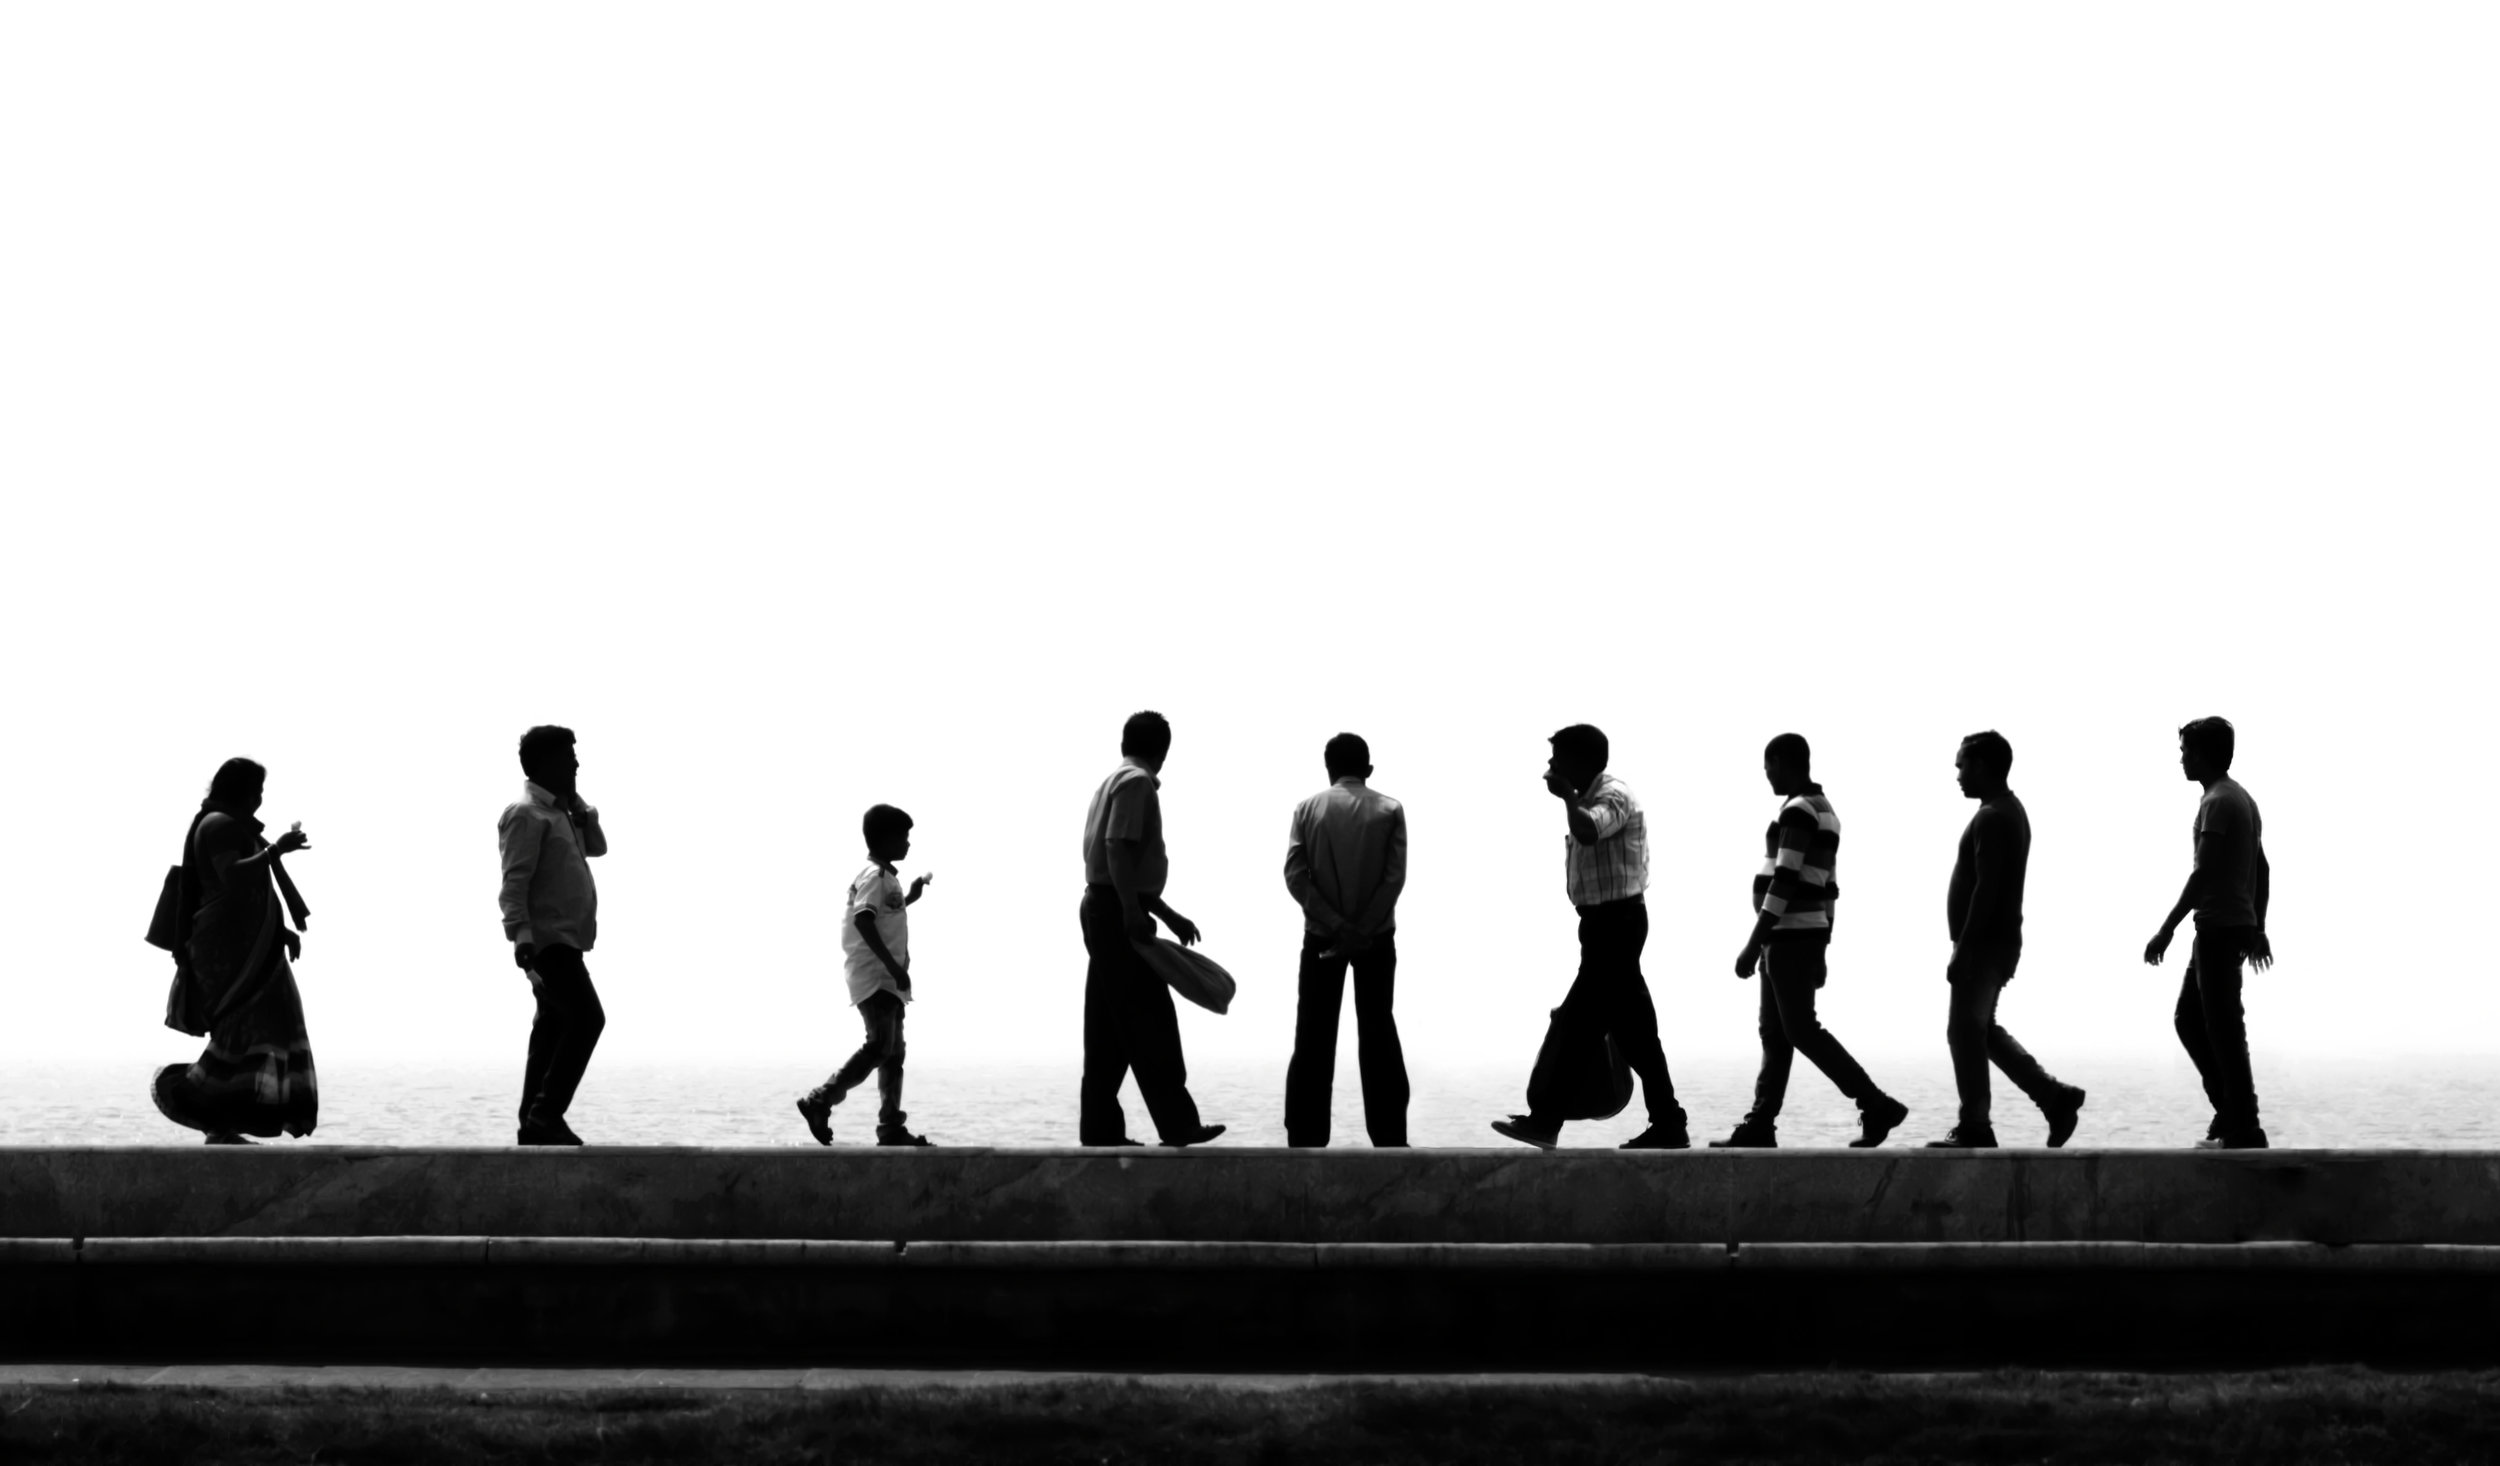
5 Frames Of Black And White Silhouettes | By Himanshu Singh Gurjar
Himanshu Singh Gurjar has been photographing silhouettes for 4 years now. This is his submission.
Himanshu Singh Gurjar is a filmmaker and photographer from Jodhpur, Rajasthan. The following article features excerpts from our conversation with him.
Why Silhouettes?
One, because it makes things simple. You get back to the basics and focus only on things that matter most: composition, the play of light and shadows. When done properly, it looks very clean and minimal. Silhouettes are very soothing to the eyes. You don’t need an expensive camera to create silhouettes, and things that are ordinarily a constraint - like harsh light - can be worked to your advantage. In fact the harsh light that you see at noon is actually better for creating silhouettes.

“Like any other kinds of images, the more you click, the more you’ll start to see silhouettes. ”
How did the idea for silhouettes come to you?
When I started my journey as a street photographer, it happened on the camera on its own . I was fascinated by how clean and cinematic it looked, and I deliberately photographed only silhouettes for the next thirty days. I started enjoying the process so much that I would often “see” silhouettes or instances where a subject was lit from behind, I would quickly underexpose the subject and take a photograph. I have lost count how many I’ve taken over the years.
What camera do you use for your images?
The ones you’re seeing were shot using a Canon 600D, with a 50mm prime and a 55-250mm zoom lens.

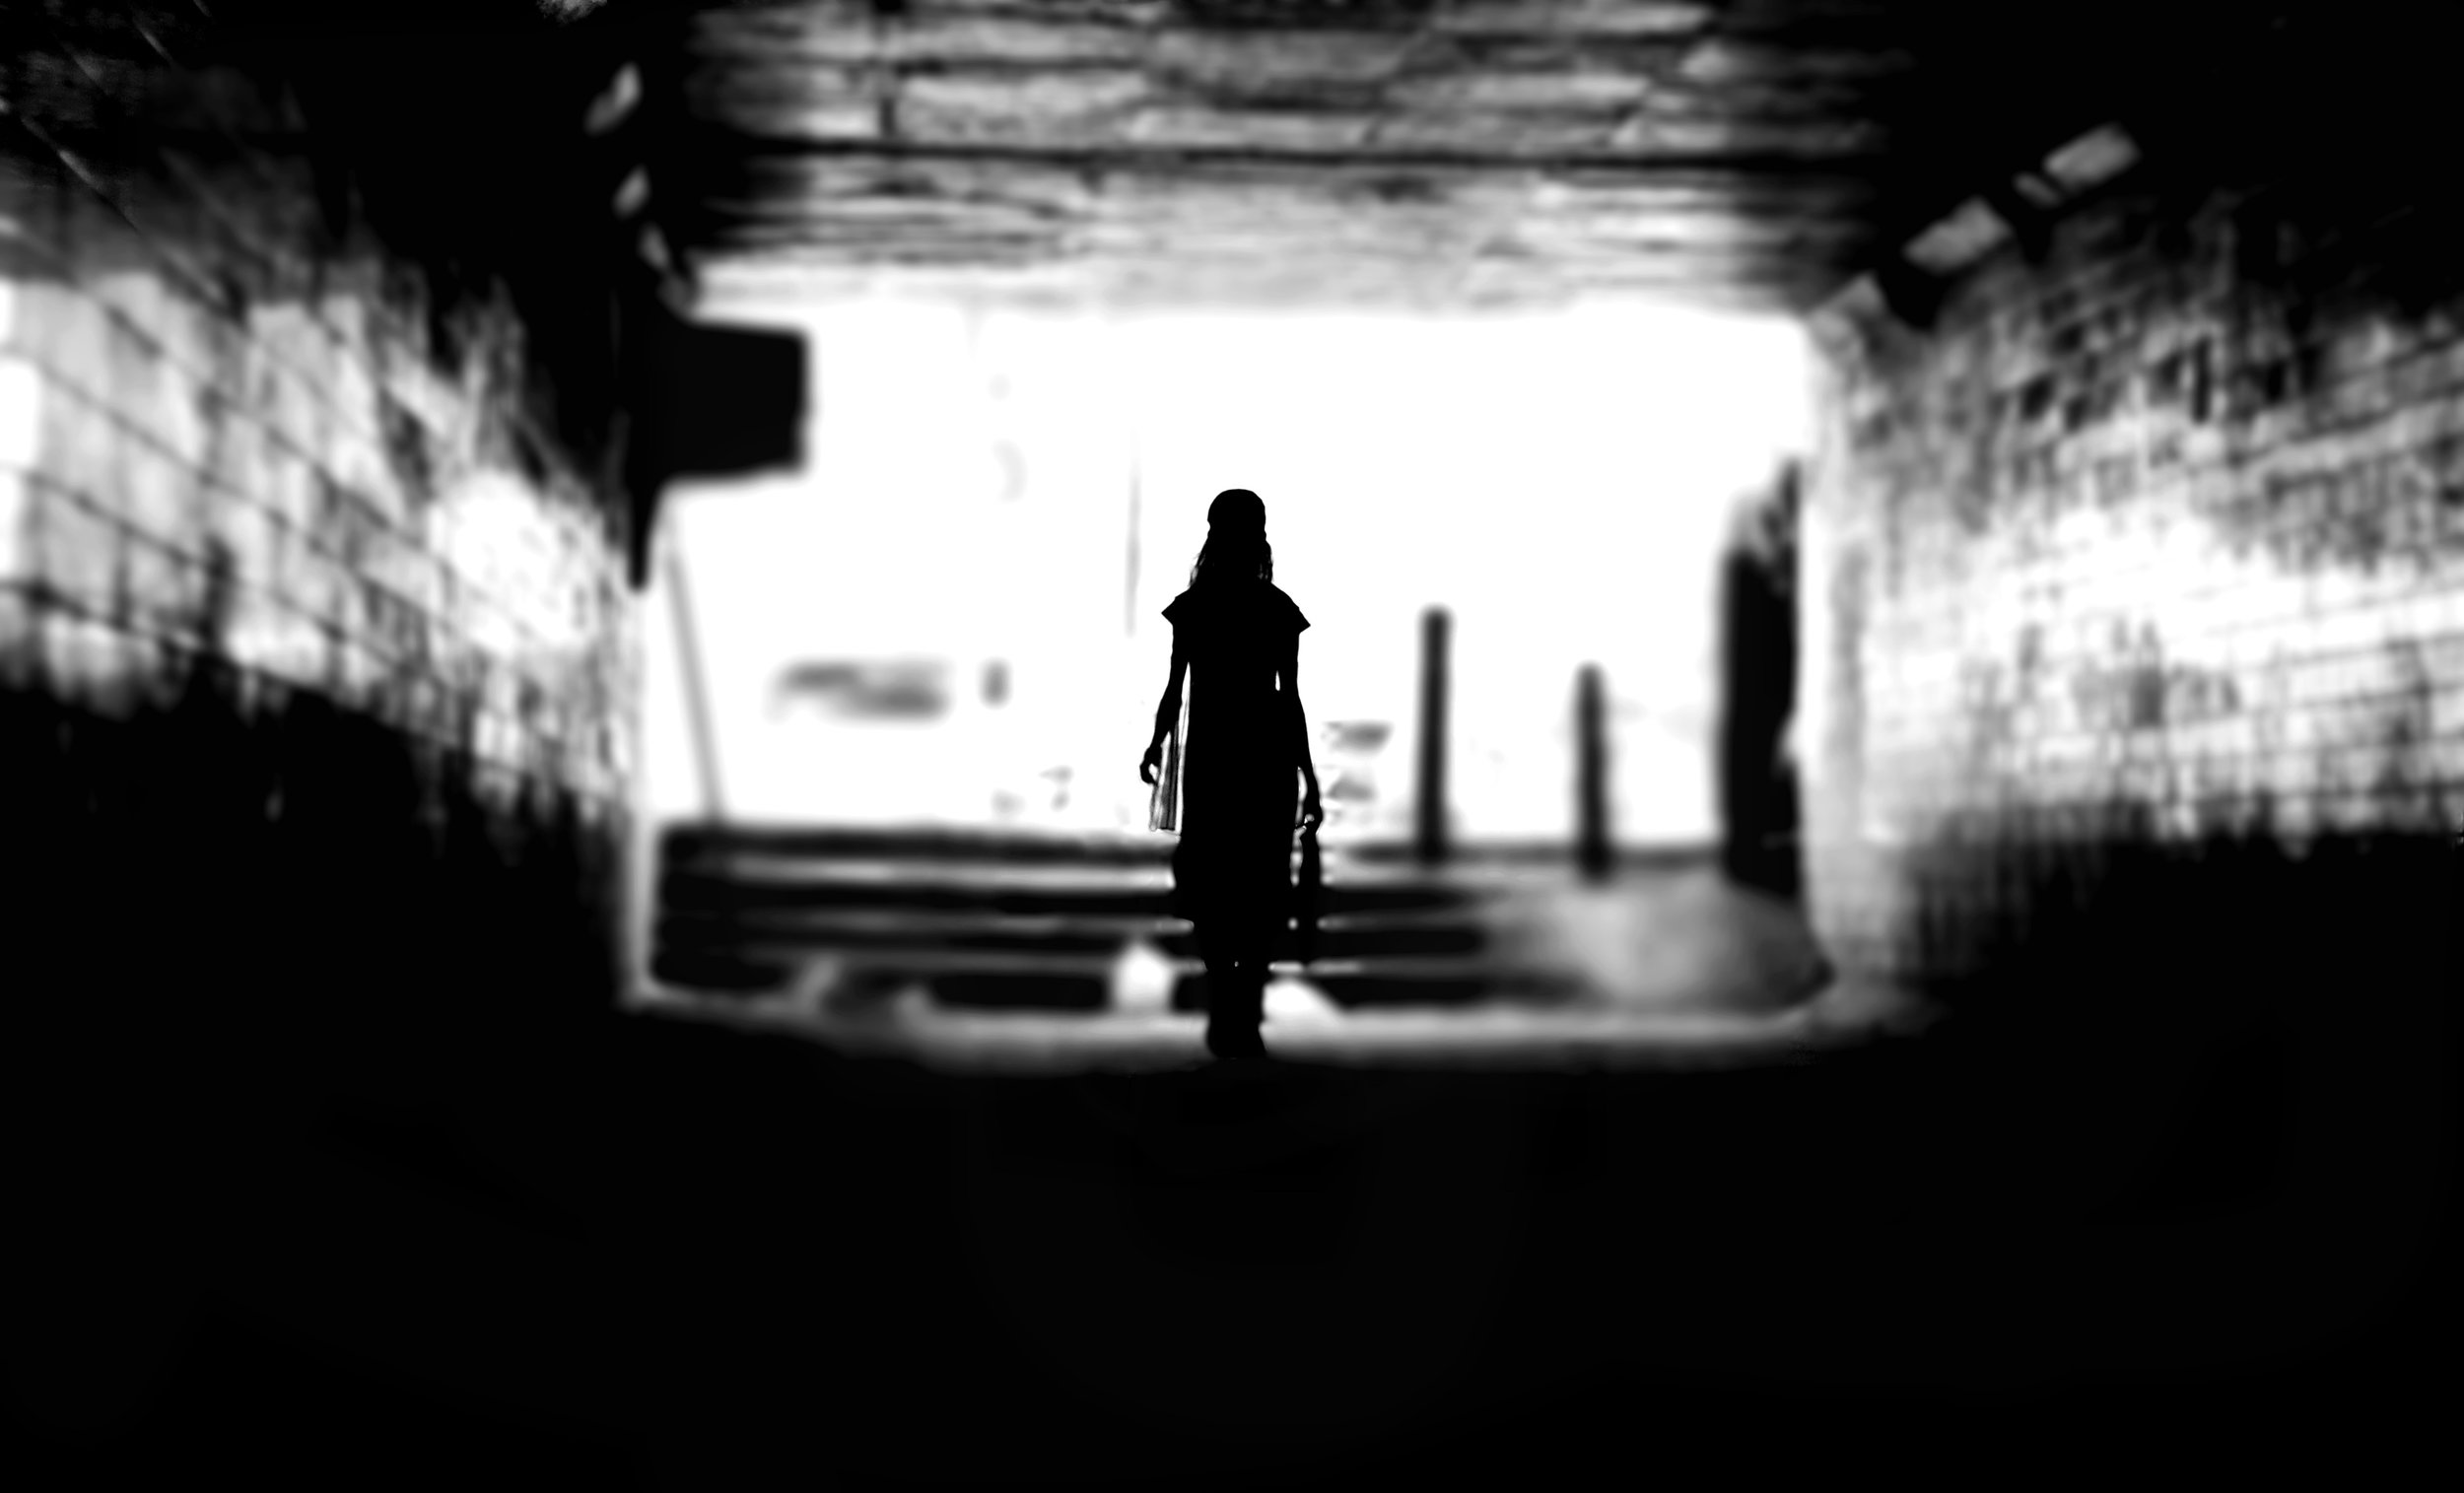
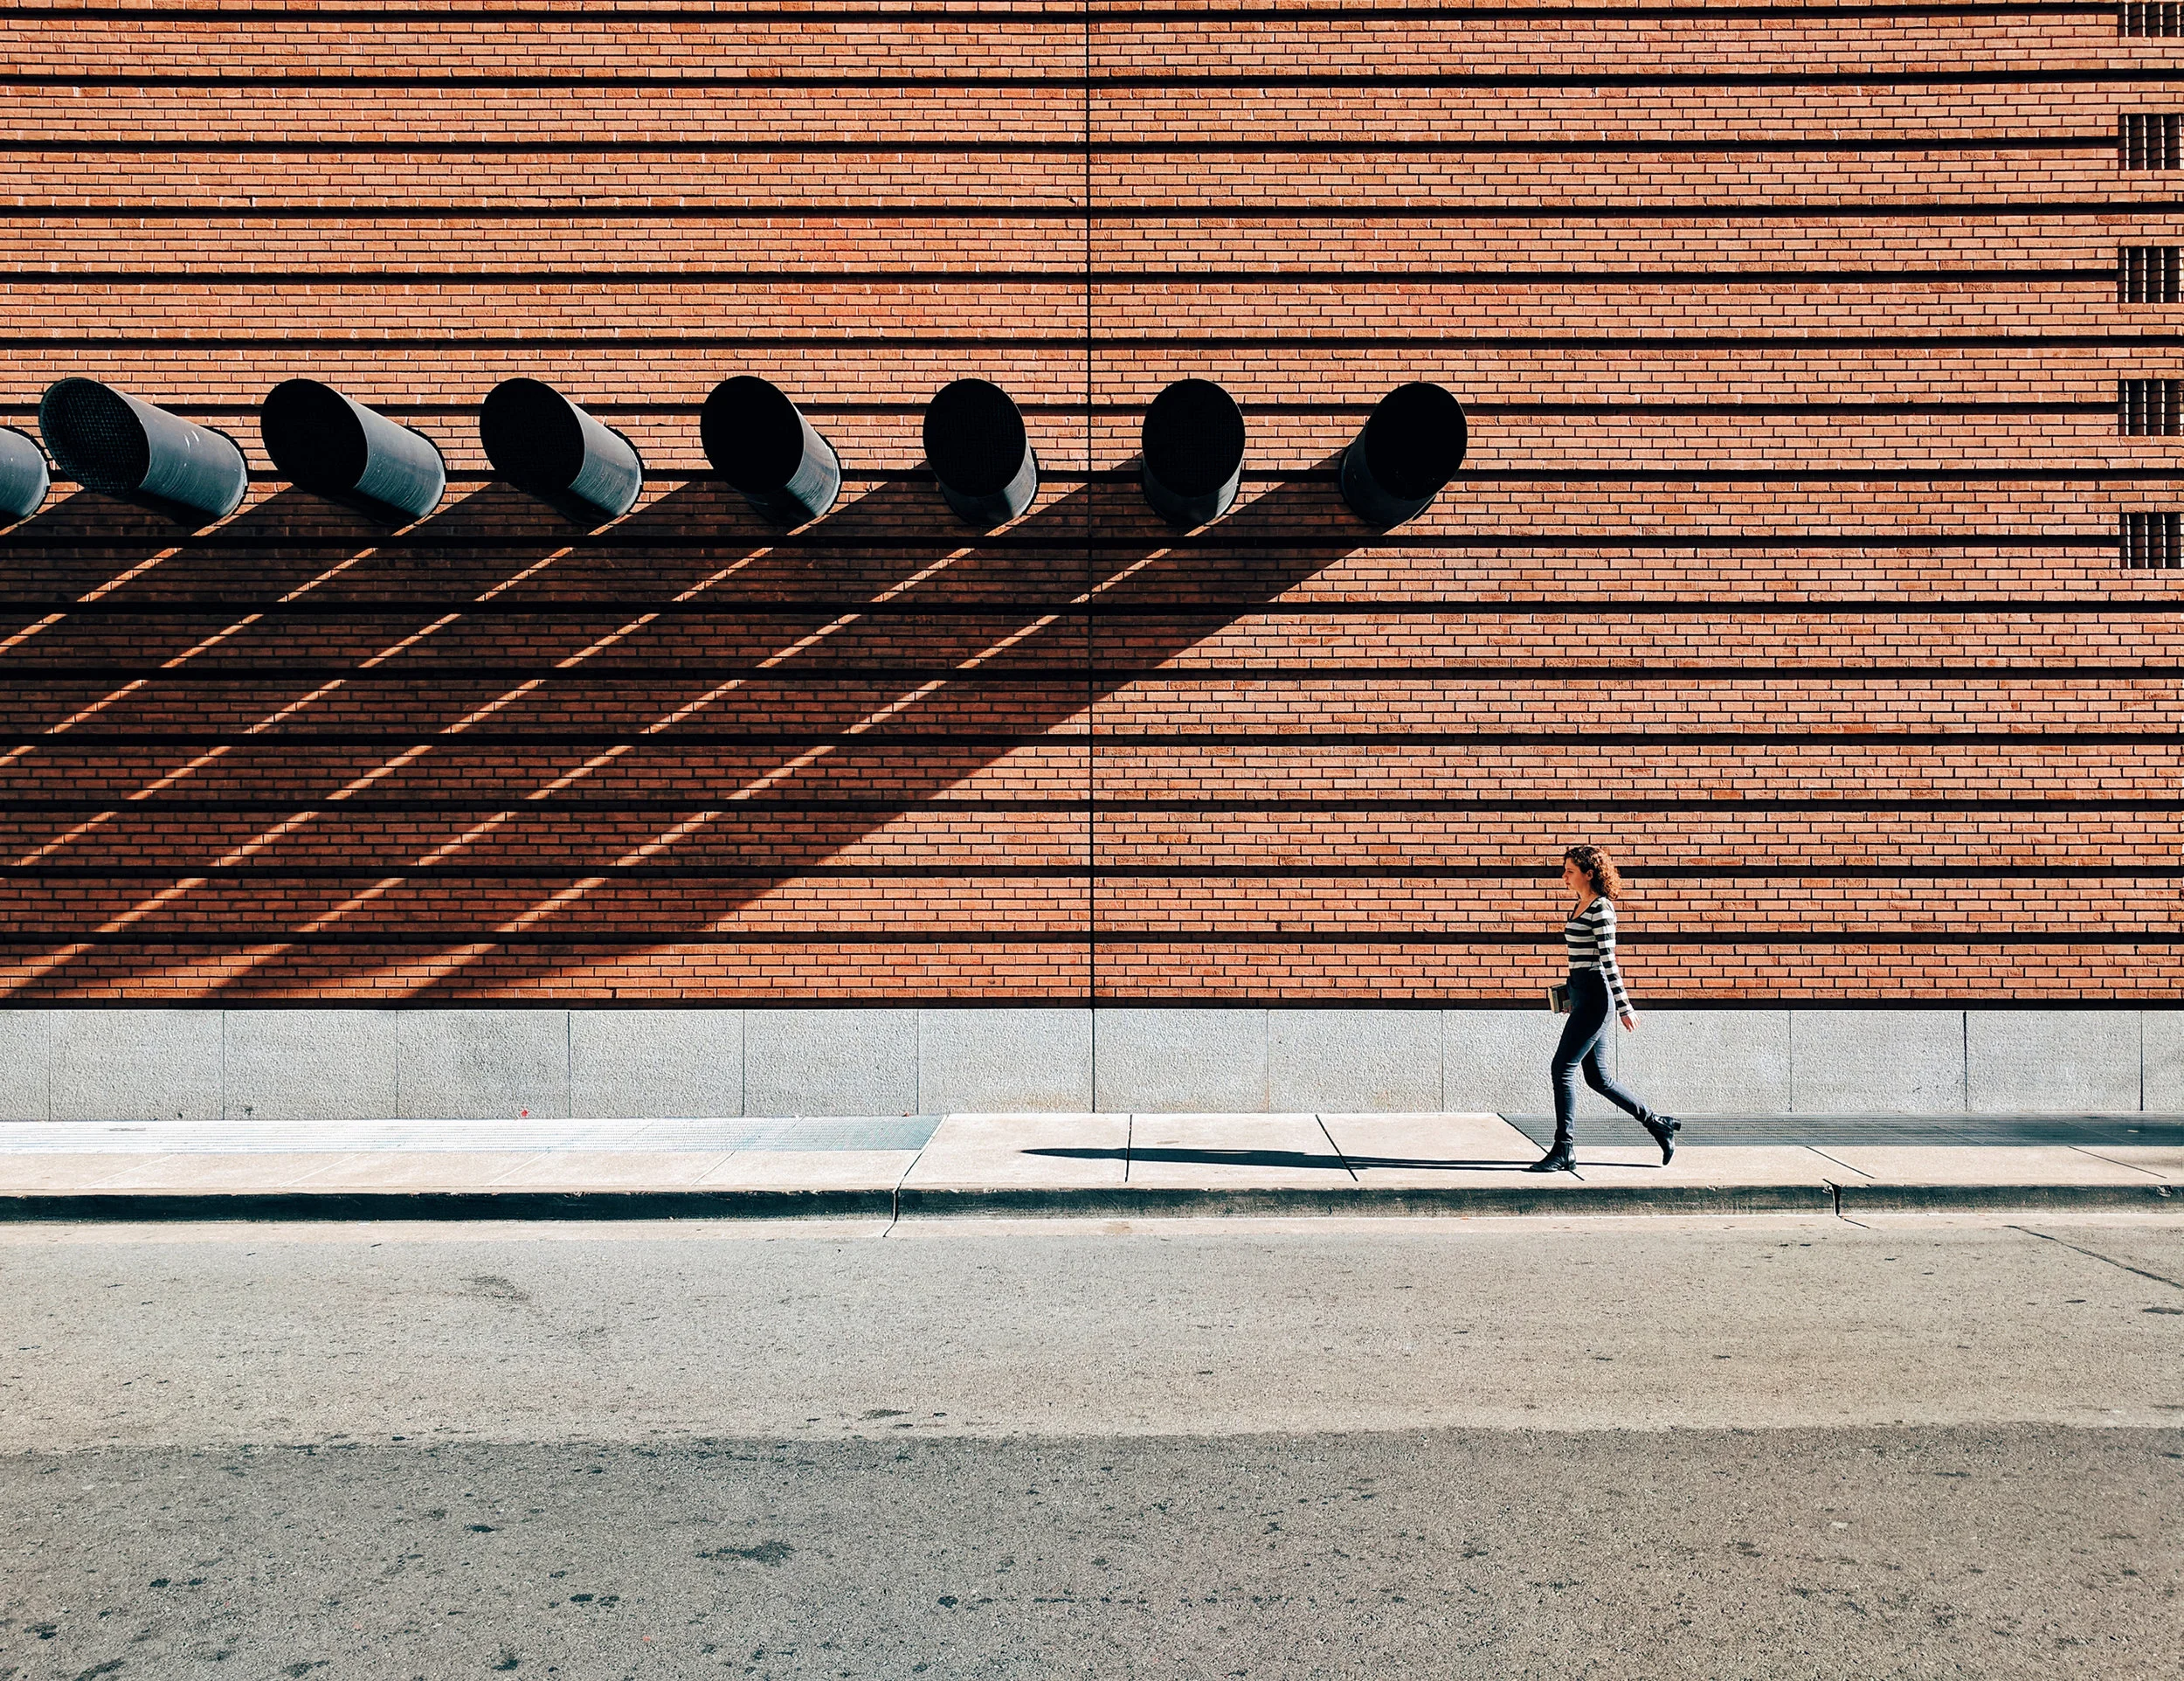
“It’s a busy subway that literally hundreds of people cross at this time of the day. Somehow, this fell in place - the lady was walking right in the center and there were absolutely no other people.”
What is the key to creating a good silhouette?
Silhouettes are created when a subject or multiple elements are blocking the light from coming into the lens. The rule of silhouette is that the source of light must be in the background. By underexposing our subject from the front, we get a good silhouette. Apart from that, the extreme contrast is what give silhouettes their charm, so there has to be that.
“Silhouettes also look like they’re created using graphics because of how clean and minimal they look. ”

Black and white or Colour?
Both have their charm. It actually depends on the theme I’m photographing. In the case of silhouettes I go with black and white because they’re great at capturing emotion. But I often shoot in colour and then process them as black and white because you never know what you might end up getting. So it’s good to have that option. When it comes to colour, everything has to be right. The various colours in the frame need to go well with each other or create a good contrast against one another and the light has to be perfect. Doing black and white is getting back to the basics - framing, highlight and shadows - that sort of thing. You don’t have to worry about your subject is wearing or what they look like.
A little on camera settings when you’re photographing silhouettes…
With the aperture, I use f/8 or f/9, for it (the images) to look more sharp. And because you’re not worried about excess light - you can also shoot using a higher shutter speed. This way, the edges of the photograph remain sharp.
What kind of post-processing do you do for these?
There’s not much post-processing but I usually boost shadows, slightly enhance the contrast, brighten the image a little bit or fix the crop, if required. I do a little bit of sharpening too because you’re not seeing the image on a bigger screen when it comes to Instagram. The images are usually lower in quality so I sharpen them so they can stand out.
“I research before going to any particular location and search for relevant pictures on Pinterest or Instagram. This helps me visualize something or come across a perspective I wouldn’t normally have thought of. ”

Himanshu Singh works and resides in Mumbai. You can hit him up on Instagram: @himanshusinghgurjar
If you would like to contribute to ‘5 Frames’ please fill this form here
Editor: Rishabh Udgata


5 Frames with the Canon 6D Mark II by Robin Ghai
Robin Ghai shares 5 Frames from Canon 6D Mark II.
Almost a decade ago, I went on a trip to Nainital with my colleagues. One of my colleagues’ fiance, Mayuk Roy, was carrying a Nikon DSLR with him. While we were strolling through the roads and by-lanes of Nainital, trekking through hills, munching at various food joints, and of course, boating on Naini Lake, Mayuk kept his camera's shutter busy. He would stop at a spot take a shot; have look at it; fiddle with few buttons on camera and another take another shot. And this continued until he was contended with result. Oblivious to the nitty-gritties of photography, I was a bit irked because it paralyzed our pace when moving from one spot to another.
A week after returning home, he shared the Picasa link to the photos that he took during our outing. I was amazed; stunned upon seeing the photos and learning what one can do with a camera. I loved how one could share his/her perspective of seeing things that are around. It fueled the contemplation of buying a DSLR camera in me. After few weeks of research (Googling and visiting camera shops), I zeroed in on a Canon 1000D. It was my turn to be "Mayuk" in next outing.
During nascent years of my passion, I was quite active and would click photographs often. However, this faded away with the passage of time.
It was August 2017, when a thunderbolt by the name of ‘Gorky M’ struck me while browsing YouTube and reignited my passion for photography. In the next few months, I graduated to a Full Frame DSLR - Canon 6D Mark II. The camera’s superb low light performance, a fully articulating touch screen, 45 cross-type focus points and a high FPS drew me to purchasing this camera.
Since then, I’ve taken it for a few outings and shot many pictures at home too. Here are my 5 Frames from Canon 6D Mark II.


This is Humayun's Tomb. It is located in the Nizamuddin East area in Delhi. The monument is quite crowded on the weekends. I used a tripod to take 5 shots and 5 second intervals and stacked them in Adobe Photoshop to remove people.

This one was shot in the basement parking area in my apartment building. I used a gobo and gel on flash to create this background.

This is an in-camera multi-exposure silhouette of my wife, at home. I used rice lights to create the bokeh and placed a flash with a CTO gel behind my wife to create a silhouette.

This is a huge mushroom-shaped Sculpture made from countless steel utensils. It is installed in Kiran Nadar Museum of Art, Saket, New Delhi. It measures 36 X 36 ft and weighs 20 tonnes.
Thanks for reading & spending time going through my work. In future if I get to write blogs, this attempt is going to be foundation stone and will make it to my story of "How I started writing blogs".
If you would like to contribute to “5 FRAMES” please fill the form here.
Robin Ghai is based out of NCR, Delhi and spends his day working on spreadsheets and PowerPoint slides at a professional services firm. Robin aspires to be a full-time wedding photographer one day. You can find him on:
Twitter: https://twitter.com/robinghaitweets
Instagram: https://www.instagram.com/robinghai/


Shooting on mobile phones takes more effort | Auditya Venkatesh Answers | In Frame with Gorky M, Episode 5
Auditya Venkatesh debunks the legend that taking pictures with your smartphone is easier than shooting with a professional camera.
If you’re Indian, and you’re a photographer - it’s quite likely you’ve heard of Auditya Venkatesh. He’s leading the army of smartphone photographers all around India. And it’s not like he only shoots with smartphones, he shoots a ton of commercial stuff too - but he wants to get the message out there that equipment shouldn’t limit you. It should empower you.
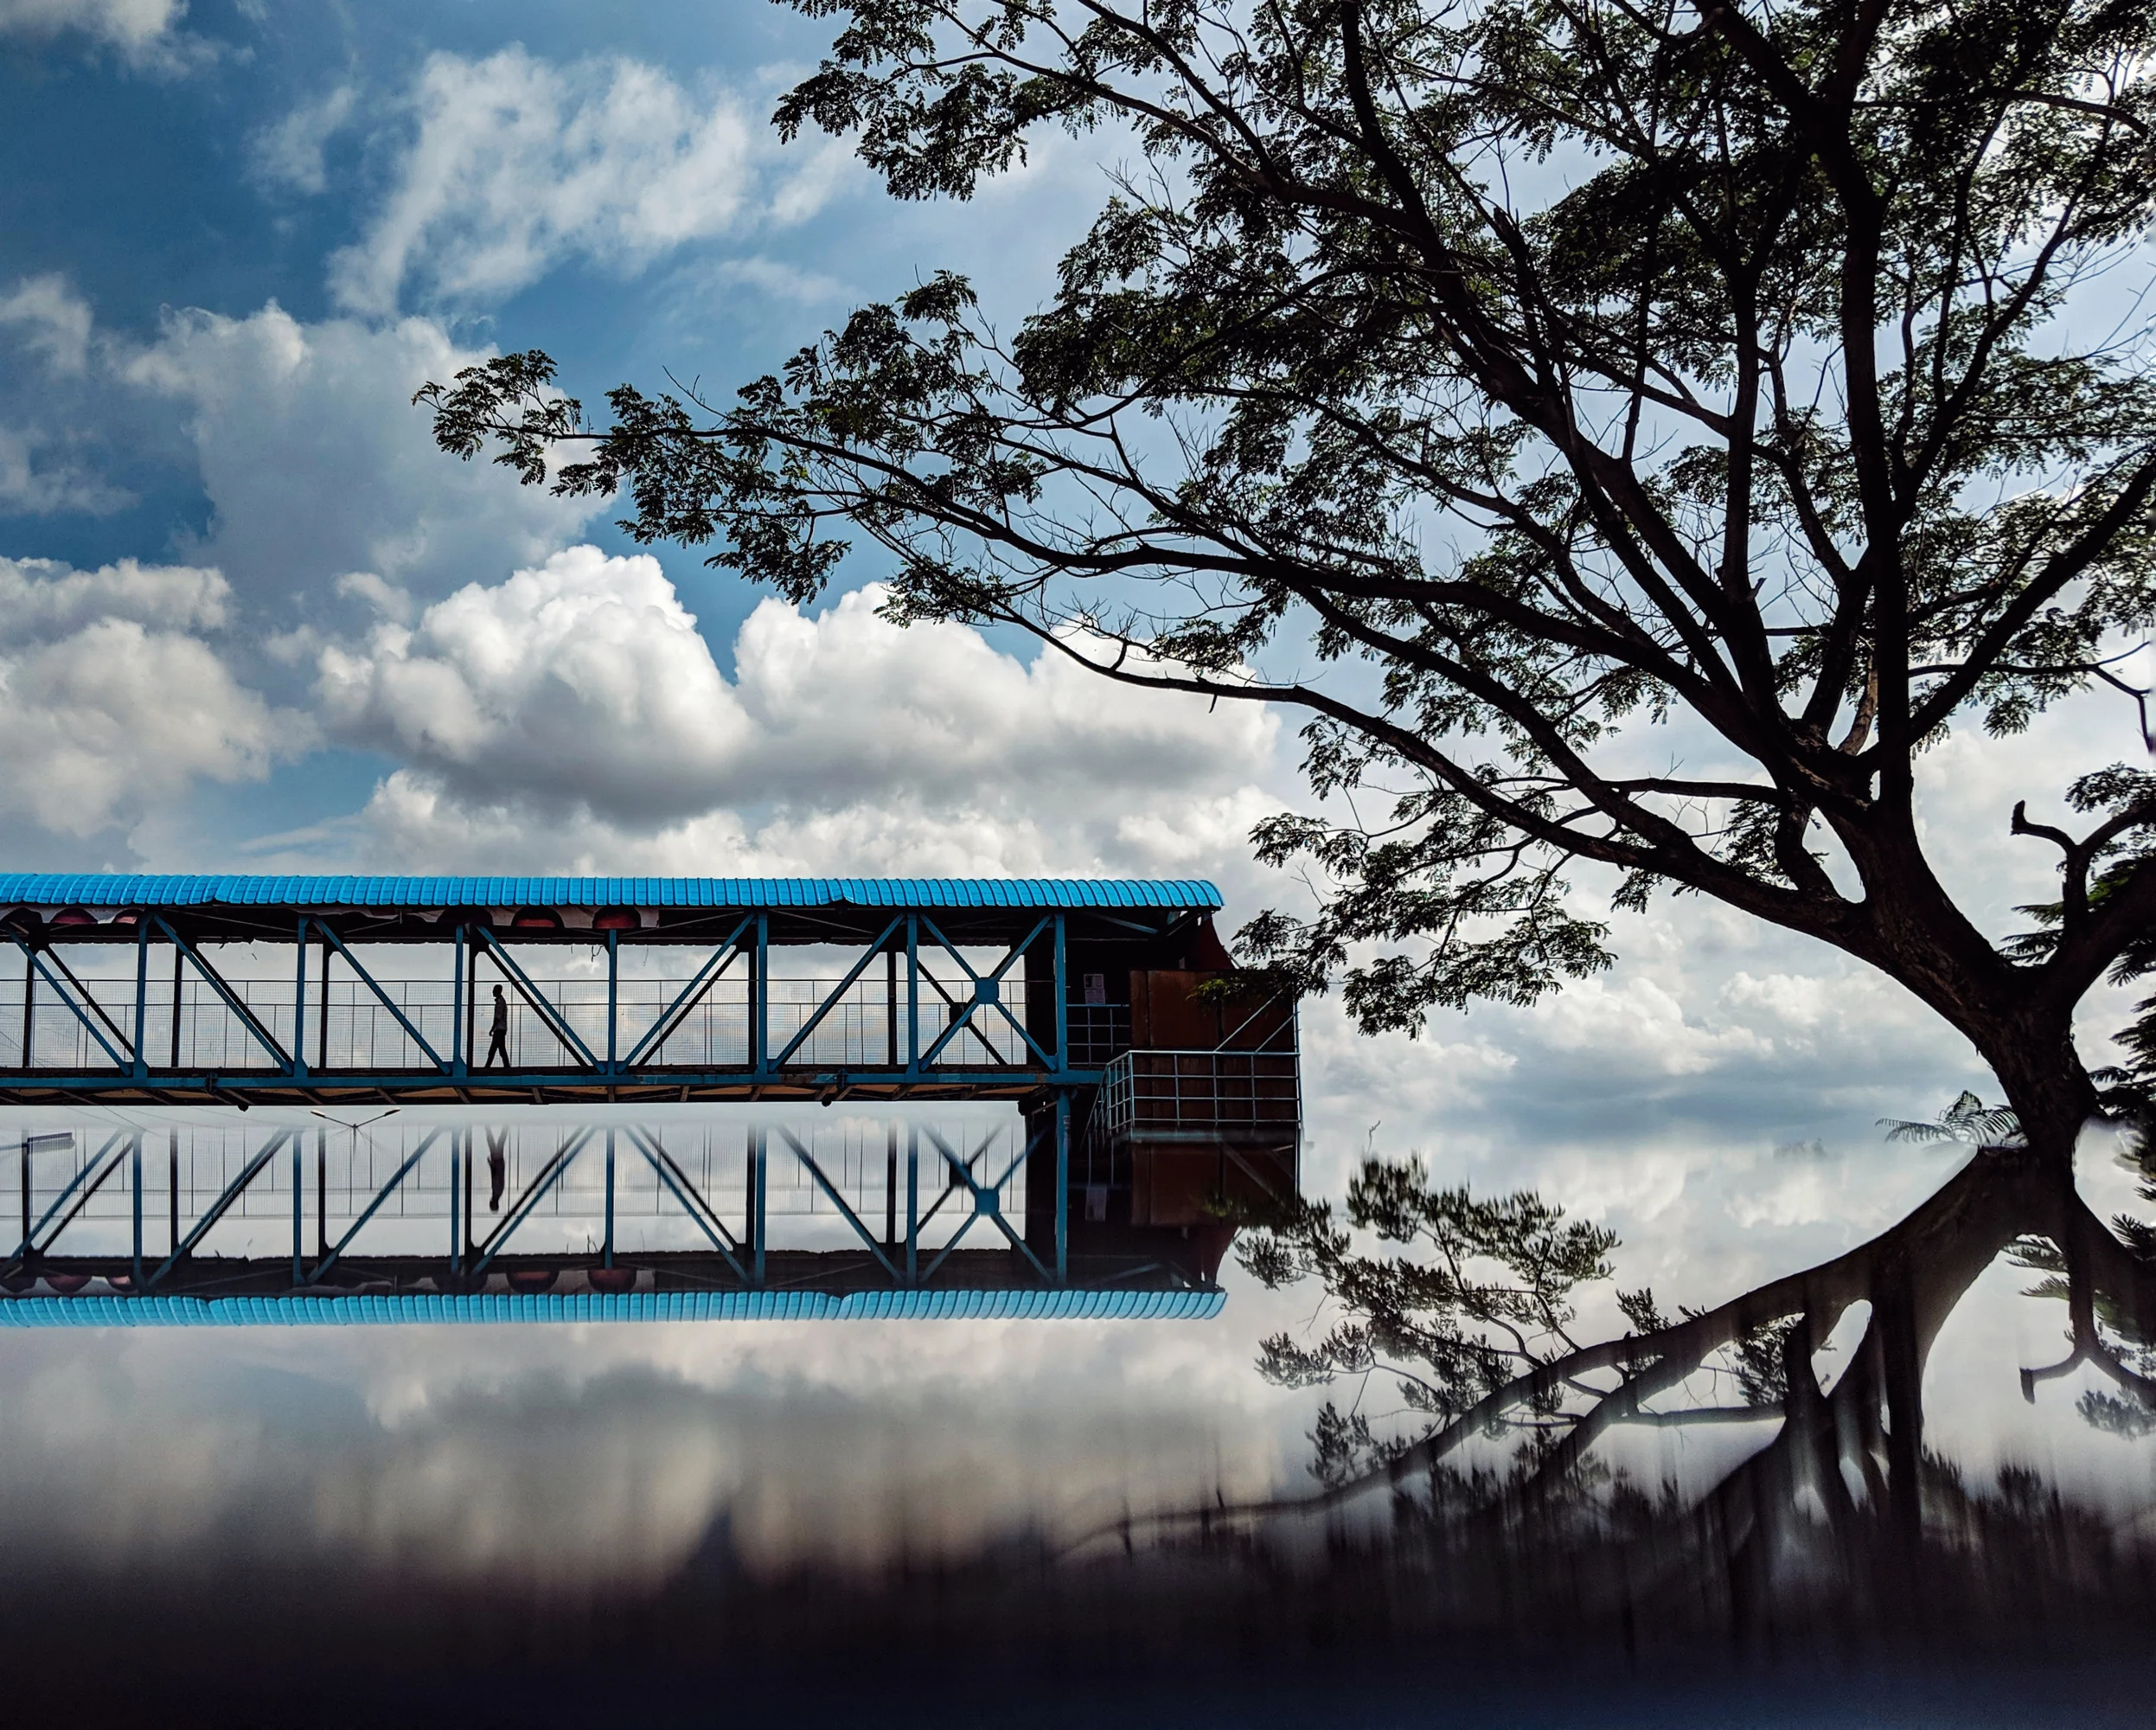
Yes, this image was taken on a smartphone. © Auditya Venkatesh Photography.
“You want to be shooting with whatever equipment you have on you.” says the acclaimed photographer and cinematographer (now a director of photography in movies as well).
Gorky M caught up with him backstage at Pepx photocon, Mumbai, where he was giving a talk and engaging his fans, and the maverick dished out plenty of insights and tips for our viewers.
“As cliche as it sounds, the most important thing is being yourself when taking pictures.” What Auditya means is that while there may be many images that people enjoy looking at, it’s important to go with what you enjoy shooting most. They could be portraits or landscapes, you must work on the kind of story YOU want to go with.
Auditya also debunks the legend that taking pictures with your smartphone is easier than shooting with a professional camera because you can just whip it out and take pictures.
“If you’re trying to shoot something more seriously,(with a smartphone) it’s actually a lot more effort. You have a really small sensor to start with, you barely have any depth of field to play around with, you get a lot more noise when shooting in low light situations. There’s a whole bunch of things (that limit you) actually. So it does take a lot more effort.”
© Auditya Venkatesh Photography
Check out the video linked at the end to know how Auditya takes mind boggling images on his smartphone.
Auditya shoots plenty of commercial assignments where the equipment he uses is top of the line, but he’s become synonymous with smartphone photography. He doesn’t mind that at all.
“I get a lot of emails and messages from people saying that they don’t have professional cameras and if it’s possible to still make images everyday. And that’s why I share so many smartphone photos. Fair enough if people think I only shoot on smartphones. ”
And there’s more where that came from. In episode 5 of our series ‘In Frame With Gorky M’, Auditya shares how it all began, and how he works. It’s a pretty interesting conversation between the two of them. Check out the entire conversation in the video embedded below. Don’t forget to subscribe. There’s more to come from GMax Studios in 2019.